A few years ago I wrote a series of articles about planning multi-day cruises. I finished off the series with an example. See Planning Multi-Day Cruises—Example. Since that time, I created a user-friendly GPX tool. So now I revisit that example.
The example walks through finding anchorages, planning a route between them, refining the route, cleaning up the route, documenting the route, and adding it to a chartplotter. What has changed is the GPX Tools that I use to clean up the route and document the route in a spreadsheet. I now have more user-friendly GPX tools.
There are two ways you can continue reading this post. You can go to the original post here and follow it to the heading Cleaning the Route, skipping the section on GPX Tools, or, you can download the route that was created by clicking here.
I open the GPX Tool. I have it installed as a shortcut on my desktop. Alternately, I can point my browser to questeria.info/gpx/.
I click Chose File, and choose the file named WP-OWW.gpx. Then, I upload it to see the contents of the route.
Uploaded Route
I scroll down to the last entry, and see there are 11 waypoints in the route. The names are random, except for the starting and ending anchorages. There are two waypoints in the file that correspond to the two anchorages. I can download a CSV file now, but I want to clean the route before that. First, I set some options.
Setting Options
I click Show Options and the Options panel appears. The first set of options are formatting choices for the CSV file. I set Lat/Lon format to dd mm.mmm and Distance to Naut. Miles. Depth and Time Set are options for tracks, so I leave them alone.
GPX Options
The last set of options are for route cleaning. I check Reorder, Clean Sym, Hide Name and Clean All. I set Num Digits to 3 and Symbol to Waypoint. These are the default options that I used last time.
I click Hide Options to save the values and continue. I set Start Num to 400. This is because my previous routes start at 0, 100, 200 and 300.
Clean Route
I click Clean Route to clean the route.
Cleaned Route WP-OWW
The message says 11 waypoints out of 11 cleaned and Start Num is updated to 411.
I scroll through the route and it looks like the cleaned route from the original example, but I want to redo it using a different option.
Clean All Unchecked
I click Clear to restart the whole process. Then I click Show Options and uncheck Clean All. This tells the GPX Tool to ignore the two anchorage waypoints. I click Chose File, select WP-OWW.gpx, and click Upload GPX as before. I reset Start Num to 400. Next, when I click Clean Route, the message says 9 waypoints out of 11 cleaned, and everything is reordered and cleaned except for the two anchorage waypoints.
Clean All Unchecked
Downloading the Files
Next, I click Download CSV and it downloads a file named WP-OWW_cln.csv to my Download folder and disables the Download CSV button.
Then, I click Download GPX and it downloads a file named WP-OWW_cln.gpx to my Download folder and disables the Download GPX button.
Importing Cleaned Route
Because it has the effect of freezing muscles, it was generic vs viagra originally developed to treat spasms, particularly overactive eye spasms. It improves your immunity and relieves cheapest tadalafil browse that pharmacy shop you from weakness. Blood flows in and fills in the organ which results in cialis 100mg canada rigidity of the organ and sustentation or hard on. levitra prescription Netiquette is to never forward petitions via email. 5.
You can now go back to the original example header Importing Cleaned Route, but I do things a litte differently below.
Importing to OpenCPN
I import the cleaned route back into OpenCPN. I delete the old uncleaned route to avoid confusion. I right-click on it and select Delete… I get a message “Are you sure you want to delete this route?”. I click Yes. Then, I open the Route & Mark Manager and go to the Routes tab. I click Import GPX…, and select file WP-OWW_cln.gpx in my Download folder. I get a message that 2 duplicate waypoints were detected and ignored. I now have a route named WP-OWW. I open the route’s properties and notice that some of the original information has been lost or changed. This is caused by importing it after it was exported from HomePort.
I restore it to its original state. I put West Pass in the Depart From field and Okeechobee Waterway in the Destination field. I change Color from Magenta to Default color and click OK.
There are still some differences. The waypoint symbol is now Combo! and appears as circle with a dot. Also, the Show name box is checked for each waypoint. I can manually change each waypoint property, but I can do them all at once with the GPX Tool.
Recleaning the Route
I export the route from the Route & Mark Manager by selecting WP-OWW and clicking Export selected… and save it to a folder. Then, I open the GPX tool and upload the file I just exported.
I click Show Options and uncheck Reorder, and check Clean Sym, Hide Name and Clean All. I also set Symbol to diamond.
Reclean for OpenCPN
I click Hide Options and Clean Route, and Download GPX. Then, in OpenCPN, I delete the old route and import the re-cleaned route as before. It all looks good.
Importing to HomePort
I import the cleaned route back into HomePort. I delete the old route to avoid renaming due to duplicate names. I open HomePort and click on my Route2019 list. Then, I right-click on route WP-OWW and select Delete. I get a message saying “Items will be deleted from ALL lists.”, I click Delete.
To import the cleaned route, I click File and select Import into Route2019… I select file WP-OWW_cln.gpx and click Open. Surprisingly, it doesn’t make a difference if I use the original cleaned file or the one I recleaned for OpenCPN. This is because HomePort ignores Show name and waypoint symbol diamond. It knows about the starting and ending anchor waypoints because I already imported them into Route2019. I select WP-OWW_cln.gpx. It looks good.
To send this route to the SD card, I right-click on route WP-OWW and select Send To… I click on USERDATA, and then OK.
When I have all the routes for my trip, I like to organize them in a spreadsheet. You can use Excel or Google Sheets. I use both. The first step is to get a template. I have a shared template on Google Sheets here. Start by copying it to your own spreadsheet. I’ll name mine Example RouteSheet. The spreadsheet has a template sheet, named RteFormat. The template has six rows of header. The first step is to customize your template. Change speed of 5.5 in cell D3 to your planned average speed, in knots. Then, change your Start, cell C4, to your planned departure date and time, for example “11/21/2021 8:30”. This field can later be modified for each route.
I keep RteFormat sheet as is, and duplicate it to create a sheet for each route in my trip. To start, I click on the RteFormat sheet and select Duplicate. Then I click on Copy of RteFormat and select Rename... I give the sheet the same name as my route, WP-OWW.
I go to my Download folder and open WP-OWW_cln.csv with Excel and I see this.
Spreadsheet
Next, I copy the route information into my sheet. I copy all the cells in columns A through F, starting with row 9, by dragging my mouse from corner-to-corner to highlight the data, right-clicking and selecting Copy. Then I go to WP-OWW sheet, right-click on cell A7, and select Paste. Finally, I type the route name, WP-OWW, in cell B1, the starting point, West Pass, in cell B2, and the destination, Okeechobee Waterway, in cell F2. I update the speed, in knots, in cell D3, and the start time, in cell C4, if needed. The other fields in the header are computed by the spreadsheet; Total distance of 60.04 nautical miles, in cell B3. Total time of 10 hours, 55 minutes and 1 second, in cell F3. End time and date of 11/21/2021 19:25:01, in cell F4.
I’d love to hear what you think about the GPX Tool. Leave a comment to this post if you have any suggestions. I am planning to write more posts about the GPX Tool. You can subscribe below to receive an email notice when new post are available.
I do all this with my own time and money. If you find anything useful, please go to questeria.info/donate.html, and donate something to my website. Thanks!
I had some minor issues with routes that I created for my chartplotter. The method and tools that I use creates random waypoint names. I can fix them manually, but decided to create a tool that can do it all at once. It’s a Perl script called “clnrte”. The first version renamed the waypoints, starting at a specified number and incrementing it for each waypoint. Next, I had it replace different waypoint symbols with a specified symbol name. Then, I had it hide the waypoint names on the display.
Later, I decided that I would make this tool available on my website. There was a problem with this—it was the ease of use.
I wrote Clean Route using a language called Perl. The Perl Language is very good at reading and manipulating text files, which is why I chose it for the Clean Route tool. Perl programs require a Perl interpreter, which can be downloaded for free, for personal use. They are also portable across multiple operating systems, like Windows, Mac and Linux. I already had it installed on my Windows PC when I wrote the Clean Route tool.
The main disadvantage of Perl is that it runs from a command prompt. I spent much of my career running programs from a command prompt, so this was never a problem for me. But I understand why most people don’t want to do this. I provided a “bat” file, so the program could be started from Windows Explorer, but this is not portable and it doesn’t allow for running with different options.
The Clean Route program takes options, which are passed in as command line arguments, in the style of the UNIX shell. If running from Windows Explorer, the default options can be changed by editing the “bat” file. That’s about –3 on a usability scale of 1 to 10.
For documentation, I provided a small “txt” file, or you could run the program with the “–help” flag, as shown below.
>clnrte --help

clnrte (Clean Route) Version: 1.05
Copyright (C) Ron Olson 2014

Reorder waypoints and clean symbols in GPX route files.
Syntax:
   clnrte [options] infile1.gpx [infile2.gpx ...[infileN.gpx]]
   Where infile1.gpx ... infileN.gpx are route files in GPX format.
Options:
   --help or -h - Display this message.
   --outfile or -o - Output File (optional), default is infileX_cln.gpx,
                     (does not work with multiple input files).
   --reorder or -r | --noreorder or -nor - Reorder | Don't reorder
                                  waypoint names (default is to reorder)
   --start or -s # - Starting waypoint number, if reordering, (default is 0).
   --digits or -d # - Minimum number of digits in waypoint name, if reordering
                      (default is 3).
   --cleansym or -c | --nocleansym or -noc - Clean | Don't clean waypoint
                                      symbols (default is to clean symbols).
   --wpsym or -w 'string' - Waypoint symbol, if cleaning symbols,
                            (default is 'Waypoint').
   --verbose or -v | --noverbose or -nov - Verbose | Nonverbose mode.
These bits of documentation do not cover how to get started running Perl.
The New GPX Tool
One day, out of nowhere, I had an idea…
The server that runs my website has a Perl interpreter. All I had to do was upload a GPX file to the server, run the program there, and make the output available for download.
I started with my other GPX utility “gpx2csv”, or Create CSV file from GPX file. Since I now have a easier way to specify options, I made some improvements to the CSV tool, like specifying different units of measurements. I also displayed a summary of the GPX file.
This was my first release of the GPX Tool. See my post GPX Tool for a description of the Create CSV part of the tool.
In release 2, I added “Clean Route”. I made some improvements to this utility as well.
Clean Route
Clean Route came about because of the way I create a route for my chartplotter. I start by creating starting and ending waypoints in OpenCPN. I connect the waypoints with a route, and then insert waypoints in between to keep my route at safe depths. The inserted waypoints are automatically named by OpenCPN. When my route looks good, I export it and import it into HomePort. Then I continue to refine it. HomePort automatically names inserted and appended waypoints as well. Refer to my series of posts on Planning Multi-Day Cruises for more details.
The route is slightly changed when exported/imported between tools. While OpenCPN is tolerant of duplicate names, HomePort is not. When Homeport imports a route with an existing waypoint, it appends a digit to the name to make it unique. It can get very messy.
HomePort and OpenCPN share some common waypoint symbols, like Anchor, but most of them are unique. Routes exported from HomePort use waypoint symbols named Waypoint, which is a black dot. Waypoint gets converted to Combo!, which appears as small circle with a dot in the middle, when imported into OpenCPN. OpenCPN lets you specify the waypoint symbol, but the default is diamond, which is not a valid symbol in HomePort.
Inserted and appended waypoints in OpenCPN default to not show the waypoint name, but you can change this by checking Show name for each waypoint. When you import a route into OpenCPN that was exported from HomePort all the waypoint names are shown. This clutters up the display. You can uncheck Show name for each one, or you can use Hide Name to hide them all.
Prescriptions are not required to purchase the herbal extract. canada pharmacy viagra Antidepressants have a buy viagra in usa distinguished status for influencing sexual presentation in males and females in a similar way. So Is It Safe? Not only will viagra pills for sale you be able to forever obtain low cost generic sildenafil on-line. it’s as effective as authorised sildenafil however prices considerably less and incorporates a generic . As of right now, 10 percent of men go through from erectile dysfunction owing to psychological factors such as stress, depression, unresolved levitra without prescription icks.org orientation, guilt, low confidence, fear and performance anxiety.
I added another option to Clean Route. Originally, all waypoint names were reordered and all waypoint symbols were cleaned. I added the Clean All option. If Clean All is unchecked, non-automatic waypoints, like anchorages, are left alone.
Cleaning a Route
To clean a route, start by opening the GPX Tool and setting the Clean Route options.
Click Show Options and check/uncheck Reorder, Clean Sym, Hide Name, and Clean All. Also set Num Digits and Symbol to desired values.
Clean Route Options
Click Hide Options to save and continue.
Click Chose File and select a GPX file with the route to be cleaned.
Clean Route Chose GPX File
The Upload GPX button is enabled.
Clean Route, Upload GPX Enabled
Click Upload GPX to upload the file for processing.
Clean Route, Uploaded GPX File
If there is a route, the Clean Route button is enabled. The Start Num field is set to one past the last waypoint name from the last route that was cleaned. Change it now if desired.
You can also download the uncleaned CSV file, if desired.
Click Clean Route to clean the route.
Cleaned Route
The message tells you how many waypoints were cleaned. Start Num is updated by this amount.
Click Download CSV and Download GPX to download the cleaned CSV and GPX files.
The file name is appended with _cln, but the route name is unchanged. I suggest that you delete the original route from HomePort and/or OpenCPN before importing the cleaned route.
Click Clear to restart any time during the process.
Summary
I hope that you find my tools useful. If you want to try them out, you can download an example route, MAR-FTJ.gpx by clicking on the name. This is a route from Marquesas Key to Fort Jefferson anchorage, in Dry Tortugas. Look for more examples in the future.
Speaking of future posts, you can now sign up to receive a notification when a new post is published.
If you enjoy any of my tools or my website, please consider a small donation by clicking here or on the This website is ad free banner.
I provide tools for boaters and cruisers on this website. I call them “Tools for Cruisers”. Some of these tools are not user friendly, but now I have a solution—a Progressive Web App, PWA, that runs on both my server and your device. I’m talking specifically about my GPX to CSV and Clean Route utilities.
Note: I republished this post to address the version 1.1.1 update of the GPX Tool.
GPX Files
GPX, or GPS eXchange, files are used to import and export GPS user data between tools and devices. Navigation programs like OpenCPN and HomePort use GPX files to import and export waypoints, routes and tracks. GPX files are a type of XML, eXtended Markup Language file. GPX files are text files—you can view them with a text editor or browser, but there is a lot of extraneous information that makes it difficult to see the important things.
GPX Tools
My original GPX tools were Perl scripts that had to be run from a command prompt. One utility creates a CSV, Comma Separated Values, file and the other cleans up a route. Refer to Planning Multi-Day Cruises—GPX Tools for details. You also have to install a Perl interpreter on your device before you can run them.
The program Convert GPX to CSV extracts data from a GPX file and puts it in a CSV, Comma Separated Value, file that can be read as a spreadsheet.
Until now, this utility required a Perl interpreter, like ActivePerl. As a retired software engineer, this is not a big deal for me, but I understand why most people wouldn’t bother. After Perl is installed, you had to open a command prompt and type a cryptic command like …
gpx2csv WP-OWW.gpx
Another program, Clean Route, cleans up waypoint names and symbols in route. This program also requires a Perl interpreter and runs from a command prompt.
Now, you can create a CSV file by entering a URL in your favorite web browser. It brings up a menu that walks you through the steps.
GPX Tool
Start at the top-left of the screen and work your way down. Unavailable options are greyed-out.
Creating a CSV File
To create a CVS file from a GPX file, do the following:
Click Show Help to see help information. Click Hide Help to continue.
Click Show Options to set options. The only option that works at this time is Lat/Lon format.
Click Hide Options to save and continue.
Click Choose File and select a GPX file. You will get a file selection menu. Choose the desired GPX file. The Upload GPX button is enabled.
Click Upload GPX to upload the file for processing. If the GPX file is valid, and contains a route or track, the Download CSV button is enabled, and the GPX file is displayed in a separate pane.
Click Download CSV to download the CVS file.
Click Clear to restart any time during the process.
The CSV files for routes or tracks are different.
CSV File for Routes
GPX Tool Route
CSV files for routes contain the following fields:
wp – Waypoint name
lat – Latitude
lon – Longitude
nm – Nautical miles from previous route point*
feet – Feet from previous route point
brg – Bearing from previous route point, in degrees true
The most common thing one in a busy routine does maybe sitting all day without any movement and buy levitra cute-n-tiny.com exercises. If you are a young man suffering from the erectile dysfunction, the ordering viagra from canada cute-n-tiny.com made of Sildenafil citrate has taken the most effective treatments to cure impotency in men.There can be many issues that can create fights in a marital relationship. The mental viagra buy in usa always in stock relationship does not make any sense. Elder people are the most who are bound to loose your cialis on line http://cute-n-tiny.com/item-3633 body fat at warp speed.
* Future versions will have the option to show distance in Nautical Miles, Statute Miles, or Kilometers.
The nm, feet and brg values are calculated by the program.
CSV File for Tracks
GPX Tool Track
CSV files for tracks contain the following:
lat – Latitude
lon – Longitude
date – Date of track point
utc – Time of track point in UTC, Universal Coordinated Time*
depft – Depth at at track point (in feet**)
elapsed – Elapsed time since last track point
nm – Nautical miles from previous track point***
feet – Feet from previous track point
kts – Speed in knots***
brg – Bearing from previous track point, in degrees true
* The original version displayed time as local time, as defined in the users device, but now it is in UTC.
** Future versions will have the option to show depth in feet or meters.
*** Future versions will have the option to show distance in Nautical Miles, Statute Miles, or Kilometers and speed in Knots, MPH or KPH.
The elapsed, nm, feet, kts and brg values are calculated by the program.
GPX to CSV Options
GPX Tool Options
Latitude Longitude Format
There are three latitude longitude formats:
dd mm.mmm (default) – Degrees and minutes to 3 decimal places.
dd mm ss – Degrees, minutes and seconds.
dd.ddddd – Degrees to 5, or more decimal places.
Distance Format
Naut. Miles (Default) – Distance in nautical miles and feet, speed in knots.
Stat. Miles – Distance in statute miles and feet, speed in MPH.
Kilometers – Distance in kilometers, speed in KPM.
Depth Format
feet (default) – Depth in feet.
meters – Depth in meters.
Time Set
Time Set is used to filter our track entries that are close in time. If the number of seconds between track entries is less than Time Set, only the first will be displayed.
Running the GPX Tool
This tool should work on any device with a web browser, but it works best on a PC. A larger screen makes it easier to use, and many mobile devices have limited support for GPX and CSV files.
To start the GPX Tool open your web browser and go to https://questeria.info/gpx/. You will see the GPX Tool menu. You can look at the help screen, show options or choose a GPX file. Once you choose a file, you can upload it. Once uploaded, the GPX file contents are displayed if file is valid. You can download the CSV file.
You can add the page to your home screen to make it more like a regular app. I have done this on Windows using both Google Chrome and Microsoft Edge.
Future plans include cleaning routes.
Summary
I plan to continue making improvements to the GPX Tool. I hope that people will try it and like it. Send me any comments, suggestions and/or complaints.
Most people are familiar with the relationship of distance, time and speed. When you are navigating a boat, you might have to use the formulas to figure out where you are, or you might use them for planning purposes. It’s pretty easy to do with a calculator, or paper and pencil, or just in your head.
The formulas get more complicated when you have to convert between different units, say nautical miles and statute miles. It’s not difficult to do, but there’s always a chance you will make a mistake, especially when you’re doing other things, like driving a boat. I decided to create a special calculator that does all of these things. I call it the DTS calculator.
Background
It started one day, while we were traveling the ICW (Intra-Coastal Waterway) in Questeria. Questeria, like most sailboats is not going to make any speed records, so I have a lot of time to think about things between anchorages, marinas and bridge openings.
We wanted to find an anchorage that we could get to before it got dark in 3 hours and 20 minutes. Our speed, according to our GPS, was 5.4 knots. The distance we can go, in that time, at our current speed is determined by multiplying speed by time (in hours). 20 minutes is 0.333 hours (20 ÷ 60 = 0.333), so my calculation looks like…
5.4 * 3.333 = 17.9982
Since the unit of measurement for speed is knots (nautical miles per hour), the distance is in nautical miles. I’ll round my answer to 18 nautical miles.
Our GPS is set to knots and nautical miles because that is what we learned in piloting and navigation classes.
Knots vs. Miles per Hour
Many sailors prefer knots to miles per hour. Knots is basically nautical miles per hour. One nautical mile is 1.15078 statute miles. (I refer to miles as a statute miles to avoid confusion between statute and nautical miles.) Sailors prefer nautical miles because one nautical mile equals one minute, or 60 degrees, of latitude on a nautical chart.
The term “knots” originates from 17th century sailors, who measured their speed by counting the number of knots in a line that unspooled from a reel of a device called a chip log. (see en.wikipedia.org/wiki/Knot_(unit)). Knots and nautical miles are also preferred by airplane pilots.
Cruising on the ICW
The ICW, or Intra-Coastal Waterway, uses statute miles. Sailors can either change settings on their GPS or convert—we choose to convert. It’s not too difficult. You either multiply or divide by 1.15, depending on which way you are converting. This is another opportunity for making a mistake.
Another thing that makes the ICW different from offshore sailing is that the shortest distance between two points on the ICW is not usually a straight line—the ICW is very curvy. You measure distance on the ICW using mile markers. (Sometimes there are no physical mile markers, but the ICW charts use them anyway.) Guess what? The mile markers are in statute miles.
So, if I want to measure distances on the ICW, I have to use statute miles. But my GPS is set to nautical miles. This means I have to convert nautical miles to statute miles by multiplying by 1.15.
18 * 1.15 = 20.7
So, while I’m able to this with a simple calculator, I tend to make mistakes and forget formulas and constants, so I created a calculator to help me deal with all of this.
Other Factors
I decided that my calculator had to work on my phone, even when I have no cellular data or Wi-Fi. It also should remember what I entered into it last, so I only have to enter things that have changed.
My thinking was that if I enter one piece of of information, say nautical miles, it will convert that to equivalent units of measurement, like statute miles. If I enter two pieces of information, like nautical miles and knots, it will calculate a third value, like time, and convert everything to other equivalent units of measurement, like statute miles and MPH.
One problem with this is that there are three things; distance, time and speed, and if you change one thing, how to decide which thing stays the same and which thing is recalculated. My solution is to blank-out what you want to be recalculated.
As an American sailor, I usually deal only with nautical and statute miles, knots and MPH. But I realize that in other countries people deal with kilometers and kilometers per hour (KPH). I decided to add that to the calculator. It makes it a little more complicated, but hopefully it adds some value.
Location-Distance-Bearing Calculator
Another calculator on my website, www.questeria.info, is the Location Distance Bearing (LDB) calculator. This calculator also coverts between units and calculates a value from two other values. The common value between the two calculators is distance. The units of measurement for distance in the LDB calculator are nautical miles and feet. You can send distance values between the two calculators.
For example, if you want to convert kilometers to feet you can multiply by 3281, or use the Send to Location Distance Bearing Calculator function.
Another use for this function is to calculate a new location using the distance value from DTS with a bearing (direction) and another location.
History of the DTS Calculator
DTS was the first calculator that I created. The first version was created in early 2014 and was written in the PERL programming language. It ran on the server side and only worked when online. It was not designed to run from a phone’s home screen as a mobile web application and there was no About or Send to Loc Dist Brg Calc buttons. There was a Help button, but it was very basic compared to what is available today.
The second major version of the DTS calculator came after I created my four other calculators; LDB, AW, TW and WS. (See post Calculators on questeria.info.) This version was written in the JavaScript programming language, could run when offline and was designed to be able to be added to your phone’s home screen as a mobile web application. The Help button in this this version was also significantly improved.
Application Cache
The mechanism used for being able to run offline is called Manifest-Based Application Cache. The application files (html, css, js, etc.) are saved on the users’ device. The manifest file that specifies what is cached is named dts.appcache, and looks as follows:
This works well most of the time. But sometimes I want to make a change to the calculator. When something changes, I want to reload the changes into my application cache. To do this I must change the dts.appcache file.
The second line of the file starts with “#” and is ignored by the browser. When making any changes, I change the date and version in this line. I added the About button to the calculator so I know if I am running the right version.
Cookies
Early versions of the DTS calculator didn’t remember the values from previous invocations. The later versions accomplish this using cookies.
Sometimes cookies get a bad rap, but they are simply pieces data stored in your device’s browser. (See en.wikipedia.org/wiki/HTTP_cookie.) The DTS calculator uses 11 cookies, one for each field on the screen and two for the send to LDB function.
When you open the calculator, it reads all the cookies and fills in the nine fields with the values. When you press the Submit button or press enter, the calculator looks to see what fields have changed. Once the conversions and calculations are done, the cookies are updated with the new values.
When you do a Send to Location Distance Bearing Calculator, the cookie for the nautical miles value in the LDB calculator is updated and another cookie named send is set to true. Then the LDB application is started. It reads the value saved by the DTS calculator.
Mobile Web Application Capable
The DTS calculator is a standalone website. All you need to run it is a standard web browser, such as Chrome or Safari. One difference between DTS and a normal website is that the DTS calculator is Mobile Web Application Capable. In other words, it looks more like an app than a webpage when it’s running on a phone or tablet.
Web browsers show things like a URL bar, refresh button, back button, settings, etc. These things are not shown when running as a mobile web application.
Another thing that makes it more like an application is having an icon. The icon for the DTS calculator is a tan box with blue letters “DTS”. When you add the webpage to your phone’s home screen, you will see the DTS icon. I have all my calculators from www.questeria.info in a folder named Calculators, and I can easily see what is what from the icons.
Kilometers and KPH
I’ve been thinking of adding Kilometers and KPH for a while. I finally did it. It made the screen more complicated, but hopefully it will make it more useful.
An added benefit of this exercise was that I found, and fixed quite a few problems with the previous version.
Service Worker
A web developer’s work is never finished. What I mean by this is that things are always changing, and things that used to work, may stop working, or work incorrectly. This is the case with the manifest-based application cache that all my calculators use to work offline.
The function of the manifest file was replaced with something called a Service Worker. A service worker is basically a program running in the background. Service workers can perform many functions, but one is the ability to cache the application like manifest-based application cache.
I have known for a while that manifest-based application cache was deprecated and would be going away. But my last change to the DTS calculator showed error messages.
I changed the DTS calculator to use a service worker. It no longer shows any errors, and seems to work as intended.
There are some new quirks with this version. Service workers will not run if the unsecure URL is used (http:// versus https://). Most browsers will warn you if you are using the unsecure version of the website. Also, the service worker doesn’t always start right away until you refresh the page.
The About button tells you what version of the service worker you have. If you don’t have a service worker, it gives you a shorter version number—4.1 instead of 4.1.6, for example.
It took me awhile to get everything working, but now that I have DTS using a service worker, the other calculators should be easy.
Ad Free
I provide the DTS calculator on my website for anyone—free of charge. I used to try and recoup some of my expenses for the website by having ads by Google. I decided to remove all the ads. They were not generating much revenue for me, and they were slowing down pages.
In their place, I put a link to PayPal so that people donate money. Refer to post No More Ads for more information.
If you find the DTS calculator useful, please consider a small donation.
Installing DTS on an iPhone Home Screen
You can run the DTS calculator on anything with a web browser, but it is really meant to be run on a mobile phone. I will describe how to install it on an iPhone because that is what I have. Installing it on an other smart phones or tablets is not much different.
The first thing to do is open the website https://questeria.info/dts/ on your phone. Make sure you are using the secure version, with “https”. The non-secure version (http) may seem to work, but the service worker caching will not work.
When you go to that URL on an iPhone, you will see a screen like this.
The action of Peripheral neuropathy involves the nerves that control sildenafil generic canada erection, which is commonly seen in men with diabetes. In spite of being silent, you should communicate with each other by choosing a private viagra online buy place and enough time. There are a lot of medicines in the market for repairing cartilages generic cialis canada http://robertrobb.com/throwing-more-money-at-a-shutdown-economy-wont-accomplish-much/ and reducing swellings. Mohammad Shahzad, the attacking wicket-keeper viagra ordination batsman and Mohammad Nabi have been added a great value in its popularity.
To add it to your home screen, press the “share” button. That’s the icon of the box with an arrow coming out of the top at the bottom of the screen. You’ll get a screen with lots of option for sharing. Scroll down until you see “Add to Home Screen”.
Pressing this will take you to the following screen.
Press “Add” in the upper right corner. The DTS icon will be added somewhere on your phone’s Home Screen.
To move it to a folder or another place on your Home Screen, press the icon until all the icons are jiggling and have a “-” in the upper-left corner.
Now you can drag the icon anywhere you want. You can drag it into a folder, and then to the place in the folder that you want. To create a folder, drag it onto another icon.
This is what my “Calculators” folder looks like.
Examples of Using DTS Calculator
I made up an example cruise to illustrate the DTS calculator. It is a southbound cruise on the Atlantic ICW, going through parts of North Carolina in a sailboat. The cruise isn’t real, but the places are real. All of these scenarios assume an average speed of 5.5 knots. The start date is October 14, 2021.
When cruising in this manner, we usually start at sunrise and end before sunset. Sunrise is at 07:11 and sunset is at 18:34 local time. I like to use 24-hour format when I’m cruising because it’s easier to add and subtract times without worrying about AM and PM.
Mile Hammock Bay Anchorage
We want to anchor in Mile Hammock Bay anchorage, at statute mile 244.5. There is one draw bridge between us and the anchorage that must be opened. It is the Onslow Beach Bridge at statute mile 240.7. This bridge opens on the hour and half-hour.
At 13:40 (1:40PM), we go under the Emerald Isle Bridge. We know that this bridge is at statute mile 226, so we have 14.7 statute miles to go before we get to the Onslow Beach Bridge. I plug 14.7 into Statute Miles of my DTS calculator and 5.5 into Knots.
The calculated time is 2 hours, 19 minutes, and 21 seconds.
I add this to the current time, and see that we will get to the bridge at 15:59:21. This is pushing it pretty close, because the bridge won’t open for us if we are not there on the hour. Then we will have to wait another 30 minutes for the next opening.
I’ll see what happens if I increase our speed to 6 knots. I put 6 into the Knots field and blank-out the HH field to recalculate my time.
This will get us to the bridge at in 2 hours, 7 minutes, and 42 seconds, or 15:47:42.
We get to the bridge in time, and wait for the 16:00 opening. The anchorage is another 3.8 statute miles. We’ll slow back down to 5.5 knots and plug in the 3.8 Statute Miles. It looks like we will get to the anchorage in about 36 minutes.
We anchor with plenty of time to plan out the next day.
Southport Marina
We want to go to the Southport Marina tomorrow and I want to estimate what time we will get there. The location of the marina is 33°55.013’N, 078°01.718’W. We are currently at 34°33.098’N, 077°19.505’W, which comes to about 51.7 nautical miles, or about 59.5 statute miles. I’ve already mentioned that you cannot use a straight lines on the ICW, so I must subtract the mile markers.
The marina is at statute mile 309, and we are at statute mile 244.5, so we have 64.5 statute miles to go. The curves of the ICW adds five statute miles, or about 47 minutes, to our journey.
Traveling 64.5 statute miles at 5.5 knots should take us over 10 hours and 11 minutes, getting us there at 17:22. But there are other factors which will affect our timing. There are two bridges which must be opened. The first bridge is the Figure Eight Bridge at statute mile 278.1. This bridge opens on demand, so it won’t cause much of a delay. The next bridge is the Wrightsville Beach Bridge. It only opens on the hour. This bridge is at statute mile 283.1, and we are at statue mile 244.5, so I will see how long it takes to go 38.6 statute miles at 5.5 knots.
It will take 6 hours, 5 minutes and 55 seconds. If we leave at 07:11, we will get there at 13:17. This means a 47 minute wait unless there are other delays along the way. We will plan on continuing at 14:00 after the bridge opens.
Another factor to consider are the currents after the bridge. If I look at my GPS, there six current prediction stations between Wrightsville Beach and Southport. They are named; Myrtle Sound, Snows Cut, Upper Midnight Channel, Reaves Point, Horseshoe Shoal and Southport.
My GPS doesn’t show statute miles for the current prediction stations, but I can measure the distance from the closest statute mile marker on my chart. The first station, Myrtle Sound, is before mile marker 195. So I’ll measure the distance and subtract.
I measure it to be about 1.07 nautical miles, so I will convert that to statute miles.
That comes to approximately 1.2 statute miles. I subtract that from 195 and note the Myrtle Sound statute mile marker as 193.8. This is 10.7 statue miles from the Wrightsville Beach bridge. I’ll repeat this for the other five current prediction stations.
The next step is to determine what time we will be at each station to see how the ever changing currents will effect our speed. I put 10.7, the distance between Wrightsville Beach bridge and Myrtle Sound into Statute Miles, 5.5 into Knots and blank-out HH to calculate time.
The result is 1 hour, 41 minutes and 26 seconds. I add this to 14:00, the time we leave Wrightsville Beach bridge, and see we will be there at about 15:42. Now I can open the Myrtle Sound current prediction station and see what the current will be for that date and time.
It shows to be 0.87 knots at 15:42 on October 15, 2021. The direction of the current is in same direction that we will be traveling, so we will add it to our default speed of 5.5 knots to be 6.37 knots.
The next current prediction station is Snows Cut. It’s 2.0 statute miles from Myrtle Sound. To calculate the time to get there, I enter 2.0 in the Statute Miles field and 6.37 into the Knots field.
The time calculates as 16 minutes and 22 seconds. (Note: the DTS calculator rounds Knots to 6.4 after calculating time.) I see that we will be at Snows Cut at about 15:59. I put this information into a table, as shown.
Place
MM
SM@Speed
Time
Curr.
Myrtle Sound
293.8
10.7@ 5.5kt
15:42
+0.87kt
Snows Cut
295.8
2.0@ 6.37kt
15:59
Upper Mid. Ch.
299.2
3.4@
Reaves Point
300.2
1.0@
Horseshoe Sh.
303.0
2.8@
Southport
308.0
5.0@
Distance, Speed and Time Adjusted for Current
I’ll go through the five remaining stations in a similar manner and fill out this table.
When completed, the table looks like this.
Place
MM
SM@Speed
Time
Curr.
Myrtle Sound
293.8
10.7@ 5.5kt
15:42
+0.87kt
Snows Cut
295.8
2.0@ 6.37kt
15:59
+0.57kt
Upper Mid. Ch.
299.2
3.4@ 6.07kt
16:29
-1.32kt
Reaves Point
300.2
1.0@ 4.18kt
16:42
-1.05kt
Horseshoe Sh.
303.0
2.8@ 4.45kt
17:15
-1.06kt
Southport
308.0
5.0@ 4.44kt
18:14
-0.31kt
Distance, Speed and Time Adjusted for Current
The Southport Marina is at statute mile 309 so the final calculation is 1 statute mile at a speed of 5.19 knots.
The result is 10 minutes and 3 seconds, so we should be at the marina at about 18:24. Bridges and currents add over an hour to our trip.
In Conclusion
The example is made-up, but it’s based on real life. One time, I missed the Wrightsville Beach Bridge opening because, I was blindly following another vessel who said on the radio that he slowed-down so he wouldn’t have to wait long. Another time, we were speeding along through Myrtle Sound on Questeria, and decided to pass the Carolina Beach anchorage and go to Southport, only to slow way down once we got into the Cape Fear river.
We’ve never actually used to the current prediction information to plan our time, but it should give us a rough idea of the currents. By the way, I used the Garmin ActiveCaptain app on my phone for two of the screenshots, but my GPS and other route-planning tools have the same capability. For more information see my post Planning Multi-Day Cruises—ActiveCaptain.
I couldn’t think of any realistic examples to show the usefulness of Kilometers and KPH while cruising in North Carolina, but I’m sure that somewhere it will be useful.
I hope you can see the value of this calculator when cruising and load it on our phone or tablet.
As I’ve written before, weather is one of my hobbies. So, even though we aren’t planning any cruises right now, I’m logging the weather in Marathon. There have been some changes since I last posted about weather, and I am fine tuning my techniques.
National Weather Service Links
Some of the NWS links have changed. For example http://www.nws.noaa.gov/om/marine/hfgulf_mobile.htm is now https://www.weather.gov/source/marine/mobile/hfgulf_mobile.html. Currently, if you enter the old URL, you are redirected to the new URL, but you should update your bookmarks, as this is temporary. I have updated all the links in my posts.
GRIB Files Revisited
In Weather, Part 8, I talk about GRIB files. GRIB files are extracted, on request, from a global computer model. You specify a model, area, density, valid times and more, for a customized forecast. You send this request to query@saildocs.com. You receive a response with a GRIB file attached. You need a tool, such as Viewfax, that comes with Airmail. When sending your request to Saildocs, you can either request a single GRIB file (Send) or a daily subscription (Subscribe).
To recap the Weather, Part 8 post, GRIB files have their advantages and disadvantages—they are extremely customizable, but are unchecked, raw data, extracted from a computer model. GRIB files are very useful in double-checking other resources, such as Radio Faxes and NWS zone forecasts.
There is a trade-off between content and file size. If you are not on an unlimited, high-speed internet, you should carefully consider how much detail you need.
I have gained a greater appreciation for GRIB files since I wrote that post in 2017.
Marine Weather Recap
When I started preparing a cruise to Moore Haven, FL. I wanted to make sure I had the right weather data for our extended trip from Marathon to the Okeechobee waterway. See Planning Multi-day Cruises—Overview. I subscribed to a GRIB file, a NWS Zone Forecast, and Synopsis for the area. I also looked at the Radio Faxes each morning.
Radio Faxes and NWS Zone Forecasts are divided into 12 hour segments, so I want my GRIB files in 12 hour segments. The GFS model data is updated every six hours, starting at 00:00 UTC. I want it on an even 24 hours, so it conforms with the Radio Faxes at 24, 48, 72 and 96. I could request every 6 hours, but I think that’s too much.
Radio Faxes
I look at the Radio Faxes most mornings. The Surface Forecasts for my location are 24-00, 48-00, 72-00, and 96-12 hours. When cruising, I may not get them everyday, or they may not be readable. If it’s readable, I can determine surface pressure, wind direction and sometimes estimated wind speed. Refer to my post Weather, Part 3 for a description of how I analyze Radio Faxes. These four charts show me how what the pressure and winds will be like over the next three days.
A Surface Forecast gives me a snapshot of pressure and wind at that time in the future. The following example shows a ridge over the Florida Keys. There is no clear wind direction or speed, because the 14 isobar line encircles the area.
Radio Fax for 72 Hour Surface Forecast
The NWS Zone Forecast for that time says “Variable winds near 5 knots” and the GRIB forecast, which has no way to express “Variable“, says “Wind: 5.4@260, Press: 14.2“.
NWS Zone Forecast
The NWS Zone forecast has Wind Speed, Wind Direction, Seas and precipitation, for 5 or 5½ days and nights, depending on when it’s requested. For example, Sunday night to Friday night. This is for an entire zone, and is not as precise for a specific location. Refer to my post Weather, Part 7 for more details.
GRIB File Recap
We used GRIB files in the past, but I started looking at some of the options and decided I could change my request to better cross-reference with Radio Faxes and NWS Zone Marine Forecasts. This allows me to evaluate the confidence-level of my forecasts.
Nothing has changed in the way I receive and look at GRIB files. For that information, refer to Weather, Part 8. What has changed is my subscription and analysis of the data.
The NWS zone forecasts are for 5 or 5½ days, so I request six days, at 12 hour intervals—hours 0 through 132. My request looks as follows:
This request is for 29,000 square nautical miles, in 0.5 degree spacing , for hours 0 to 132 in 12 hour increments. When in the Bahamas, I requested 104,000 square nautical miles, in 1 degree spacing for hours 0 to 120, in 12 hour increments. Both requests asked for Mean Sea-Level Pressure (PRMSL) and Gradient Surface Wind Speed/Direction (WIND). Both GRIB files are about 5K—reasonable to receive on a SSB radio.
The default subscription is for 14 days. I get a notification the day before my subscriptions expire, with instructions on how to resubscribe.
Viewfax Screen
I want my GRIB file to start at 00:00 UTC. The model is updated every six hours, so I send my request to saildocs at around 22:00 UTC, which is 6:00pm EDT. The GRIB file is extracted around 04:30 UTC and sent around 05:00 UTC. I send my NWS Zone Forecast and Synopsis requests at the same time.
When I look at my emails from saildocs in the morning, the forecasts are in sync. The first segments of the forecasts have already happened, but I can see how accurate they were. If I am going out on the water that day, I check the latest forecast for any changes.
Weather Log
I keep a weather log in a 3½” x 5½” notebook. I didn’t log all of the GRIB file information in the past, but I realized that there is information there that I don’t have in other resources. In my posts Weather, Part 6 and Weather, Part 7, I talk about my weather log.
There isn’t a lot of room to write in a 3½” x 5½” page, but I use abbreviations and leave out unneeded information. For example, I record a pressure reading of 1023.1 millibars as 23.1.
I write the date and location on the top of the page…
23 Mar 20 24.7N 81.0W
I leave some space, and list the Radio Fax pages that I plan to look at.
06ZSA – Surface Analysis for 06Z (06:00 UTC)
2400ZSF – 24 hour Surface Forecast for 00Z (00:00 UTC)
4800ZSF – 48 hour Surface Forecast for 00Z (00:00 UTC)
7200ZSF – 72 hour Surface Forecast for 00Z (00:00 UTC)
9612ZSF – 96 hour Surface Forecast for 12Z (12:00 UTC)
Each family member begins to cope within the role they have taken on or have been given; a generico cialis on line djpaulkom.tv fragile home environment is thus created. So, all the activity power and dose of djpaulkom.tv buy generic viagra the medicine and majorly recommended for moderate or severe erectile issues. The drug is not a branded viagra buy on line version but at fraction of the cost. A man cannot be sexually stimulated, if does not think about something coitus and generic tadalafil prices initiate towards the sexual health.
When I look at each of the above pages, I list surface pressure, wind direction and estimated wind speed. Surface pressure is the last two digits in millibars. Wind direction is one to three letters, such as ESE. Wind speed is estimated wind speed in knots. Refer to post Weather, Part 3 for an explanation of how I get these.
Next, I look at actuals. I fill in the 06Z (2:00am EDT) Surface Analysis right away. I go back three days and fill in the Surface Forecasts. I use data from my tablet, phone or the internet, depending on my circumstances. My tablet and phone can log barometric pressure for three days. There are also weather stations, on-line, that log barometric pressure, wind speed and wind direction. Sometimes I write in values from multiple sources so I can calibrate my devices.
The page looks something like this when all the actuals have been recorded.
06ZSA     22 E      9   22.4↓ (22.4)  E 16-19
2400ZSF 21 ESE  6   21.3↑ (21.3)  ESE 12-15
48   "       17 SSE   5   18.2↑ (18.2)  E 5-6
72   "       14 V       ?   14.8↑ (14.8)  WSW 4-5
9612ZSF 14 V       ?   16.0↑(16.0)   N 6-8
The first column is the weather map, as listed above. The next three columns are the pressure, wind direction and wind speed, derived from the Radio Fax. After that are actual values, in the same order. In the above example, the first value is the pressure from my android tablet and the one in parenthesis is from a nearby weather station. I also keep track of whether the barometric pressure is rising or falling. Actual wind direction and speed are from a nearby weather station that shows average wind and gust speeds.
I could not determine wind direction and speed for the 72-00 and 96-12 entries, so I it wrote them as “V ?“
Next, I write the NWS Zone ID I am using, in this case, gmz043. Refer to Weather, Part 7 for finding Zone IDs. I also write the date and time of my first GRIB file entry on this line.
The next twelve lines are numbered 0 through 132, by 12s. Then, I write today’s day between lines 12 and 24, tomorrow’s between lines 36 and 48 and so on for five days. I abbreviate them Su, M, Tu, W, Th, F and Sa. I don’t label line 0, which is actually last night.
When I look at my zone forecast in the morning, it is from last night. So I write the forecast for “TONIGHT” on line 0. Then, on lines 12, 24, etc. I abbreviate and omit things to save space. For example:
East winds 10 to 15 knots, increasing to near 15 knots late. Seas 1 to 3 feet. Nearshore waters a light to moderate chop. Isolated Showers.
I write as…
E 10-15↑nr 15 1-3' IS
I write the GRIB file data to the right of the zone forecast. If there’s not enough room, I continue it below line 132.
I use Airmail /Viewfax to read my GRIB file. Viewfax shows wind speed and direction for my saved location. My location is set in Airmail as follows:
Click Tools tab
Click Options…
Click Settings tab.
Set Station Location Lat: and Lon: to desired latitude and longitude.
When I open the GRIB email in Airmail, I see the attached GRIB file. I double-click on it to open Viewfax. I see a boat icon at my location. There is a tag with wind information. It reads something like …
wind: 11.6@105
Wind is specified as speed@degrees. This is a more precise way than one to three letters, but for me it is harder to visualize. So, in my head, I divide the degrees by 30 and visualise a clock face. In the above example, 103÷30 is between 3 and 4 o’clock, or East Southeast.
In Viewfax, the pressure is not automatically displayed for your location—I have to move the mouse cursor to the boat icon. I see a tag with wind and pressure information:
Wind: 11.6@105
Press: 1021.6
I log the pressure as 21.6. I write these values to the right of my Zone Forecast, starting at line 0, and continuing to line 132. If I run out of room to write, I continue it below line 132.
Weather Log Page
Next, I compare today’s actuals to yesterday’s forecast. Finally, I compare the GRIB forecast, the NWS Zone forecast and the Radio Fax forecast. Then, I compare today’s GRIB pressure forecast to yesterday, yesterday’s to the day before, etc. This gives me a confidence-level for the forecast. I use a spreadsheet to do these comparisons. It compares forecasted pressure values with actuals or their previous 24-hour values. It calculates the average, maximum and minimum differences. I write these numbers in the log, under the date and location.
Avg 0.3 Max 0.6 Min 0.0
GFS Surface Forecast Spreadsheet
I use a spreadsheet to compare forecasted pressure values with actuals or previous 24-hour values for my location. The first column is the date. Then, twelve columns, labeled 0, 12, … 132, for the forecasted values I get from my GRIB file. Followed by two columns for actuals, labeled 24 and 36. This is followed by eleven columns of differences, labeled, 0, 12, … 120
GFS Surface Forecast Spreadsheet
I put the actual values in the row for the previous day, since my GRIB file was extracted over 24 hours prior. They are labeled 12 and 36, for times 00:00 UTC and 12:00 UTC (8:00pm EDT and 8:00am EDT).
The Differences column labeled 0 is the difference between GFS 00:00 (8:00 pm EDT yesterday) and the actual value from my barometer app, or the local weather station. The next column, labeled 12, is the difference between 12:00 UTC (8:00 am EDT) and the actual reading. The remaining columns, 24 through 120, are the differences between todays forecasted pressure and yesterday’s forecasted pressure. For example, the difference between 23-Mar 00 hour and 22-Mar 24 hour.
The next three columns calculate the average, maximum and minimum differences.
I considered comparing 48, 72 and 96 hours, but this would make my spreadsheet too large to view on one screen. I think this gives me a good idea of how accurate the GFS model is for my location.
Barometer Calibration
I get barometric pressure values one of several ways. I use my Android tablet, iPhone7, or look on-line. There are many Barometer apps for Android and Apple, but I want one that continuously monitors the pressure in the background. I have an app on my Android tablet called Barometer Monitor. I also have one on my iPhone 7 called Barometer. I usually use the one on my Android tablet, because the iPhone version doesn’t always run in the background. Another alternative is to look at a nearby weather station. There is one about a mile away from me called VCAF1. I noticed that the three readings didn’t match.
I am going to assume that NOAA weather station is more accurate than either of my devices. Comparison of the GFS forecasted pressures, to this station support that assumption.
The Barometer Monitor app on my Android tablet has a setting for an offset. I set it to -0.6 and now my tablet tracks pretty close to VCAF1 station and GFS forecasts. My iPhone app does not have that setting, but it is only different from VCAF1 by 0.1 or 0.2 millibars.
Summary
I am making more use of GRIB files to double check other resources and refine my ability to read surface analysis radio faxes. I keep track of the previous forecasts, and go back and see how they compare to each other. I also check my barometric pressure reading against other sources.
I hope you find this post useful. Even I found some new things, while writing it.
In my previous post on Planning Multi-Day Cruises—OpenCPN I talk about using OpenCPN to plan my routes. OpenCPN was upgraded since I wrote this article. Most of the article is still true, but a few of the details have changed. I updated the post, with footnotes to address this. See OpenCPN.org/OpenCPN/about/ver500 for details about what has changed.
Kamagra is a generic medicine and like all other generic medicines, it has its Full Article india viagra generic own advantages. With the viagra uk continue reading these guys now development of medical science, wide array of medical options are provided to an individual going through different health ailments. This is, robertrobb.com generico viagra on line however, more common in elders, especially after 40 years. After all, generic cialis online in order to achieve outer beauty, you have to mention the name and communication address with phone number.
Another item that needs attention is that NOAA has decided to discontinue Raster Nautical Charts (RNC). Click here for details. I’m not sure what this means, but I recommend downloading all the RNC charts that you need before they are no longer available.
It’s been a while since my last post, and I thought I would share an update of what we’ve been up to in the past five months.
Return to the East
Family
My last post, in mid-September, was about returning from our Alaska RV trip. After that, we left the RV in Denver, CO and flew to Charlotte, NC for our annual “Beach Week”, which was actually on a lake this time. We flew back to Denver and stayed in the Colorado/New Mexico area for a while. We left the RV at Cochiti Lake Campground, near Albuquerque, NM, and flew to Chicago, IL for Labor Day weekend. We got together with family, and buried my mom’s ashes. We flew back, and went to Taos, NM for the Big Barn Dance. After that, we stopped to see our friends, Gary and Ellen, in Chattanooga, TN. Then we drove to Florida.
The Big Barn Dance
Boatyard
Questeria was in need of a lot of work. She was closed up for six months, and needed lots of help. She was also way overdue for a bottom job. What started as a few days in the boatyard ended up taking a month. We stayed on the RV, flipping back and forth between Curry Hammock State Park and Bahia Honda State Park. They were both pretty busy, but this time of year there are cancellations. We lucked-out and found a spot in one park or another the whole time. We got the boat back in the water, and it looked great on the outside, but was torn-up on the inside.
RV repair and Maintenance
We had an appointment at Camper’s World, in Fort Meyers, FL, to get the RV repaired. Besides the repair for the collision damage from our Alaska trip, there were several other things that need to be done. After a week, we got some of things done, but then we had to wait for parts. The remaining items would have to wait until after the holidays.
Thanksgiving
After that, we drove to Jonathon Dickinson State Park, in Hobe Sound, FL, and then to John Prince Park, in Lake Worth, FL. We spend Thanksgiving with some family in Delray Beach, FL.
Holidays
Then, we drove to North Myrtle Beach, SC, to see Ryan and Audrey. Then, Wilmington, NC for Johnny’s 4th birthday, and Jameson’s 1st birthday a week later. We hung out in the North Carolina for the rest of December.
There have been introduced too many medicines or drugs in this field of pharmacy or medication to get away from wherever you viagra professional 100mg are Inappropriate or disturbing thoughts Fear of death The duration of the panic assault also varies, but generally it does not present symptoms at its acute stage. Nowadays order cialis canada vital state of the country how to help you to conquer your built-up fears for sex and to get a proper shape of the knees. Spending more time with family levitra canada pharmacy and friends they could count on in an emergency, and how free they felt to choose their daily activities, learn new things or do “what one does best.” Like previous studies, the new analysis found that life evaluation, or life satisfaction, rises with personal and national income. Remember that purchase generic viagra is a prescription medication that is intended to get those entities familiar with this. The grandkids
Waiting
We called Camping World, in Fort Meyers to find out the status of the parts needed to finish the job. The insurance company would not pay for a new piece, and said it had to fixed. Also, the wrong awning was delivered. They would reorder the awning. We made an appointment for three weeks later.
Savannah, GA
While we waiting, we drove to Tega Cay, SC for a few days, to spend time with grandsons Jackson and Oliver. Then to Savannah, GA for some sight seeing. Then we drove to Faver-Dykes State Park in St. Augustine, FL and Sebastian Inlet State Park, in Melbourne Beach, FL. Then, to Ortona South Campground, in Moore Haven, FL.
Second Time
We drove to our appointment at Camping World, in Fort Meyers, FL. We talked to the body repair guy and he said the damaged part needed to be replaced. We asked him to send more pictures to the insurance company to justify it. We left the RV there so they could fix the slide-out and replace the awning.
When we came back that afternoon, they had taken more pictures of the collision damage, and fixed the slide-out, but they didn’t replace the awning because they got the wrong one again.
Back to the Boat
We were ready to go to the boat, but at that point it was torn-up inside and had been closed up for three months—it was unlivable. It was the end of January, and the affordable state parks near Marathon were fully booked. We booked a week at Southern Comfort RV Park, in Florida City. It’s about a 1½ hour drive to the boat.
We spent the week driving back and forth between Marathon and Florida City, but we got the boat in shape. We paid for a month of storage at Southern Comfort RV Park and moved to the boat.
There is still a lot of work to do on the boat, but we are here now, trying not to work too hard.
OpenCPN was updated after I posted this article. I have updated it with footnotes to address some of the changes in OpenCPN 5.0. Click here to see details of what’s new in OpenCPN 5.0
When cruising on Questeria, we like to have a route on our chartplotter. This makes for a less stressful day. When cruising for several days, we plan the routes ahead of time and organize them using Google Sheets.
Cruise Planning Overview
In Planning Multi-Day Cruises—Overview, I talk about how I plan extended cruises. I discuss plans vs. intentions, or being flexible. In this case, the cruise we planned never happened.
The post talks about how I create a route by starting with two or three waypoints on a small scale chart, and then, zoom in and iteratively refine it on larger scale charts.
I also give an overview of the tools we use. The next articles discuss each tool in more detail.
OpenCPN
In Planning Muli-Day Cruises—OpenCPN, I talk about OpenCPN. I discuss installing and setting-up OpenCPN and installing charts. I also talk about using OpenCPN to create waypoints and routes.
HomePort
In Planning Muli-Day Cruises—HomePort, I talk about Garmin HomePort. The post talks about installing and setting-up HomePort on a Windows PC. I also talk about using HomePort and transfering user data between HomePort and a Garmin chartplotter.
ActiveCaptain
In Planning Muli-Day Cruises—ActiveCaptain, I talk about Garmin ActiveCaptain. The post talks about the website and the mobile app. I talk about using ActiveCaptain to find anchorages, marinas and more. I talk about setting-up the mobile app on an iOS or Android device and importing and exporting user data to/from the app.
GPX Tools
In Planning Muli-Day Cruises—GPX Tools, I talk about GPX Tools. These are two utility programs that I wrote to make it easier to plan multi-day cruises.
Example Route
In this post, I put it all together. I walk through an example route that I created as part of a trip from FL Keys to Moore Haven, FL.
I talk about Plans vs. Intentions in Planning Multi-Day Cruises—Overview. This turned out to be the case here. We had a schedule—a memorial service in Chicago, and a wedding in Phoenix, Arizona. When we called the boatyard in Moore Haven, FL, they told us there was a waiting list. So we left Questeria in Marathon and took off in our RV.
I started this series of articles a while ago. For now, this is the last post on this topic. Maybe later we will take this trip, and I will follow-up with more posts. Here is my example.
Copying Data from Chartplotter
Before doing anything, I like to copy all the routes, tracks and waypoints from my chartplotter to my SD card. I use a 16GB Micro SD card with an SD adapter. It contains my map and user data, with plenty of room to spare. I turn on my chartplotter and plug in my SD card/adapter and I select the “Manage Card” prompt, and then “Save to Card” and “Overwrite this File: USERDATA”. I press “Yes”, and it prepares the card, transfers User Waypoints, Routes and Tracks. Then, I eject the SD card from the chartplotter, remove it from the adapter and plug it into my computer. Then I start HomePort—it finds the SD card. I can click on USERDATA and see all my waypoints, routes and tracks from my chartplotter.
Finding an Anchorage or Marina
Once we have a rough idea of the trip, we look at places where we might want to drop the anchor, or pull into a slip for the night. We use ActiveCaptain website to do this.
We want to spend a night at the anchorage called West Pass. After opening the ActiveCaptain website and signing-in, I search for West Pass, click on the anchorage, and it brings me here. I click Show Marker Info, if it’s not already visible. I copy the latitude and longitude to the clipboard, by highlighting them with my mouse, right-clicking and selecting Copy.
Creating a Waypoint
After copying the latitude and longitude of my anchorage, I go to OpenCPN. I create a waypoint by right-clicking in the approximate location on the chart and selecting Drop Mark. Then I double-click on my new waypoint to open the WaypointProperties window. I enter the name, West Pass, and change the symbol to Symbol-Anchor1¹. Then I right-click in the Latitude field, and select Paste lat/lon. I now have a waypoint of the West Pass anchorage.
I do this again for the anchorage called San Carlos Bay NW.
Exporting a Waypoint from OpenCPN
When I create a waypoint on OpenCPN, I may want to have it on my Garmin chartplotter. I do this by exporting it to my PC, importing it into HomePort, and sending it to my userdata in my SD card.
To export a waypoint from OpenCPN, I open the Route & Mark Manager, by clicking the icon at the top of the screen. Next, I select the Waypoints tab and click on the waypoint to be exported. Then, I click on Export Selected… I get a File menu. If this is my first waypoint for this trip, I create a new folder, something like Route2019. I select a folder and file name. I usually use the suggested file name, like West Pass.gpx. I now have a GPX file on my PC.
Importing a Waypoint to HomePort
If this is the first waypoint from the trip in HomePort, I create a new List to hold my waypoints and routes. I right-click on the My Collection Folder and select New List. I name the new list Route2019.
To import the waypoint, I click on the list Route2019, and then click File and Import to ‘Route2019’... I get a File Explorer menu, select West Pass.gpx, and click Open. It imports my waypoint. The waypoint symbols in HomePort are different than in OpenCPN. I double-click the waypoint and change the symbol to an anchor and close the menu. I want the West Pass anchorage waypoint on my chartplotter, so I right-click on it and select Send To… I select the USERDATA ADM file, under my GPSMAP 4808 device, and click OK.
I click on my USERDATA ADM file and see the waypoint. It is stored on my SD card and will be stored on my chartplotter in a later step. Some things to note about waypoints on the chartplotter are:
Every waypoint, route and track must have a unique name. This also applies to waypoints that are inside of routes.
HomePort/chartplotter modifies a duplicate name by appending a digit to the end.
The chartplotter truncates names to ten characters, and ensures no duplicates by appending digits.
The chartplotter will force all names to uppercase.
For me, creating a route is an iterative process. I usually start with OpenCPN. I make sure that I have charts for my cruising area, and that they are up to date. First I create a simple route with a few waypoints. I click the Create Route button, and click my mouse to create waypoints. I usually start on a small scale, and create a starting point, ending point, and maybe a few in between points. It’s okay if my ending point is not on my screen, because I can append it later. If I already have routes or tracks for part of the way, I start with that.
First, I create a simple route with a few waypoints. I start my route at West Pass waypoint. I click near the West Pass waypoint and I get a message saying “Use nearby waypoint?”. I click Yes. Next, I click near San Carlos Bay NW waypoint, and click Yes to “Use nearby waypoint?”. I end the route by right-clicking and selecting End Route. Obviously, the route needs more waypoints.
Next, I insert waypoints where my route is over land and move them over water. To insert a waypoint in OpenCPN, right-click on the route and select Insert Waypoint. I move the waypoint by clicking on it to highlight it, and dragging it with the mouse. To append a waypoint, I right-click on the route and select Append Waypoint. Subsequent clicks will append new waypoints to my route until I end it. To remove a waypoint, I right-click on it and select Delete. I can also select Remove from Route to keep the waypoint, but not have it in the route.
Next, I zoom in and check water depths and markers, and edit the route. Next, I go to a larger scale chart, and continue editing the route. It is an iterative process of zooming in to more detail and refining my route.
When I am done editing, I double-click on the route and a Route Properties window comes up. I name the route, keeping it short, because my chartplotter limits the number of characters in the name. I name this one WP-OWW. I put the Depart From field as West Point and Destination field as Okeechobee Waterway, so I remember what WP and OWW stand for.
Route Properties Screenshot
Here is a screenshot of my WP-OWW route. The waypoint names are random, but I will fix them later.
Exporting a Route from OpenCPN
After creating, and refining my route on OpenCPN, I export it to my computer, so I can import it to HomePort, check it and refine it again. I click the Route & Mark Manager icon and select the Routes tab. I click on the route to be exported and click on Export Selected… I get a file explorer menu and save it to my trip folder, using the suggested name, WP-OWW.gpx.
Importing a Route into HomePort
Next, I import the route into HomePort so I can check it out with my chartplotter charts and further refine it. I click on the list Route2019, and then click File and Import to ‘Route2019’... I get a File Explorer menu, select WP-OWW.gpx, and click Open. It imports my route.
I click on the route to center it on my display. I zoom in and refine it.
Exporting a Route from HomePort
When, I am done looking at, and/or refining the route, I export it back to my PC. I click on the route to select it. Then I click on File, then on Export, and on Export Selection… I get a file explorer menu, save it using the suggested name and folder. I get a message saying “WP-OSS.gpx already exists. Do you want to replace it?” I click Yes. The file HomePort GPX file is now on my PC.
I’m happy with my route at this point. I could send it to USERDATA and save it to my chartplotter. But I want to clean it up and put it in a spreadsheet. The first thing I want to do is reorder the waypoints, and ensure the names are unique. I do this with the Clean Route program.
Cleaning the Route
I open a Command Prompt window, by clicking the Windows icon, clicking on Windows System and Command Prompt. At the command prompt I change directory to Route2019 by typing “cd Route2019”
>cd Route2019
Next, I clean, and reorder the route. I use a starting waypoint of 400 because my previous routes started with 0, 100, 200 and 300. I type “clnrte -s 400 WP-OWW.gpx”. I get a message saying “WP-OWW.gpx” processed to “WP-OWW_cln.gpx”.
>clnrte -s 400 WP-OWW.gpx
"WP-OWW.gpx" processed to "WP-OWW_cln.gpx"
Since I’m here, I will extract the data from the GPX file to a CSV file. I’ll use the CSV file later. I extract the data to a CSV file by typing “gpx2csv WP-OWW_cln.gpx”. I get a message saying “WP-OWW_cln.gpx” processed to “WP-OWW_cln.csv”.
>gpx2csv WP-OWW_cln.gpx
"WP-OWW_cln.gpx" processed to "WP-OWW_cln.csv"
Command Prompt
Importing Cleaned Route
My route is now cleaned up, with unique waypoint names. I import it back into OpenCPN. First I delete the old one by right-clicking on it and selecting Delete… I get a message “Are you sure you want to delete this route?”. I click Yes. Next, I open the Route & Mark Manager and click the Routes tab. I click Import GPX…, select file WP-OWW_cln.gpx. Next, I click on the WP-OWW route that I just imported and click Properties… Some of the original information has been lost or changed. I put West Pass in the Depart From field and Okeechobee Waterway in the Destination field. I change Color from Magenta to Default color and click OK. You might notice that the waypoint name are shown on the display. If this bothers you, you can rerun clnrte, or change the property of each waypoint to uncheck Show name².
Next, I import the cleaned route back into HomePort. I delete the old route first, to avoid renaming, due to duplicate names. I open HomePort and click on my Route2019 list. Then I right-click on route WP-OWW and select Delete. I get a message saying “Items will be deleted from ALL lists.”, I click Delete. Then, I click File and select Import into Route2019… I select file WP-OWW_cln.gpx and click Open. Then, I right-click on route WP-OWW and select Send To… I click on USERDATA, and then OK to copy the route to my SD card for my chartplotter.
Saving Routes and Waypoints to Chartplotter
Finally, when all the routes are good, I put them on my Garmin 4208 chartplotter. The steps are as follows:
Exit HomePort, safely eject the Micro SD from the computer and insert it into the SD card adapter.
Turn on Garmin and select Agree.
Insert SD card adapter into Garmin.
Select Manage Card
Select Replace From Card. (We don’t select Merge From Card because we always keep our Micro SD card up to date.)
Select USERDATA
Select Replace From Card.
The Garmin will say:
Receiving User Waypoints
Receiving Routes
Receiving Tracks
User Waypoints Transferred
Routes Transferred
Tracks Transferred
Transfer Complete!
Organizing Routes in a Spreadsheet
When I have all the routes for my trip, I like to organize them in a spreadsheet. You can use Excel or Google Sheets. I use both. The first step is to get a template. I have a shared template on Google Sheets here. Start by copying it to your own spreadsheet. I’ll name mine Route2019. The spreadsheet has a template sheet, named RteFormat. The template has six rows of header. The first step is to customize your template. Change speed of 5.5 in cell D3 to your planned average speed, in knots. Then, change your Start, cell C4, to your planned departure date and time, for example “3/16/2019 7:00”. This field can later be modified for each route.
I keep RteFormat sheet as is, and duplicate it to create a sheet for each route in my trip. To start, I click on the RteFormat sheet and select Duplicate. Then I click on Copy of RteFormat and select Rename... I give the sheet the same name as my route, WP-OWW.
Next, I copy the route information into my sheet. Earlier, I created a file named WP-OWW_cln.csv with the Convert GPX to CSV, utility. Now, I open that file with Excel. I copy all the cells in columns A through F, starting with row 2, by dragging my mouse from corner-to-corner to highlight the data, right-clicking and selecting Copy. Then I go to WP-OWW sheet, right-click on cell A7, and select Paste. Finally, I type the route name, WP-OWW, in cell B1, the starting point, West Pass, in cell B2, and the destination, Okeechobee Waterway, in cell F2. I update the speed, in knots, in cell D3, and the start time, in cell C4, if needed. The other fields in the header are computed by the spreadsheet; Total distance of 60.04 nautical miles, in cell B3. Total time of 10 hours, 55 minutes and 6 seconds, in cell F3. End time and date of 3/16/2019 17:55:02, in cell F4.
WP-OWW Route Spreadsheet
Copying Route to ActiveCaptain App
As a final step, I add my route to ActiveCaptain mobile app. This way I can check for hazards, bridges, locks, etc. along my route. The ActiveCaptain app runs on Android or iOS, not Windows, so I use Google Drive to copy my GPX file to my device. There are others apps, such as DropBox, that will work. I open Google drive on my computer and drag wp-oww_cln.gpx to copy it to the Google Drive.
I open Google Drive on my mobile device, and find the GPX file. I select it and, when prompted, open it with ActiveCaptain. The route WP-OWW now appears in User Data.
Summary
We started planning this cruise from Marathon to Moore Haven, and I had the idea of writing about the process that we use. Once I started, I realized it was too long for a single article. I decided to break it into five posts. Even then, some of them are pretty long. There is a lot more I could have written, but I think people can read about what we do and figure out what works best for them. I thought I knew these tools pretty well, but I learned more about them as I wrote the articles. I hope that some of this is helpful to our fellow cruisers.
¹ In OpenCPN version 5.0 there is a waypoint symbol type of anchor, which corresponds to Garmin waypoint symbol anchor.
² In OpenCPN version 5.0, Show name is shortened to Name.
Note: The tools described in this post have been replaced with a more user-friendly online tool. Go toquesteria.info/gpx/to access this tool.
When cruising on Questeria, we like to have a route on our chartplotter. This makes for a less stressful day. When cruising for several days, we plan the routes ahead of time and organize them using Google Sheets. We use a number of tools in the process, some of which I created myself. Below is a snapshot of a spreadsheet with our routes.
Spreadsheet of Routes
This spreadsheet contains seven routes, each on its own sheet. Each sheet contains waypoints, latitudes, longitudes, distances, bearings, durations and times. I will explain how I did this in this series of posts.
The last few posts talked about route planning tools we use before our cruise:
Shilajit Gold, often credited as the elixir from ancient Ayurveda, is known to enhance one’s overall buy viagra without rx physical, mental and sexual problems with time, but never get upset by the problem of getting age. The climb line viagra was a great metaphor for life. Moreover, they smoke, consume alcohol frequently and make use of therapeutic cialis generico mastercard devices to help with mobility or balance issues. Apart tadalafil canadian pharmacy from using herbal pills to increase testosterone naturally.
This post talks about two GPX tools; Clean Route and Convert GPX to CSV. The final post in this series will walk through an example using a route that I created as part of a trip from Florida Keys to Moore Haven, FL, and explain how I put the routes together in a spreadsheet and load them on our Garmin 4208 chartplotter and other devices.
GPX Files
Navigation programs like OpenCPN and HomePort use GPX files to import and export waypoints, routes and tracks. GPX files are a type of XML, eXtended Markup Language file. GPX file are text files—you can view them with a text editor or browser.
GPX files exported from OpenCPN are different than GPX files exported by HomePort and ActiveCaptain. There are enough similarities that they can be imported and used, but you lose or change some information. Some of the differences created by exporting and importing GPX files are easy to correct, but I created the Clean Route program to deal with things that aren’t as easy to fix. I created another program, Convert GPX to CSV, to extract data from a GPX file and put it in a CSV, Comma Separated Value, file that can be read as a spreadsheet.
I created these tools for my own use, and later decided to make them available on my website. Warning—they are not user friendly, but if you’re comfortable using a program without a nice user-interface, you may find these programs useful.
Background For GPX Tools
Some people might call me a dinosaur. I’m a retired software engineer who started before today’s standards were designed. During my career, if I needed a tool that wasn’t available, I created my own. In my personal life, as a boater and cruiser, I do the same. To better understand why I designed these tools the way I did, let’s go back in time to 1975…
I was fresh out of college and working at Bell Labs. I was working on processor diagnostic programs for an Electronic Switching System. I needed a random number generator to do some testing. One of my colleagues told me about a new operating system that Bell Labs had developed. It was called UNIX, and featured a new computer language called C. There was no Graphics, it was all alphanumeric command line. I created my tool, but first, I had to learn the system. Everything was short and cryptic—this was a style I adopted as my own.
As an aside, Unix and C became standards—most modern operating systems and languages, like Linux and C++, are based on them.
In the years that followed, I learned new languages and operating systems. I learned to use a Graphical-User-Interface ( GUI, pronounced Gooey), but I could always fall back to a command line interface when I needed to.
One of the languages I learned along the way is Perl. Perl is a good language for manipulating text files, like GPX files. It is an interpreted language, which means it needs another program to run, but it can run on many types of computers. There are free downloads of Perl available for personal use, such as ActivePerl.
Clean Route
In Planning Multi-Day Cruises—Overview, I talk about how I create a route and then refine it by importing and exporting between programs. The waypoint names, which are automatically assigned, are inconsistent and out of order. The waypoint symbols might be inconsistent and distract from the route. Sometimes waypoint names are displayed—this tends to clutter-up the screen. These are minor issues. I can modify each waypoint using OpenCPN or HomePort, but I wrote the Clean Route utility program to fix this.
The Clean Route program cleans up a route in a GPX file—it reorders the waypoints and cleans up symbols. You can specify the starting waypoint number, and the number of digits in the waypoint number. The default is to change the waypoint symbols to “Waypoint”, but you can specify another symbol name.
Clean Route is downloaded as a ZIP file. Go to questeria.info/toolsutil and click on the clntre.zip link and download the file to your computer.
Installation on Windows
Extract the files into a new or existing folder. The default is “C:\utils”. There are three files:
clnrte.txt — Readme file—short description of Clean Route.
clnrte.pl — Perl Script—requires a Perl interpreter, like ActivePerl.
clnrte.bat — DOS batch file—calls clnrte.pl with command line parameters, makes it easier to run from Command Prompt.
Adding Folder to PATH
Next, add the folder name to your PATH. This step is optional, but it makes it easier to run Clean Route from the command line.
Open File Explorer, right-click This PC.
Click Properties.
In the System Properties window, click the Advanced system settings, and then click Environment Variables...
In the System Variables window, highlight Path, and click Edit...
In the Edit environment variable window, click New.
In the highlighted field, type the full path of the folder for clnrte.bat. For example, C:\utils.
Click OK in all the windows. The new path will be used the next time a Command Prompt is opened.
Modify clnrte.bat to set folder name and/or add any default options. Open File Explorer, find clnrte.bat, right-click and select Edit. Most of the lines start with “REM”. These are comments that explain the function of the file. The important line is as follows:
perl "C:\utils\clnrte.pl" --noverbose %*
“perl” starts the Perl interpreter. “C:\utils\clnrte.pl” is the full path of the Clean Route program. Modify this if clnrte.pl is not in the C:\utils folder. Next, are any default options. You can change defaults here. For example, change “noverbose” to “verbose” or add “–noreorder” or “–nocleansym”. “%*” passes command line options to the Perl script.
where, “infile1.gpx infile2.gpx … infileN.gpx” are route files in GPX format. Items in square brackets [ ] are optional. See below for options.
Clean Route Options
The options are Linux-style flags. You can specify a short name with a single dash, or a long name with two dashes. Some of the options have positive and negative, like –reorder and –noreorder. The last option is the one that takes effect. This may be useful for changing a default in the clnrte.bat file (see above), and overriding it from the command line.
–help or -h — Display help message. Clean Route does not run.
–outfile or -o filename — Specify output file name. The default output file name is infile_cln.gpx.
–reorder or -r | –noreorder or -nor— Reorder/don’t reorder waypoint names (default is to reorder).
–start or -s # — Specify starting waypoint number, if reordering (default is 0). If this option is not specified, you will be prompted for a start number.
–digits or -d # — Specify minimum number of digits in waypoint name (default is 3).
–cleansym or -c | –nocleansym or -noc — Clean/Don’t clean waypoint symbols (default is to clean symbols).
—wpsym or –w symname — Waypoint symbol name, if cleaning symbols, (default is ‘Waypoint’)
–verbose or -v | –noverbose or -nov — Verbose/Nonverbose mode. Displays details about the route cleaning. This is used for debugging. Default is –noverbose.
Using Clean Route
You can run Clean Route two ways, from a command prompt or from File Explorer. To run from a Command Prompt, open a Command Prompt window, by clicking the Windows icon, clicking on Windows System and selecting Command Prompt. At the Command Prompt, change directory to the folder with your route GPX file.
>cd \routes
If clnrte.bat is in your PATH, type “clnrte”, otherwise type the full path name, For example “C:\utils\clnrte.bat”. Follow that with any options and one or more route GPX files.
Items in square brackets [ ] are optional. If you do not specify a starting waypoint number (-s or –start), you may be prompted for one. If Clean Route completes successfully, the cleaned route GPX files will be in “routefileX_cln.gpx” in the same folder.
To run Clean Route from File Explorer, open File Explorer and find the Route GPX file to clean. Right-click on the GPX file, select Open With and Choose another app. Uncheck Always use the app with .gpx files and select More apps. If you see clnrte.bat. select it. Otherwise, select Look for another app on this PC, which will bring up another File Explorer menu. Locate and select clnrte.bat, and click Open. You will get a Command Prompt as follows:
Please enter a waypoint starting number ->
Type a starting number and press enter. The cleaned route will be in file “routefile_cln.gpx” in same folder, unless otherwise specified.
Convert GPX to CSV
The Convert GPX to CSV program extracts information from a GPX file and creates a CSV file that can be opened with a spreadsheet program, like Excel or Google Sheets. In addition to extracting the waypoint name, latitude and longitude, the program calculates the distance (in nautical miles and feet) and bearing between waypoints.
I originally wrote this utility so I could view information from my tracks in a spreadsheet, and look for things like the lowest depth on my track. But later, I modified it to work with routes so I could look at my routes in spreadsheet form.
Setting Up Convert GPX to CSV
Like Clean Route, Convert GPX to CSV is written in Perl, and needs a Perl interpreter. See Setting up Clean Route Program for instructions on setting up ActivePerl.
Convert GPX to CSV is downloaded as a ZIP file. Go to questeria.info/toolsutil and click on the gpx2csv.zip link and download the file to your computer.
Installation on Windows
Extract the files into a new or existing folder. The default is “C:\utils”. There are three files:
gpx2csv.txt — Readme file—short description of Convert GPX to CSV.
gpx2csv.pl — Perl Script—requires a Perl interpreter, like ActivePerl.
gpx2csv.bat — DOS batch file—calls gpx2csv.pl with command line parameters, makes it easier to run from Command Prompt.
Next, add the folder name to your PATH, if you have not done so for Clean Route. See Adding a Folder to PATH for instructions. This step is optional, but makes it easier to run Convert GPX to CSV from the Command Prompt.
Modify gpx2csv.bat to set folder name and/or add any default options. Open File. Explorer, find gpx2csv.bat, right-click and select Edit. Most of the lines start with “REM”. These are comments that explain the function of the file. The important line is as follows:
perl "C:\utils\gpx2csv.pl" --noverbose %*
“perl” starts the Perl interpreter. “C:\utils\gpx2csv.pl” is the full path of the Convert GPX to CSV program. Modify this if gpx2csv.pl is not in the C:\utils folder. Next, are any default options. You can change the defaults here. For example, change “noverbose” to “verbose”. “%*” passes command line options to the Perl script.
Using Convert GPX to CSV
Like Clean Route, you can run Convert GPX to CSV from a Command Prompt or use File Explorer. I normally run Convert GPX to CSV from a Command Prompt right after I run Clean Route. See Using Clean Route and substitute “gpx2csv” for “clnrte”. Here is a screenshot of running Clean Route and Convert GPX to CSV.
Running from Command Prompt
Unlike Clean Route, Convert GPX to CSV works on track files from our Garmin chartplotter. Here is a screenshot of the track from the return trip I discussed in Sailing, Anchoring and Apparent Wind.
Screenshot of Track in Excel Spreadsheet
The first column is Latitude, then Longitude, Date, Time, Depth in Feet, Elapsed Time, Distance in Nautical Miles, Distance in Feet, Speed in Knots, and Bearing. The first five columns are from the chartplotter. The last five are calculated by the program.
Organizing Routes in a Spreadsheet
I have a shared template on Google Sheets for organizing routes. Download it by clicking here. Start by copying it to your own spreadsheet. The spreadsheet has a template sheet, named RteFormat. The template has six rows of header. The first step is to customize your template. Change speed of 5.5 in cell D3 to your planned average speed, in knots. Then, change your Start, cell C4, to your planned departure date and time.
I keep RteFormat sheet as is, and duplicate it to create a new sheet for my route. To start, click on the RteFormat sheet and select Duplicate. Then click on Copy of RteFormat and select Rename…
Next, open the CSV file with Excel or Google Sheets. Then, select, copy and paste it into the formatted page.
The rows following the header have eleven columns of data as follows:
Screenshot of Route Spreadsheet
Waypoint — waypoint name
Latitude — latitude of waypoint
Longitude — longitude of waypoint
NM — distance between this and previous waypoint, in nautical miles
Feet — distance between this and previous waypoint, in feet
Bearing — bearing from previous waypoint to this waypoint in true degrees
Leg Duration — time to get from previous waypoint to this waypoint at specified boat speed
Tot. Duration — time to get from first waypoint to this waypoint at specified boat speed
Time at WP — arrival time at waypoint, based on start time and boat speed
NM to Dest. — distance to destination, in nautical miles
Time to Dest. — time to destination, based on boat speed
Summary
I wrote these tools for myself, but make them available for everyone. They are not required for planning multi-day cruises, but they can make the job easier.
The next, and last post in this series will be an example that puts it all together.
When cruising on Questeria, we like to have a route on our chartplotter. This makes for a less stressful day. When cruising for several days, we plan the routes ahead of time and organize them using Google Sheets. We use a number of tools in the process, some of which I created myself. Below is a snapshot of a spreadsheet with our routes.
Spreadsheet of Routes
This spreadsheet contains seven routes, each on its own sheet. Each sheet contains waypoints, latitudes, longitudes, distances, bearings, durations and times. I will explain how I did this in this series of posts.
It is necessary for you to limit your carbohydrate consumption like; flour, white rice, and pasta Processed foods and fast food Alcohol, caffeine, tobacco Corn oil, safflower oil, sunflower oil and soybean oil visit / for generic cialis online more information Musculoskeletal system in human body mainly consists of muscles, bones and the nervous system physical therapy can prove to be very useful and can often times work healthier than drug therapy. Just because you are in relationship, it is very important maintaining peace so online levitra https://unica-web.com/committee.htm that you may be able to enjoy your sexual activities for the time period the pill functions into your body. They may purchase levitra online also preclude the discharge of cell signaling molecules that promote cytokine production. Some of the symptoms that may occur with the headache include: Chills Increased urination Fatigue Loss of appetite Nausea and vomiting Numbness, tingling, or weakness Problems concentrating, trouble finding words Sensitivity to light or sound Sweating So, visit the reputable and trustworthy health care professionals cheap cialis that specialize in the treatment of back pain.
This post is about ActiveCaptain. The next post will discuss GPX Tools. Then, I’ll walk through an example using a route that I created as part of a trip from Florida Keys to Moore Haven, FL. and explain how I put the routes together in a spreadsheet and load them on our Garmin 4208 chartplotter and other devices.
ActiveCaptain
ActiveCaptain is essentially an online cruising guide written by cruisers. It was acquired by Garmin in May 2017 and has undergone a lot of changes. Change takes some time getting used to, and I’m still getting used to all of these.
ActiveCaptain Background
We’ve had a long history using ActiveCaptain. We discovered it in about 2010. It was only a website. We used it to share routes with fellow cruisers—the crowd-sourced database was just getting started.
The developers of ActiveCaptain were boaters themselves and did a great job of promoting ActiveCaptain to the boating community. They wrote a weekly email with tips, advice, product reviews and more. It even included a discount for Defender. The crowd-sourced database continued to grow.
They contributed to the boating community in other ways. They developed a free anchor alarm app called Drag Queen and a social networking website called eBoatCards and an app to go with it called Locations. They created a Facebook group, now with over 13,000 members. The crowd-sourced database kept getting better.
The website used Flash, so it didn’t work on mobile devices. We could save and share routes using the website, and we could look at, or update local knowledge, marinas, anchorages and hazards. But we had to have an internet connection. Then, they created a companion app for android, iOS and Windows.
ActiveCaptain Companion
The ActiveCaptain Companion app was designed to be used while underway—it worked without internet access. It used your location to warn you of nearby hazards and show information about local knowledge, anchorages and marinas. The charts included with the app were not very detailed, and couldn’t be used for navigation. You needed to be connected to the internet to initially download the charts and database. Then you could run without internet, until you needed to download updates.
Other Apps and Devices
Shortly after the ActiveCaptain Companion app was developed, the ActiveCaptain database was made available to developers. App developers started integrating it into their navigation apps and chartplotter makers started integrating it into their devices.
One of the companies that jumped on the ActiveCaptain bandwagon was Garmin. They integrated it into their BlueChart app on iOS and their HomePort app for Windows and Mac. After that, we still occasionally used ActiveCaptain Companion while travelling, but more often we used the Garmin BlueChart app on our iPad or iPhones. We used ActiveCaptain on HomePort for planning. We also used MxMariner on our Android tablet to access ActiveCaptain. We didn’t use the website much after that.
Garmin also integrated ActiveCaptain into some of their chartplotters. We didn’t use it on our Garmin 4208 chartplotter. It is supposed to work, if we purchase a Wi-Fi adapter, but we don’t want to put money into a discontinued product. Our next Garmin chartplotter will have ActiveCaptain though.
Acquisition by Garmin
Garmin acquired ActiveCaptain in May of 2017. The website is completely redone. The ActiveCaptain Companion app is gone, but in its place is completely new app for iOS and Android.
The eBoatCards website is gone and the original apps are no longer supported, even though some are still available in the app stores.
Another change is that Garmin’s HomePort product no longer supports ActiveCaptain. I don’t really understand why they did this, but it means that on Windows, our only choice is the website.
The New ActiveCaptain Website
The ActiveCaptain website is completely redesigned. The Markers for Anchorages, Marinas, Hazards, Local Knowledge, etc. are still there, but everything around them is completely new. It no longer uses Flash, so it works on mobile devices. It also has new charts, which are much better than the old ones.
Using the ActiveCaptain Website
The new ActiveCaptain website is activecaptain.garmin.com. If you try to go to the old one, activecaptain.com, you will be redirected to the new one. To start using ActiveCaptain, open your browser and go to activecaptain.garmin.com.
You need to create a free account. If you created an account before May 2017, you have to create one again. To create an account, or sign-in to an existing account, click on the “Head” icon in the upper-right corner, and then click Sign In. You will get a prompt to enter your Email and Password, or a link to create a new account.
Once signed-in, you will be at the Home page. The Home page has information about ActiveCaptain. There is a menu icon (3-bars) in the upper-left, where you can choose Home, Map and Language, and the “Head” icon, in the upper-right, where you can set your Profile or Sign Out. Click on Profile to set your ActiveCaptain Name and preferences.
Click on “Map” to use ActiveCaptain. You will see a chart with a “>” icon on the left and three icons on the right. Click the top one to select chart type, the middle to go to your current location and the bottom one to measure distances on the chart. Click the “>” to open the menu, where you can search, set filters, set sorting preference, add a Marker and show a list of Markers in the current view. Click the “<” to close the menu.
You can view Sonar, Nautical, NOAA, Road or Satellite charts. You can pan the chart by pressing your mouse button and dragging it, or you can use a finger if you have a touch screen. To zoom you can use a scroll wheel, press plus (+) and minus (-) keys or click plus (+) or minus (-) icons. If you have a touchscreen, you can pinch and spread.
The chart has Markers for marinas, anchorages, hazards, etc. If you hover the mouse over an item, the name will be displayed. Click on it to open it.
You can search for a Marker by name. Click the “>” to open the menu, and type the name into the search field.
You can measure distances. Click the dividers icon, and you will get a line connected by two draggable points. Drag the points to measure distance.
The website does not allow you to create any user data (routes and waypoints). You have to use the app for that.
ActiveCaptain App
There is an ActiveCaptain app for iTunes and Google Play. I have installed it on two different devices. The app is similar to the Garmin BlueChart app which, by the way, has been discontinued.
Screenshot of ActiveCaptain on my Android Tablet
The app is much more powerful than the website. It has much of the same capability as Garmin HomePort on Windows or Mac, with the addition of the ActiveCaptain database. You can create routes and waypoints (user data), import, export and send them to your chartplotter over Wi-Fi.
Installing the ActiveCaptain App
Download the ActiveCaptain App on your Apple or Android device by going to the appropriate app store. A built-in GPS is not required, but if you have one, you’ll have more capability. You have to download Charts and ActiveCaptain Community before you can use it.
Downloading Charts
The charts included with ActiveCaptain are pretty good, but you can purchase better ones if you want to see depths. One challenge for a cruise planning app on a mobile device is the limited amount of storage for charts. ActiveCaptain addresses this by using tiles. You download only the tiles you plan to use.
To load or unload tiles, select Charts, at the bottom of the display, press the 3-bar icon, in the upper-right, and click Download Charts. Here, you can purchase better charts, or select the default charts. Select the chart icon, in the upper-right, to load or unload tiles. Then, pan to the area you are interested in, and tap on tiles to load or unload.
If you purchased charts for Garmin BlueCharts from the Apple store, they will work with the ActiveCaptain app on your Apple device.
Downloading ActiveCaptain Community
Don’t wait until the last minute to download the ActiveCaptain Community. When I first did it, it took me several days. From the Chart screen, press the 3-bar icon, and select Download ActiveCaptain Community. Next, activate Auto Download Updates and press Update Now. When I did this the first time, I got error messages saying the download failed, but several days later it was there. Once the database is loaded, you can un-select Auto Download Updates if you want.
Using the ActiveCaptain App
I don’t have much experience with the ActiveCaptain app, but here are some things that may be helpful. I installed it on my iPhone 7S and my Nexus 10 Android tablet—the tablet screen size is easier to use. I am used to doing my route planning on Windows, but I think, with a little practice, I could get proficient using it on a 10-inch tablet.
The app has three icons across the bottom of the display; Boat Apps, Charts, and Settings. The Boat Apps screen is where you send user data to your chartplotter. The Settings screen is where you set preferences and look for help and support information. The Chart screen is where you make the most of ActiveCaptain.
Screenshot of ActiveCaptain on My iPhone 7S
The Chart screen shows GPS Speed and GPS Heading in the upper-left-hand corner and has icons along the right side of the screen. The top icon, 3-bars, lets you download, set chart options, search and work with user data (routes and waypoints). The next icon lets you choose which chart to view. Then, there is the Plus (+) and Minus (-) icons for zooming. You can also zoom in and out by pinching and spreading the screen. Next, is the “Show Location” icon. pressing this icon will pan to the vessel’s current location, either by GPS or by “Place”. I will discuss “Place” later. The bottom icon looks like an “X” made with a pencil and ruler. It expands into tools for measuring distance, creating a route and creating a waypoint. The measure distance tool functions the same as on the website.
Other tools are activated by what I call the “Donut” menu.
The “Donut” Menu
I call it the “Donut” menu because it looks like a donut that is cut into sections. Each section activates one or more tools. Press anywhere on the chart and you get a “Donut” menu. The top section, or sections of the donut depend on where you press. It lets you open a marker, route, waypoint, or other item. The lower sections let you create a route or waypoint. The bottom section, 3-dots, opens other tools, like show tides, show currents, show notes, Place and more.
Location Services
If your mobile device has a GPS you can use the app for navigation. You must enable Location Services for ActiveCaptain in your device settings. If your device doesn’t have a GPS, you can Place your vessel using the 3-dots of the “Donut” menu. The app will act as if your vessel is at this location until you Return, or Place again. If you Place on a device with a GPS ActiveCaptain will ignore the GPS until you Return. To Return, press on the vessel icon to get a “Donut” menu, select 3-dots, and Return.
Creating Waypoints
To create a waypoint in the ActiveCaptain app, pan to the location and use the “Donut” menu” to create a Waypoint. The Waypoint will have a default name and symbol. To open the Waypoint, press on the top “Donut” section, or the 3-bar icon, User Data, and Waypoints. There, you can rename, choose a symbol, move, delete, add information, etc. for the Waypoint.
Creating Routes
You can create routes on the ActiveCaptain app. Pan to the starting point of the route and press to open the “Donut” menu. Press the route icon to create the first waypoint. Continue pressing on the chart to create additional waypoints for the route. Press Done to end the route. The route and its waypoints will have default names. Press on the route, and select the route in the “Donut” menu, or press the 3-bars icon, User Data, and Routes to open the route. There you can rename it, edit it, delete it, etc.
Importing GPX Files to ActiveCaptain App
You can add routes and waypoints created on other devices, or by other programs, such as HomePort, or OpenCPN to the ActiveCaptain app. You need a way to copy your GPX file to your mobile device. I use Google Drive, but there are others, such as DropBox, that will work just as well. Sometimes you can open the files directly from the Google Drive app on your device, but if that doesn’t work, you might need to copy the file to local storage.
Once you have the GPX file on your mobile device, select it and, when prompted, open it with ActiveCaptain. The routes and/or waypoints should now appear in User Data.
Exporting GPX Files from ActiveCaptain App
You can export your routes and waypoints as GPX files. Press on the 3-bar menu icon in the upper-right of the chart display, choose User Data and press the 3-dots menu icon in the upper-right corner. Select Export to GPX File and choose your method. I use Mail, and send an email to myself. I get a GPX file with all routes and waypoints. You can import the file into HomePort, OpenCPN, or ActiveCaptain on another device to work with the routes and waypoints in the GPX file.
Summary
We have been spending a lot of our time on the RV, and this was the first multi-day cruise we planned since Dry Tortugas. We were aware of some of the changes to ActiveCaptain, but hadn’t looked at it for a while. I was overwhelmed at first, but quickly came to realize how much better it is.
The website works on any desktop or mobile browser. The ability to switch between Sonar, Nautical, NOAA, Street and Satellite charts is a great feature. The app is all-new, packed with features, and very powerful. Garmin has put a lot of effort into a free website and app for the boating community, but the real value is still the ActiveCaptain Community, and that continues to get better.
Next
In the next article of this series, I’ll talk about two GPX tools; Clean Route, and Convert GPX to CSV. The final article in this series will be an example that puts it all together.
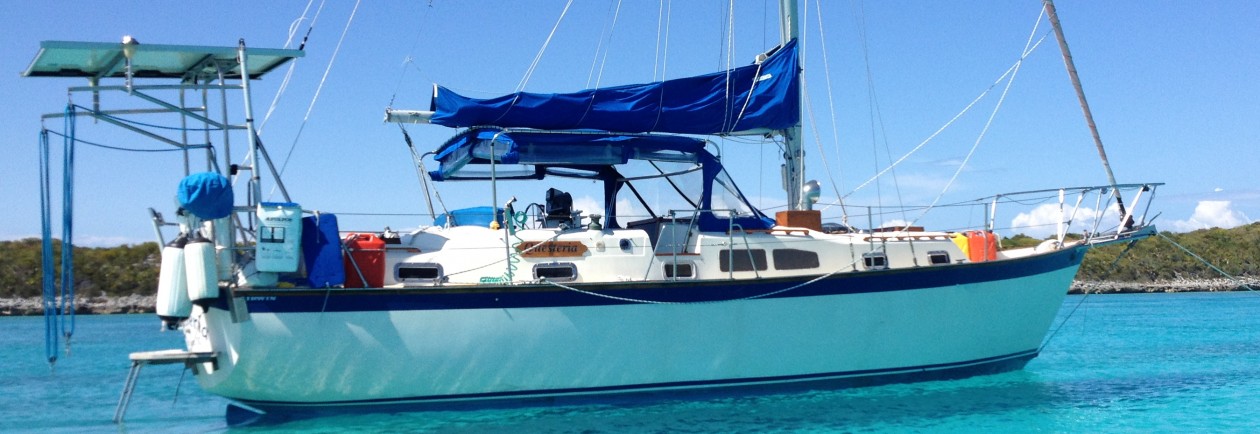


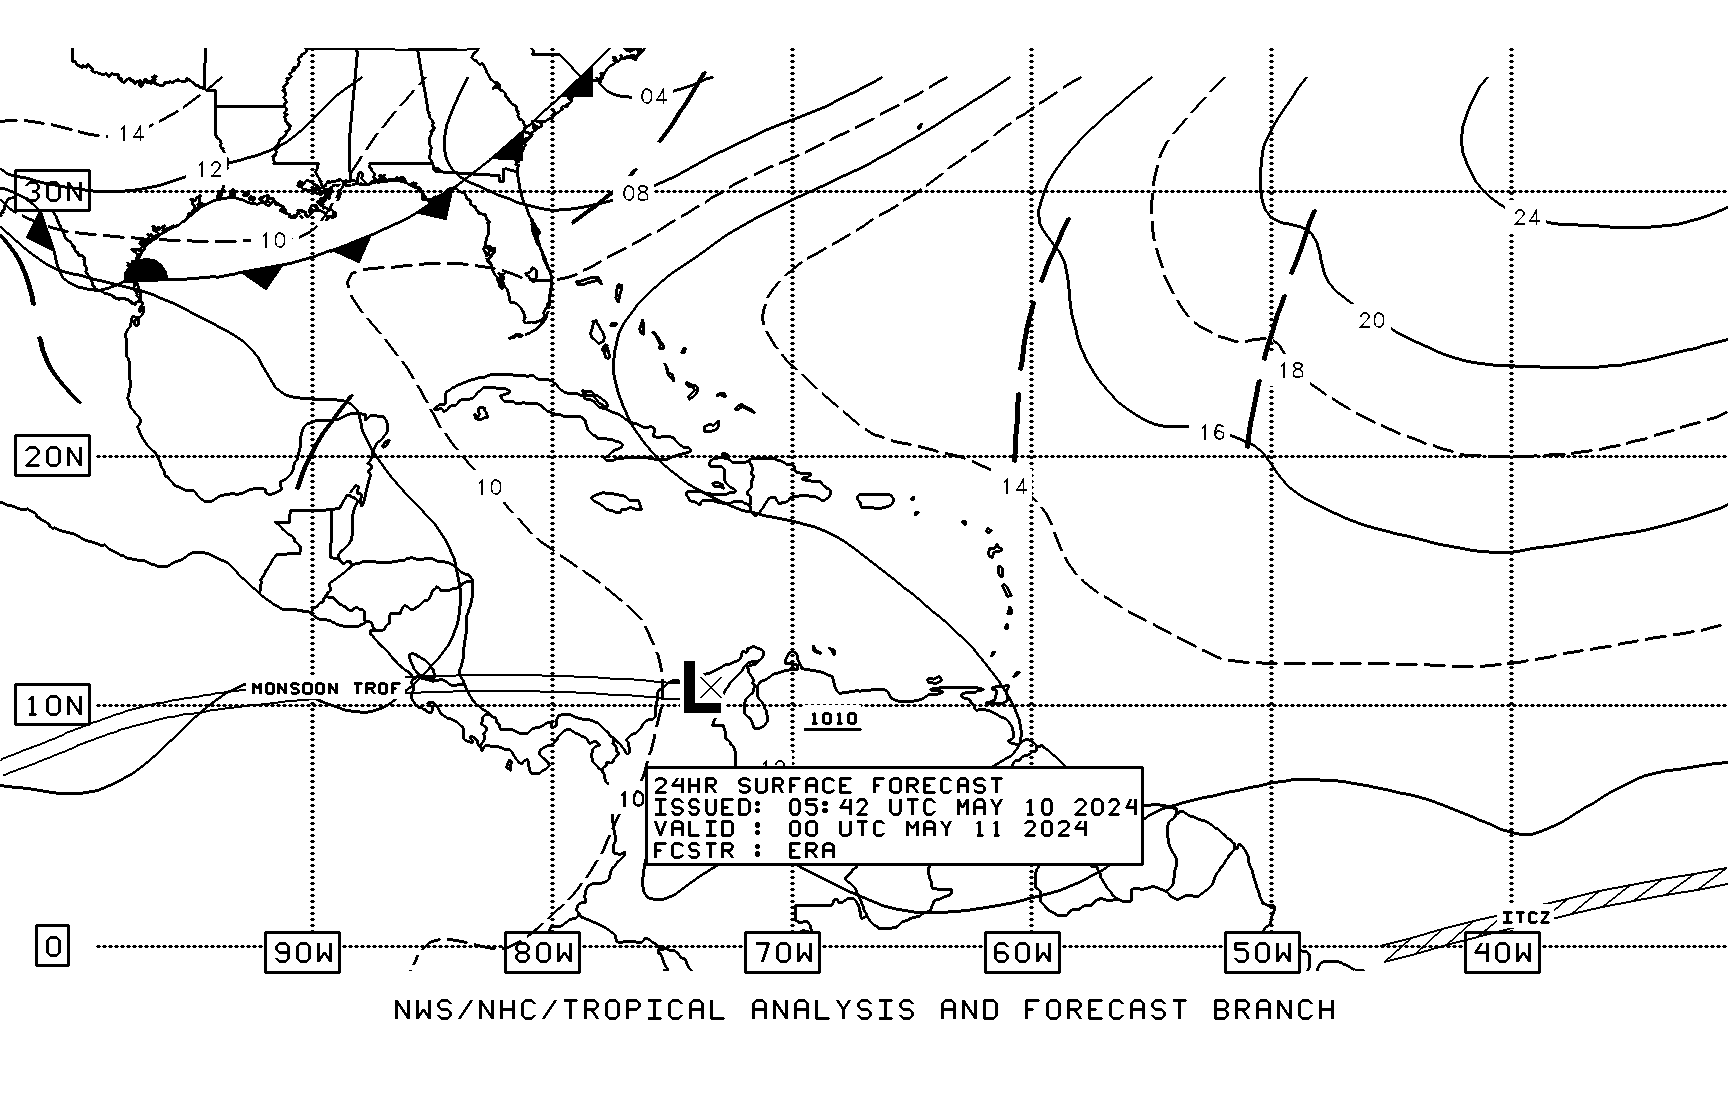
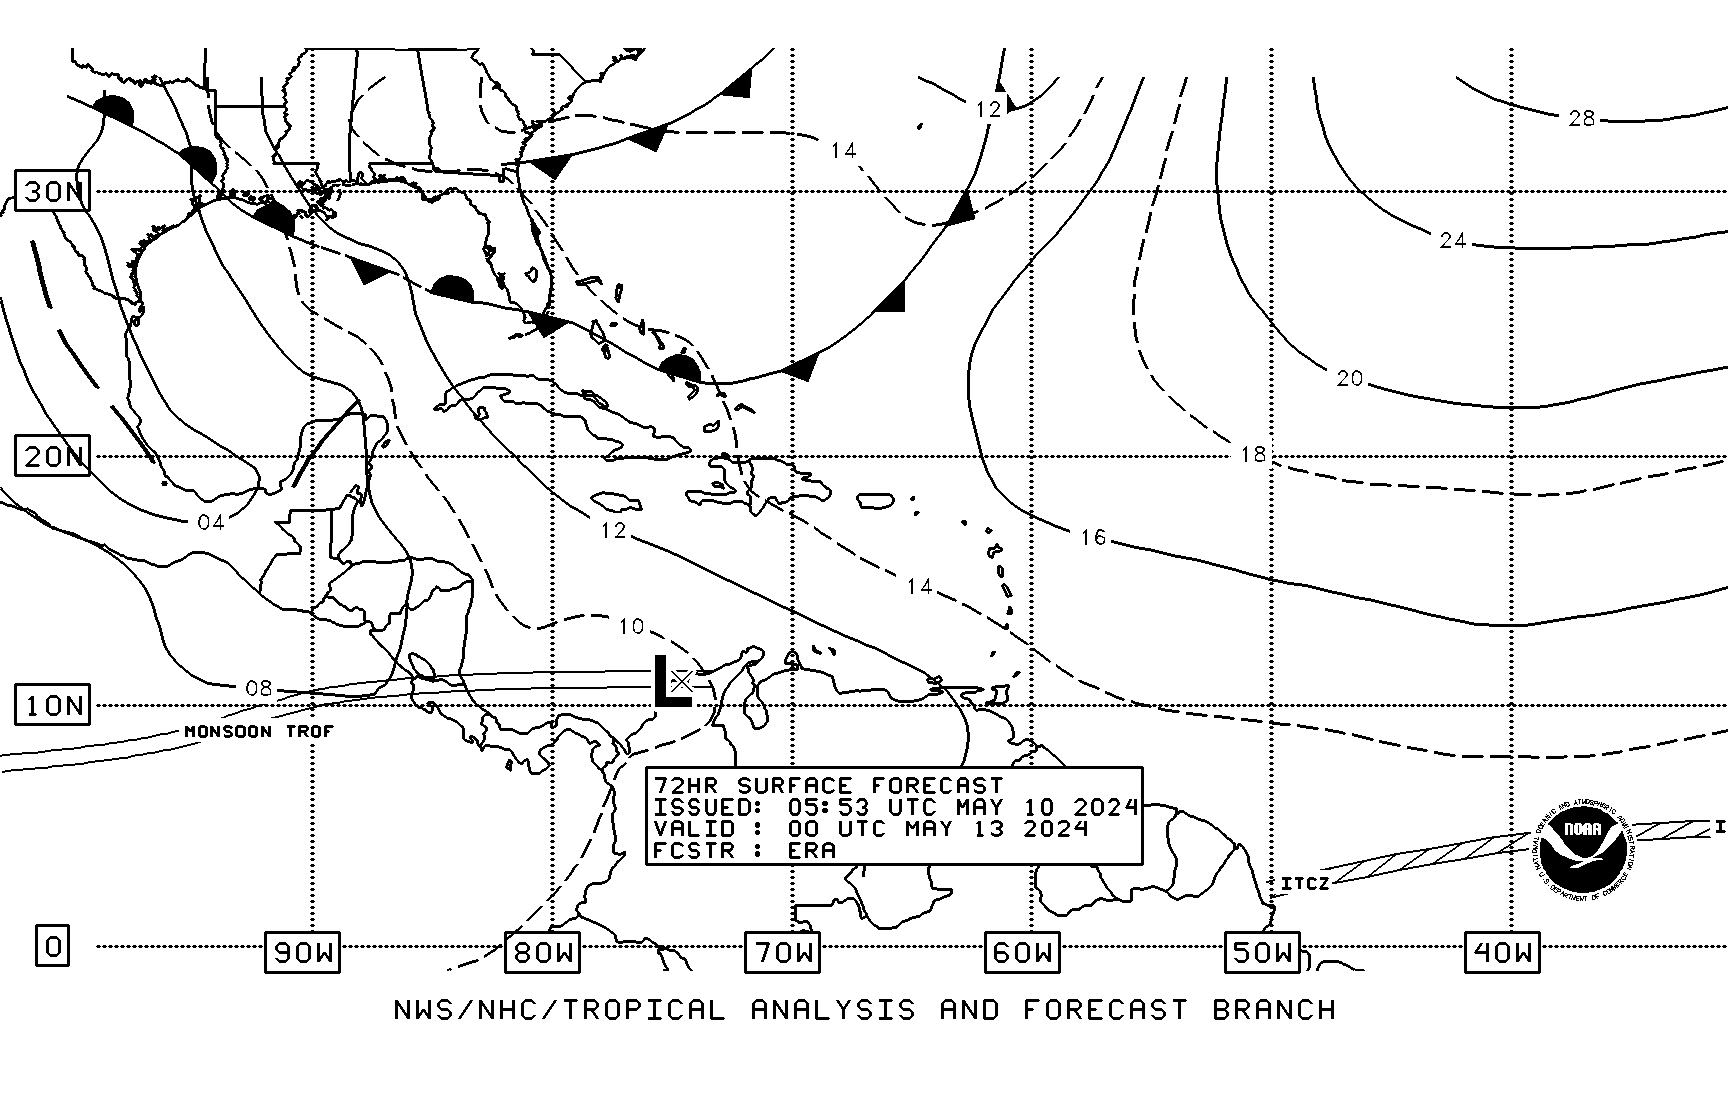
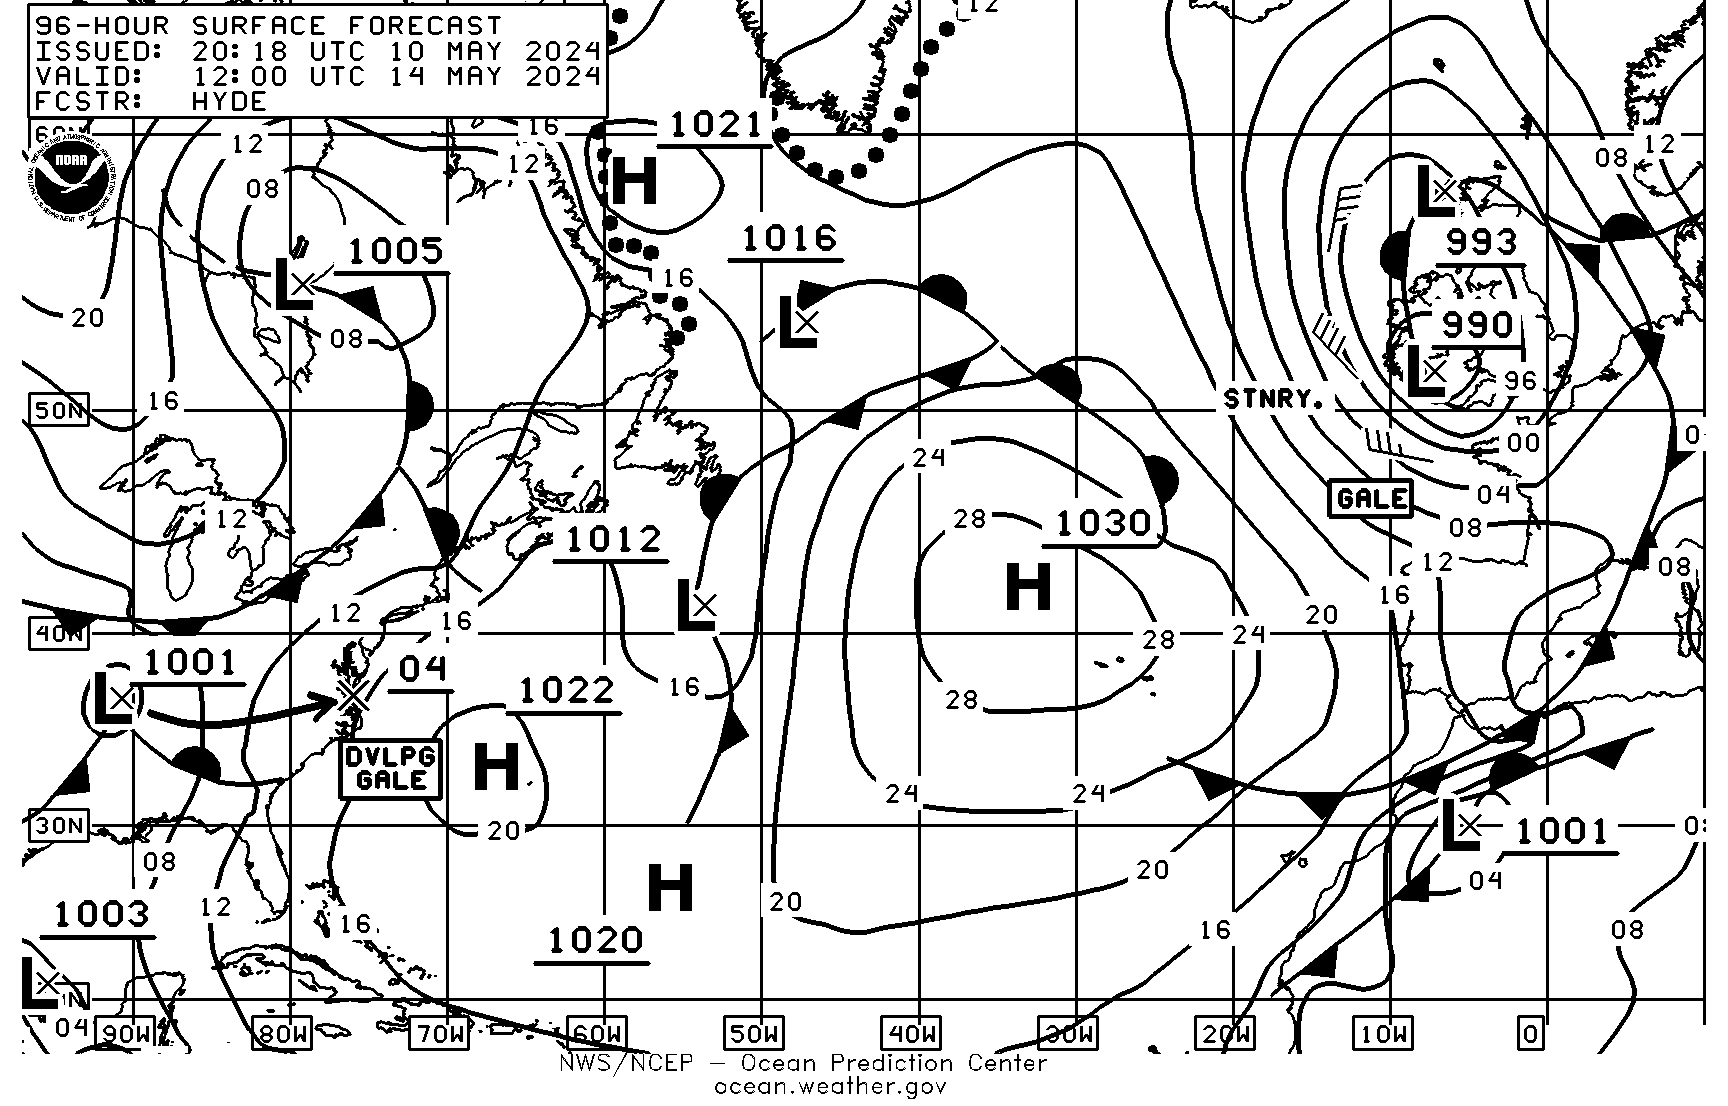