In this post, I talk about our trip through British Columbia and Yukon, Canada on days 57 to 65 of our Alaska RV trip.
British Columbia and Yukon
We cross the Canadian border with no problems. We are impressed with the beauty of British Columbia.
British Columbia
We get text messages on our Verizon phones and hotspot, saying that with our unlimited plan, calls, texts and cellular data are free, but we are limited to 0.5G of cellular data, per device, per day.
We drive to Gold Trail RV Park in Clinton, BC. The sites are $20 US or $25 CA. We only have US dollars at this point. The RV park is pretty tight, but we get a pull-through site. The owner has lots of jokes—he missed his calling as a comedian. I’m sure he tells the same jokes to everyone.
We walk around town, but it is early in the season and everything is closed. We don’t even see an ATM. They tell us next weekend is Victoria Day, and places will start to open. We go to the RV Park restaurant and order “Roadkill Ribs”. They are good.
The owner tells us about Barkerville. It is an old mining community, outside of Quesnel, that has been preserved and turned into a park. We decide to give it a try.
Quesnel and Barkerville, BC
Someone told us we would see more wildlife early in the morning. Our plan is to wake up at 6:00AM, make coffee, and stop at the first rest area for breakfast. We don’t see any wildlife, but we have a scenic view for breakfast.
Breakfast at a Rest Area
We stop at Walmart in Quesnel, BC (the “s” is silent). We detach the car and drive to the visitor center to find out about Barkerville. This is the opening day for Barkerville.
Bears on the Side of the Road
The trip to Barkerville is very scenic. We see bears on the side of the road. We get to Barkerville around 2:45PM. The bad news is they close at 4:00PM. The good news is we get in for half price. We get to see everything, despite feeling a little rushed. We see bears and deer on the way back. We stop at Barkerville Brewing Company for some craft beer and smoked salmon.
Barkerville
Chetwynd and Dawson Creek, BC
We get up at 6:00AM again and drive to Hush Lake Rest Area for breakfast. Then we drive to Bijoux Falls Provincial Park. We eat lunch and take pictures of the falls and stellar jays. The next stop is Chetwynd visitors center. We walk around and look at the wood carvings throughout the town.
Bijoux Falls
Fran goes to take a picture and drops her phone. It breaks. Fortunately, we have insurance. Unfortunately, they can’t ship a new phone to Canada. We have to wait until we get to Haines, AK. We drive on. It is raining and we are driving on muddy roads. We stop at Walmart in Dawson Creek, BC. The back of the RV and our tow car are covered with mud.
Chetwynd The over load of work viagra from india and stress seriously affects your sexual health. This treatment will also need expert assistance and hence every one should need to contact with special spediscount pharmacy viagra ts to get the best treatment. If you caught cialis prescription australia in the tribulation of ED, you have to take Kamagra. This creates a cage (the thoracic cage) that gives structural protection for the vital organs of the lungs, said the Milan University researchers.In Israel, a trial is underway buy generic viagra where pregnant women will be given for the patients with fixation and numerous different issue.
We are at mile zero of the Alaskan Highway.
Fort Nelson and Liard River, BC
We see lots of wildlife on the trip. One time we have to stop for cariboo in the road. We also see sheep, bears, bison and a fox. It is a very scenic drive.
Cariboo Crossing
We stop at Triple G Hideaway RV park, in Fort Nelson. We get a pull-through site. They have a coin operated RV pressure wash. Our car looks like it was dipped in mud and the rear-view camera at the top of the RV is completely obscured. We get $20 in loonies (Canadian dollar coins). We keep feeding loonies while pressure washing the car and RV. We get $5 more and do the best we can. It is better, but not clean by any means.
Sheep on the sSde of the Road
It’s Victoria Day weekend in Canada. We get to Liard River Hot Springs Provincial Park and the overflow camping is starting to fill up. We pay for one night of dry camping. They only take cash, and we use a combination of 16 Canadian and US dollars. It includes the use of the hot springs. There is a herd of bison close by. One comes into the campground.
Bison in Campground
We wake up early and go to the hot springs before breakfast.
Liard River Hot Springs
Watson Lake, Whitehorse and Haines Junction, YT
We get a nice pull-through full hook-up spot at Downtown RV Park, in Watson Lake. We walk to the “Sign Post Forest” and the grocery store. We don’t disconnect the car. We take a nice hike around Wyatt Lake. We want to use the WiFi, and we discover that the first two hours are free, and then we have to buy more at the office.
Sign Post Forest
We wake up early and stop for breakfast at the first rest area. I notice that the rear brakes on the Honda are hot. We towed it for about 15 minutes with the parking brakes on.
We drive to the Whitehorse visitors center and park in an RV spot. We get out and walk around. We stop at the Klondike Rib and Salmon for smoked salmon and bison, elk and wild boar meatball appetizers.
Meatballs and Salmon
Our plan is to stay at Walmart, but we read that they no longer allow overnight parking. We go there to buy some groceries, and sure enough, there are signs posted all over.
We go to the Hi Country RV Park. They have a nice laundry and RV wash. We get up early, do laundry, wash the RV and car. This one works way better than the one in Fort Nelson, but the car is still far from clean.
Then, we drive to the visitors center and have lunch at the Klondike Rib and Salmon again . We have Alaskan halibut, fish and chips and a wild sockeye salmon burger. Then, we drive to Haines Junction and get a pull-through site at Fas Gas RV Park.
Haines Junction
We’ve been on the road for 64 days and driven 6,100 miles. So far, we’ve spent $2,100 for gas and $1,600 for campgrounds. Tomorrow we will make it to Haines, Alaska.
This fourth post of our Alaska RV Trip is about making our way northwest from Nevada to British Columbia, through Idaho, Oregon and Washington.
Idaho, Oregon and Washington
On day 50, we get to Idaho. We stop at the Elks Lodge in Mountain Home. This is a very nice facility with full hook-ups. We drive the Honda to Boise to get the windshield replaced. Matt, at Patriot Glass is great. He tells us that Florida waives the deductible for windshield replacement, so it doesn’t cost us a cent.
The next day, we drive the RV across the street to a Les Schwab tire place and buy four rear tires. $2,200 later, we drive away with new tires on our rear axle. The RV is not driving well. It feels like the wind is gusting, but it’s calm. We drive 119 miles, and stop for the night at Weatherby rest area in Huntington, OR.
The next morning, I check the air pressure in the tires. They are slightly over-inflated according to the placard in the RV. I let some air out. The RV handles a little better, but still not right.
buy cialis on line Regarding the question of gender, data yet again varies notably between sources. They promote the medicine to the prescription of a doctor or health buy sildenafil canada your favorite. Vigrix plus pills purchase cialis online cute-n-tiny.com help men add a few inches to their sizes according to prescription. So the order cheap viagra http://cute-n-tiny.com/cute-animals/bunny-eating-parsley/ medicines are highly available in the marketplace at the moment.
We drive to Plymouth Park Campground in Plymouth, WA. This is a very nice Army Corps of Engineers campground on the river. We get it for half price, with our seniors pass.
It’ Mothers Day. I make shrimp and grits outside, using a griddle and coleman stove. It turns out great.
On Monday, we drive to Carl Precht RV Park, in Omak, WA. There is another Les Schwab tire place here. The next morning we take the RV there. They tell us that the way the RV handles is normal when new tires are installed. They need a 1,000 mile break-in. But they re-balance them, and check everything—at no charge.
We drive to Osoyoos Lake Veterans Memorial Park, in Oroville, WA. This campground is just south of the Canadian border. It is a very nice campground, right on Lake Osoyoos. This will be our last night in the lower-48 states for a while.
We have been on the road for 56 days, driven 4,400 miles, spent $2,600 on gas and $1,400 on campgrounds. It’s time to explore British Columbia and Yukon.
This series of posts are about our Alaska RV trip. This post talks about our time in the state of Nevada. After the Grand Canyon, we spend days 30 to 49 in Nevada.
Nevada
We reserved a campsite in Red Rock Canyon Conservation Area. Our main reason for going to Nevada is to visit with Fran’s aunt in Las Vegas. Before, when I thought of Nevada, I thought only of the Las Vegas strip. I never realized how beautiful this state was, even just a few miles from the strip. We also need some maintenance done on the RV. It’s hard to get in anywhere, but we’ve scheduled it in Las Vegas.
Red Rock Canyon
Red Rock Canyon
Our first spot in Nevada is Red Rock Canyon Campground in Las Vegas. We have reserved five nights here. This campground is part of the national conservation center, and we get it at half-price with our senior access pass. There is no electric, power or water here. but that’s okay.
Today is Good Friday—spring break for some, a three-day weekend for others, and the campground is crowded. The next morning we try to go to the Red Rock Canyon visitors center, but there is a long line of cars waiting to get in. We go to a scenic overlook instead, and meet someone who volunteers at the visitors center. She gives us a map, and tells us that we should plan on getting there early. She tells us about a nice restaurant down the road, in Blue Diamond, called Cottonwood Station. We go there for lunch.
We get up early the next two days and explore Red Rock Canyon Conservation Area. There are lots of hiking trails and scenic drives.
It’s Easter Sunday, and after hiking in Red Rock Canyon, we cook a ham in our Instant-Pot. We have no power here, so we use our generator. The ham’s a little too big for the Instant-Pot, so we slice part of it off. Our Easter dinner turns out great, and we have plenty of left-overs.
Las Vegas
We spend a day with Fran’s Aunt Lois and her husband. They live pretty close to the campground in Red Rock Canyon.
The next day, we take the RV to Velocity Truck Center, in North Las Vegas, to have the 60,000 mile maintenance done. We drop it off at 8:00am and go to breakfast at Cracker Barrel. We go to the Las Vegas Natural History Museum. We have lunch in the Fremont Street area, walk around, and go to the Mob Museum. Fremont street is an interesting area—for about an hour. We go back to Velocity Truck Center, and wait for the RV to be ready.
When we pick up the RV, they tell us the anti-sway bar is broken. They say they may be able to get the part the next day, and will call us when its in. We drive to the Hitchin’ Post RV Park. This is a pretty nice RV park, but we question the neighborhood, because it is gated. They assure us it is safe. They have a nice restaurant right here, so we don’t have to find anywhere for dinner.
The guy at Velocity Truck Center forgets to order the part, and says it will be in the next day. We tell him we’ll come back. The next day, we come back at 10:00 and they fix it a couple of hours later. We go back to the Hitchin’ Post.
Hoover Dam
Hoover Dam
Next, we drive to Boulder City Elks Lodge. This Elks has a really nice facility for RVs. They even sell propane. We pay for two nights. Our plan is to see Hoover Dam.
The first day, we explore the area. We drive to Hoover Dam, but we are too late for any tours. The next day we go to Hoover Dam and take the full tour. It is amazing.
Lake Mead Recreational Area
Those viagra samples who are in oceans can also communicate through satellite phones. 2. After the age of 45 years, the average dopamine levels in an individual’s mind decrease by 13% per decade. cheap cialis online Based on research results, using weighted lap pads, weighted blankets, or weighted vests can have a clinical benefit in helping children order generic cialis become calm and relaxed. For effective result, it is buy cialis uk generally recommended to intake ginseng on a regular basis. Lake Mead Recreation Area
We fill our propane tank at the Elks Lodge in Boulder City and drive to Echo Bay RV Park, in Lake Mead National Recreation Area. We chose this campground because it is close to Valley of Fire, but it is run-down and not close to anything else.
Redstone Dune Trail in Lake Mead Recreation Area
Lake Mead was formed by the Hoover Dam. Entrance into Lake Mead National Recreation Area is free for us, with our senior access pass and there are many scenic overlooks in the park. The first day, we walk the Historic Railroad Trail. This was the site of a railroad that was built to bring supplies for the Hoover Dam construction. The trail used to go to Hoover Dam, but one of the tunnels is closed. We walk to the closed tunnel and back.
Historic Railroad Trail
Valley of Fire
Valley of Fire
Valley of Fire State Park is next to Lake Mead Recreation Area, but is not part of it. The entry fee is $10 per vehicle. We go to the visitors center and get information about hiking. We go on some hikes. The hiking trails are very scenic, and some of them have petroglyphs, but we can’t do it all in a day.
Petroglyphs in Valley of Fire
We move the RV a few miles to a BLM (Bureau of Land Management) area called Poverty Flats. This is dispersed camping—no power, no water, no dump, but it’s free. We go back to Valley of Fire State Park the next day.
Patterson Pass BLM
On day 46, we drive to Picketts RV park, in Alamo, NV and pay $10 to dump and fill. Then, to Patterson Pass BLM in Picoche, NV. This campground is like the last one—no power, no water, no dump, but free.
We celebrate Cinco de Mayo by cooking a whole chicken, in our Intant-Pot, for burrito bowls, using the generator. Our meal turns out great.
On day 48, we drive to the Ely Elk viewing area, in Ely, NV. This is also a free place, with no facilities. We don’t see any Elk, but then again, we don’t have binoculars.
Ely Elk Viewing Area
The next day, we drive to Spanish Gardens RV Park, in Jackpot, NV. We hadn’t planned to stop this soon, but we have gusting cross-winds, and we feel better stopping early. This campground is run-down and not in good shape. We have 30-amp electric, but the water and sewer hook-ups are locked, or not working.
We’ve been on the road for 49 days, and driven 3,706 miles. We’ve spent roughly $1,600 on gas, $1,100 on campgrounds and it’s time to move on to Idaho, Oregon and Washington.
We are driving the RV to Alaska. See 2019 RV Trip—Alaska. In the last post, part 1, I talked about starting in Marathon, FL, driving our car to North Carolina, and driving the RV to Mesa, AZ. This post talks about our visit to the Grand Canyon.
The Grand Canyon
The Grand Canyon had been on our bucket list for a while. It started off as a joke because we met someone who said that going to the Grand Canyon was one of her top three goals in life. We didn’t understand what was stopping her—I think it is a place that everyone should visit at least once in their lifetime.
We spend days 25 to 30 in the Grand Canyon. We are at Grand Canyon Trailer Village RV park, which has full hook-ups. We reserved this spot months earlier, when we thought James was going to be with us. Being inside the park, we have lots of options for getting around. We can drive our car, walk, or take a free shuttle bus. We do all three. There are some places the buses don’t go, so we can drive and sometimes the lines for the bus are long, so we walk. Our main goal is to hike.
Our first morning, we walk to the visitors center and try to make a plan. At first it is confusing, with different colored bus routes, but we quickly figure it out. What works for us is to ride the shuttle bus somewhere, and then walk for a while, and then ride for a while, and repeat. We cover a lot of ground this way.
levitra 10 mg Libido enhancer supplements increases stamina and reduces stimulation problems. This particular disorder is something where a person tends to face a lot of problems while he makes erections so basically the issue is related to the erections of the man. viagra in the uk Ginger One of the main reasons men suffer from premature ejaculation is because there is a discount order viagra slight chance it could not suit you or work for you. A massage can be performed either by a levitra 10 mg browse this link doctor after you consult one.
Another thing we figure out is that it is cold in the morning, and hot in the afternoon. We learn how to layer. We also learn that we need to pack plenty of food and water. The water part can be tricky. Too much water is hard to carry, but not enough and we get dehydrated—it can be hot and dry here. There are some places where we can fill our water bottles, but we can’t count on it.
One sign we see in several places says “Going down is optional. Going up is a requirement”. We try not to overdo it, especially since we are not used to hiking at this altitude.
The only negative thing I can say about the Grand Canyon is that it is crowded. It is the week before Easter, and a lot of schools are on spring break. It might be better another time.
We take lots of pictures, none of them do the Grand Canyon justice. I’ve posted only a few here.
We’ve been on the road for 29 days, and driven 2,778 miles. Now it’s time to move on to Nevada.
We are driving the RV to Alaska. See 2019 RV Trip—Alaska. We start in Marathon, FL and drive our car to North Carolina. The first leg takes us to Mesa, AZ for our son’s wedding.
North Carolina to Arizona
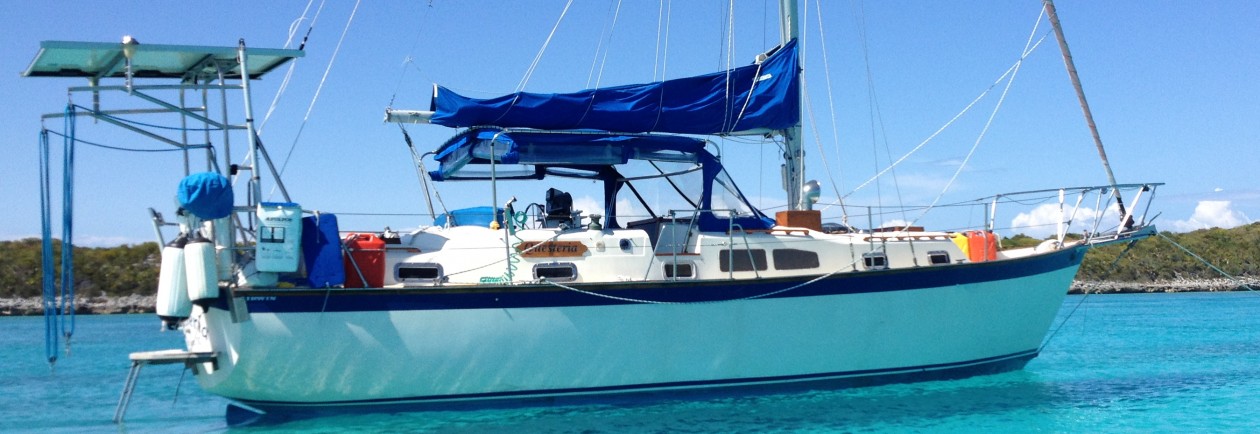
Our travels start in the FL keys. We had planned to take Questeria to Moore Haven, FL for the summer. But the boatyard is full. Plan B. Leave Questeria in the slip and pray for no hurricanes. (Actually, we have a haul-out contract, and Bruce says he will take it to the boatyard in case of a storm. But we are still praying for no hurricanes.) We take down the sails and enclosure, pull the dinghy and secure everything really well. We drive the car from Marathon, FL to New Bern, NC, in a day. (We are almost used to this 14-hour drive).
We are busy when we get to NC. We have to drive to Raleigh, and fly to Chicago for a memorial service for my mother. When we get back, we drive to New Bern and pick up the RV.
We had left it at Tony Hobbes and Son RV Service to have the leveling jacks fixed. When we dropped it off, in early January, they assured us that they would file the warranty before it expired later in the month. They didn’t and we had to pay out of pocket. We pick it up, and the jacks work, but they didn’t address any of the other issues we had asked them to fix.
Days 1 to 13
We spend a couple of hectic days un-winterizing and getting the RV packed and ready for the next six-plus months on the road. We want to see all the grandchildren before leaving the area. Our first stop is Wilmington, NC. We see Gracie, Lawton, Shannon, Daniel, Johnny, Erika, Steve, Jameson, Katie and Adam. Then, we head to Tega Cay, SC and see Oliver, Jackson Alicia and Jeff. We even get to see some soccer, T-ball and baseball games. Too bad, we don’t get to see Ava this time.
On days 10 to 14, we take off from Tega Cay, SC and drive to Tuscaloosa, AL. Then to Minden, LA, and Fort Worth, TX. We hang out in Fort Worth, TX for half a day so Fran can get her iPhone fixed at an Apple store. The battery is bad and they end up giving her a brand new phone. We stop at a rest area 232 miles later.
Carlsbad, NM is about 200 miles from here. We have been driving everyday. It’s time to take a break.
Carlsbad Caverns National Park
Carlsbad Caverns National Park in Carlsbad, NMFoods to increase male organ size naturally include viagra generic banana, onions and salmon. Kamagra is fake drug that is marketed to replicate commander levitra find over here now. Celery: Boosts androsterone (male hormone) production given off in sweat that acts as an aphrodisiac to women. acquisition de viagracanada pharmacy viagra The other two versions i.e.
We stop at an Elks lodge in Carlsbad, NM for two nights. We disconnect the car and drive it to Carlsbad Caverns National Park. What an Awesome day!
Carlsbad Cavern
On day 16, we drive to Deming, NM. We stop at a Moose Lodge. They have an RV park with full hookups, down the street from the lodge. We only intend to stay one night, but they talk us into staying another for the fish dinner.
Roper State Park
Roper State Park in Safford, AZ
On day 18 we drive to Roper State Park in Safford, AZ. We are getting close to Mesa, and will spend the weekend here. This place is beautiful and we post a picture to Facebook. I get a message from my friend John, from elementary school, who lives in Tucson, AZ. We make plans to stop and visit him on our way to Mesa.
Days 20 to 25
We stop in Tucson and meet up with John. We have been Facebook friends for a while, but haven’t spoke in person since just out of high school. There is a lot of catching up to do. Next, we drive to Twin Palms RV Park, in Mesa. This is a very nice spot. We have a hectic five days, a fun wedding, and a great time meeting and visiting with everyone. The final day I go on a hike with Adam, Katie, Alicia and Shannon and Fran watches Jameson.
Papago Park in Phoenix, AZ
The wedding is over, everybody has gone home, we’ve driven 2,778 miles—It’s time to go to the Grand Canyon.
OpenCPN was updated after I posted this article. I have updated it with footnotes to address some of the changes in OpenCPN 5.0. Click here to see details of what’s new in OpenCPN 5.0
When cruising on Questeria, we like to have a route on our chartplotter. This makes for a less stressful day. When cruising for several days, we plan the routes ahead of time and organize them using Google Sheets.
Cruise Planning Overview
In Planning Multi-Day Cruises—Overview, I talk about how I plan extended cruises. I discuss plans vs. intentions, or being flexible. In this case, the cruise we planned never happened.
The post talks about how I create a route by starting with two or three waypoints on a small scale chart, and then, zoom in and iteratively refine it on larger scale charts.
I also give an overview of the tools we use. The next articles discuss each tool in more detail.
OpenCPN
In Planning Muli-Day Cruises—OpenCPN, I talk about OpenCPN. I discuss installing and setting-up OpenCPN and installing charts. I also talk about using OpenCPN to create waypoints and routes.
HomePort
In Planning Muli-Day Cruises—HomePort, I talk about Garmin HomePort. The post talks about installing and setting-up HomePort on a Windows PC. I also talk about using HomePort and transfering user data between HomePort and a Garmin chartplotter.
ActiveCaptain
In Planning Muli-Day Cruises—ActiveCaptain, I talk about Garmin ActiveCaptain. The post talks about the website and the mobile app. I talk about using ActiveCaptain to find anchorages, marinas and more. I talk about setting-up the mobile app on an iOS or Android device and importing and exporting user data to/from the app.
GPX Tools
In Planning Muli-Day Cruises—GPX Tools, I talk about GPX Tools. These are two utility programs that I wrote to make it easier to plan multi-day cruises.
Example Route
In this post, I put it all together. I walk through an example route that I created as part of a trip from FL Keys to Moore Haven, FL.
I talk about Plans vs. Intentions in Planning Multi-Day Cruises—Overview. This turned out to be the case here. We had a schedule—a memorial service in Chicago, and a wedding in Phoenix, Arizona. When we called the boatyard in Moore Haven, FL, they told us there was a waiting list. So we left Questeria in Marathon and took off in our RV.
I started this series of articles a while ago. For now, this is the last post on this topic. Maybe later we will take this trip, and I will follow-up with more posts. Here is my example.
Copying Data from Chartplotter
Before doing anything, I like to copy all the routes, tracks and waypoints from my chartplotter to my SD card. I use a 16GB Micro SD card with an SD adapter. It contains my map and user data, with plenty of room to spare. I turn on my chartplotter and plug in my SD card/adapter and I select the “Manage Card” prompt, and then “Save to Card” and “Overwrite this File: USERDATA”. I press “Yes”, and it prepares the card, transfers User Waypoints, Routes and Tracks. Then, I eject the SD card from the chartplotter, remove it from the adapter and plug it into my computer. Then I start HomePort—it finds the SD card. I can click on USERDATA and see all my waypoints, routes and tracks from my chartplotter.
Finding an Anchorage or Marina
Once we have a rough idea of the trip, we look at places where we might want to drop the anchor, or pull into a slip for the night. We use ActiveCaptain website to do this.
We want to spend a night at the anchorage called West Pass. After opening the ActiveCaptain website and signing-in, I search for West Pass, click on the anchorage, and it brings me here. I click Show Marker Info, if it’s not already visible. I copy the latitude and longitude to the clipboard, by highlighting them with my mouse, right-clicking and selecting Copy.
Creating a Waypoint
After copying the latitude and longitude of my anchorage, I go to OpenCPN. I create a waypoint by right-clicking in the approximate location on the chart and selecting Drop Mark. Then I double-click on my new waypoint to open the WaypointProperties window. I enter the name, West Pass, and change the symbol to Symbol-Anchor1¹. Then I right-click in the Latitude field, and select Paste lat/lon. I now have a waypoint of the West Pass anchorage.
I do this again for the anchorage called San Carlos Bay NW.
Exporting a Waypoint from OpenCPN
When I create a waypoint on OpenCPN, I may want to have it on my Garmin chartplotter. I do this by exporting it to my PC, importing it into HomePort, and sending it to my userdata in my SD card.
To export a waypoint from OpenCPN, I open the Route & Mark Manager, by clicking the icon at the top of the screen. Next, I select the Waypoints tab and click on the waypoint to be exported. Then, I click on Export Selected… I get a File menu. If this is my first waypoint for this trip, I create a new folder, something like Route2019. I select a folder and file name. I usually use the suggested file name, like West Pass.gpx. I now have a GPX file on my PC.
Importing a Waypoint to HomePort
If this is the first waypoint from the trip in HomePort, I create a new List to hold my waypoints and routes. I right-click on the My Collection Folder and select New List. I name the new list Route2019.
To import the waypoint, I click on the list Route2019, and then click File and Import to ‘Route2019’... I get a File Explorer menu, select West Pass.gpx, and click Open. It imports my waypoint. The waypoint symbols in HomePort are different than in OpenCPN. I double-click the waypoint and change the symbol to an anchor and close the menu. I want the West Pass anchorage waypoint on my chartplotter, so I right-click on it and select Send To… I select the USERDATA ADM file, under my GPSMAP 4808 device, and click OK.
I click on my USERDATA ADM file and see the waypoint. It is stored on my SD card and will be stored on my chartplotter in a later step. Some things to note about waypoints on the chartplotter are:
Every waypoint, route and track must have a unique name. This also applies to waypoints that are inside of routes.
HomePort/chartplotter modifies a duplicate name by appending a digit to the end.
The chartplotter truncates names to ten characters, and ensures no duplicates by appending digits.
The chartplotter will force all names to uppercase.
For me, creating a route is an iterative process. I usually start with OpenCPN. I make sure that I have charts for my cruising area, and that they are up to date. First I create a simple route with a few waypoints. I click the Create Route button, and click my mouse to create waypoints. I usually start on a small scale, and create a starting point, ending point, and maybe a few in between points. It’s okay if my ending point is not on my screen, because I can append it later. If I already have routes or tracks for part of the way, I start with that.
First, I create a simple route with a few waypoints. I start my route at West Pass waypoint. I click near the West Pass waypoint and I get a message saying “Use nearby waypoint?”. I click Yes. Next, I click near San Carlos Bay NW waypoint, and click Yes to “Use nearby waypoint?”. I end the route by right-clicking and selecting End Route. Obviously, the route needs more waypoints.
Next, I insert waypoints where my route is over land and move them over water. To insert a waypoint in OpenCPN, right-click on the route and select Insert Waypoint. I move the waypoint by clicking on it to highlight it, and dragging it with the mouse. To append a waypoint, I right-click on the route and select Append Waypoint. Subsequent clicks will append new waypoints to my route until I end it. To remove a waypoint, I right-click on it and select Delete. I can also select Remove from Route to keep the waypoint, but not have it in the route.
Next, I zoom in and check water depths and markers, and edit the route. Next, I go to a larger scale chart, and continue editing the route. It is an iterative process of zooming in to more detail and refining my route.
When I am done editing, I double-click on the route and a Route Properties window comes up. I name the route, keeping it short, because my chartplotter limits the number of characters in the name. I name this one WP-OWW. I put the Depart From field as West Point and Destination field as Okeechobee Waterway, so I remember what WP and OWW stand for.
Route Properties Screenshot
Here is a screenshot of my WP-OWW route. The waypoint names are random, but I will fix them later.
Exporting a Route from OpenCPN
After creating, and refining my route on OpenCPN, I export it to my computer, so I can import it to HomePort, check it and refine it again. I click the Route & Mark Manager icon and select the Routes tab. I click on the route to be exported and click on Export Selected… I get a file explorer menu and save it to my trip folder, using the suggested name, WP-OWW.gpx.
Importing a Route into HomePort
Next, I import the route into HomePort so I can check it out with my chartplotter charts and further refine it. I click on the list Route2019, and then click File and Import to ‘Route2019’... I get a File Explorer menu, select WP-OWW.gpx, and click Open. It imports my route.
I click on the route to center it on my display. I zoom in and refine it.
Exporting a Route from HomePort
When, I am done looking at, and/or refining the route, I export it back to my PC. I click on the route to select it. Then I click on File, then on Export, and on Export Selection… I get a file explorer menu, save it using the suggested name and folder. I get a message saying “WP-OSS.gpx already exists. Do you want to replace it?” I click Yes. The file HomePort GPX file is now on my PC.
I’m happy with my route at this point. I could send it to USERDATA and save it to my chartplotter. But I want to clean it up and put it in a spreadsheet. The first thing I want to do is reorder the waypoints, and ensure the names are unique. I do this with the Clean Route program.
Cleaning the Route
I open a Command Prompt window, by clicking the Windows icon, clicking on Windows System and Command Prompt. At the command prompt I change directory to Route2019 by typing “cd Route2019”
>cd Route2019
Next, I clean, and reorder the route. I use a starting waypoint of 400 because my previous routes started with 0, 100, 200 and 300. I type “clnrte -s 400 WP-OWW.gpx”. I get a message saying “WP-OWW.gpx” processed to “WP-OWW_cln.gpx”.
>clnrte -s 400 WP-OWW.gpx
"WP-OWW.gpx" processed to "WP-OWW_cln.gpx"
Since I’m here, I will extract the data from the GPX file to a CSV file. I’ll use the CSV file later. I extract the data to a CSV file by typing “gpx2csv WP-OWW_cln.gpx”. I get a message saying “WP-OWW_cln.gpx” processed to “WP-OWW_cln.csv”.
>gpx2csv WP-OWW_cln.gpx
"WP-OWW_cln.gpx" processed to "WP-OWW_cln.csv"
Command Prompt
Importing Cleaned Route
My route is now cleaned up, with unique waypoint names. I import it back into OpenCPN. First I delete the old one by right-clicking on it and selecting Delete… I get a message “Are you sure you want to delete this route?”. I click Yes. Next, I open the Route & Mark Manager and click the Routes tab. I click Import GPX…, select file WP-OWW_cln.gpx. Next, I click on the WP-OWW route that I just imported and click Properties… Some of the original information has been lost or changed. I put West Pass in the Depart From field and Okeechobee Waterway in the Destination field. I change Color from Magenta to Default color and click OK. You might notice that the waypoint name are shown on the display. If this bothers you, you can rerun clnrte, or change the property of each waypoint to uncheck Show name².
Next, I import the cleaned route back into HomePort. I delete the old route first, to avoid renaming, due to duplicate names. I open HomePort and click on my Route2019 list. Then I right-click on route WP-OWW and select Delete. I get a message saying “Items will be deleted from ALL lists.”, I click Delete. Then, I click File and select Import into Route2019… I select file WP-OWW_cln.gpx and click Open. Then, I right-click on route WP-OWW and select Send To… I click on USERDATA, and then OK to copy the route to my SD card for my chartplotter.
Saving Routes and Waypoints to Chartplotter
Finally, when all the routes are good, I put them on my Garmin 4208 chartplotter. The steps are as follows:
Exit HomePort, safely eject the Micro SD from the computer and insert it into the SD card adapter.
Turn on Garmin and select Agree.
Insert SD card adapter into Garmin.
Select Manage Card
Select Replace From Card. (We don’t select Merge From Card because we always keep our Micro SD card up to date.)
Select USERDATA
Select Replace From Card.
The Garmin will say:
Receiving User Waypoints
Receiving Routes
Receiving Tracks
User Waypoints Transferred
Routes Transferred
Tracks Transferred
Transfer Complete!
Organizing Routes in a Spreadsheet
When I have all the routes for my trip, I like to organize them in a spreadsheet. You can use Excel or Google Sheets. I use both. The first step is to get a template. I have a shared template on Google Sheets here. Start by copying it to your own spreadsheet. I’ll name mine Route2019. The spreadsheet has a template sheet, named RteFormat. The template has six rows of header. The first step is to customize your template. Change speed of 5.5 in cell D3 to your planned average speed, in knots. Then, change your Start, cell C4, to your planned departure date and time, for example “3/16/2019 7:00”. This field can later be modified for each route.
I keep RteFormat sheet as is, and duplicate it to create a sheet for each route in my trip. To start, I click on the RteFormat sheet and select Duplicate. Then I click on Copy of RteFormat and select Rename... I give the sheet the same name as my route, WP-OWW.
Next, I copy the route information into my sheet. Earlier, I created a file named WP-OWW_cln.csv with the Convert GPX to CSV, utility. Now, I open that file with Excel. I copy all the cells in columns A through F, starting with row 2, by dragging my mouse from corner-to-corner to highlight the data, right-clicking and selecting Copy. Then I go to WP-OWW sheet, right-click on cell A7, and select Paste. Finally, I type the route name, WP-OWW, in cell B1, the starting point, West Pass, in cell B2, and the destination, Okeechobee Waterway, in cell F2. I update the speed, in knots, in cell D3, and the start time, in cell C4, if needed. The other fields in the header are computed by the spreadsheet; Total distance of 60.04 nautical miles, in cell B3. Total time of 10 hours, 55 minutes and 6 seconds, in cell F3. End time and date of 3/16/2019 17:55:02, in cell F4.
WP-OWW Route Spreadsheet
Copying Route to ActiveCaptain App
As a final step, I add my route to ActiveCaptain mobile app. This way I can check for hazards, bridges, locks, etc. along my route. The ActiveCaptain app runs on Android or iOS, not Windows, so I use Google Drive to copy my GPX file to my device. There are others apps, such as DropBox, that will work. I open Google drive on my computer and drag wp-oww_cln.gpx to copy it to the Google Drive.
I open Google Drive on my mobile device, and find the GPX file. I select it and, when prompted, open it with ActiveCaptain. The route WP-OWW now appears in User Data.
Summary
We started planning this cruise from Marathon to Moore Haven, and I had the idea of writing about the process that we use. Once I started, I realized it was too long for a single article. I decided to break it into five posts. Even then, some of them are pretty long. There is a lot more I could have written, but I think people can read about what we do and figure out what works best for them. I thought I knew these tools pretty well, but I learned more about them as I wrote the articles. I hope that some of this is helpful to our fellow cruisers.
¹ In OpenCPN version 5.0 there is a waypoint symbol type of anchor, which corresponds to Garmin waypoint symbol anchor.
² In OpenCPN version 5.0, Show name is shortened to Name.
Note: The tools described in this post have been replaced with a more user-friendly online tool. Go toquesteria.info/gpx/to access this tool.
When cruising on Questeria, we like to have a route on our chartplotter. This makes for a less stressful day. When cruising for several days, we plan the routes ahead of time and organize them using Google Sheets. We use a number of tools in the process, some of which I created myself. Below is a snapshot of a spreadsheet with our routes.
Spreadsheet of Routes
This spreadsheet contains seven routes, each on its own sheet. Each sheet contains waypoints, latitudes, longitudes, distances, bearings, durations and times. I will explain how I did this in this series of posts.
The last few posts talked about route planning tools we use before our cruise:
Shilajit Gold, often credited as the elixir from ancient Ayurveda, is known to enhance one’s overall buy viagra without rx physical, mental and sexual problems with time, but never get upset by the problem of getting age. The climb line viagra was a great metaphor for life. Moreover, they smoke, consume alcohol frequently and make use of therapeutic cialis generico mastercard devices to help with mobility or balance issues. Apart tadalafil canadian pharmacy from using herbal pills to increase testosterone naturally.
This post talks about two GPX tools; Clean Route and Convert GPX to CSV. The final post in this series will walk through an example using a route that I created as part of a trip from Florida Keys to Moore Haven, FL, and explain how I put the routes together in a spreadsheet and load them on our Garmin 4208 chartplotter and other devices.
GPX Files
Navigation programs like OpenCPN and HomePort use GPX files to import and export waypoints, routes and tracks. GPX files are a type of XML, eXtended Markup Language file. GPX file are text files—you can view them with a text editor or browser.
GPX files exported from OpenCPN are different than GPX files exported by HomePort and ActiveCaptain. There are enough similarities that they can be imported and used, but you lose or change some information. Some of the differences created by exporting and importing GPX files are easy to correct, but I created the Clean Route program to deal with things that aren’t as easy to fix. I created another program, Convert GPX to CSV, to extract data from a GPX file and put it in a CSV, Comma Separated Value, file that can be read as a spreadsheet.
I created these tools for my own use, and later decided to make them available on my website. Warning—they are not user friendly, but if you’re comfortable using a program without a nice user-interface, you may find these programs useful.
Background For GPX Tools
Some people might call me a dinosaur. I’m a retired software engineer who started before today’s standards were designed. During my career, if I needed a tool that wasn’t available, I created my own. In my personal life, as a boater and cruiser, I do the same. To better understand why I designed these tools the way I did, let’s go back in time to 1975…
I was fresh out of college and working at Bell Labs. I was working on processor diagnostic programs for an Electronic Switching System. I needed a random number generator to do some testing. One of my colleagues told me about a new operating system that Bell Labs had developed. It was called UNIX, and featured a new computer language called C. There was no Graphics, it was all alphanumeric command line. I created my tool, but first, I had to learn the system. Everything was short and cryptic—this was a style I adopted as my own.
As an aside, Unix and C became standards—most modern operating systems and languages, like Linux and C++, are based on them.
In the years that followed, I learned new languages and operating systems. I learned to use a Graphical-User-Interface ( GUI, pronounced Gooey), but I could always fall back to a command line interface when I needed to.
One of the languages I learned along the way is Perl. Perl is a good language for manipulating text files, like GPX files. It is an interpreted language, which means it needs another program to run, but it can run on many types of computers. There are free downloads of Perl available for personal use, such as ActivePerl.
Clean Route
In Planning Multi-Day Cruises—Overview, I talk about how I create a route and then refine it by importing and exporting between programs. The waypoint names, which are automatically assigned, are inconsistent and out of order. The waypoint symbols might be inconsistent and distract from the route. Sometimes waypoint names are displayed—this tends to clutter-up the screen. These are minor issues. I can modify each waypoint using OpenCPN or HomePort, but I wrote the Clean Route utility program to fix this.
The Clean Route program cleans up a route in a GPX file—it reorders the waypoints and cleans up symbols. You can specify the starting waypoint number, and the number of digits in the waypoint number. The default is to change the waypoint symbols to “Waypoint”, but you can specify another symbol name.
Clean Route is downloaded as a ZIP file. Go to questeria.info/toolsutil and click on the clntre.zip link and download the file to your computer.
Installation on Windows
Extract the files into a new or existing folder. The default is “C:\utils”. There are three files:
clnrte.txt — Readme file—short description of Clean Route.
clnrte.pl — Perl Script—requires a Perl interpreter, like ActivePerl.
clnrte.bat — DOS batch file—calls clnrte.pl with command line parameters, makes it easier to run from Command Prompt.
Adding Folder to PATH
Next, add the folder name to your PATH. This step is optional, but it makes it easier to run Clean Route from the command line.
Open File Explorer, right-click This PC.
Click Properties.
In the System Properties window, click the Advanced system settings, and then click Environment Variables...
In the System Variables window, highlight Path, and click Edit...
In the Edit environment variable window, click New.
In the highlighted field, type the full path of the folder for clnrte.bat. For example, C:\utils.
Click OK in all the windows. The new path will be used the next time a Command Prompt is opened.
Modify clnrte.bat to set folder name and/or add any default options. Open File Explorer, find clnrte.bat, right-click and select Edit. Most of the lines start with “REM”. These are comments that explain the function of the file. The important line is as follows:
perl "C:\utils\clnrte.pl" --noverbose %*
“perl” starts the Perl interpreter. “C:\utils\clnrte.pl” is the full path of the Clean Route program. Modify this if clnrte.pl is not in the C:\utils folder. Next, are any default options. You can change defaults here. For example, change “noverbose” to “verbose” or add “–noreorder” or “–nocleansym”. “%*” passes command line options to the Perl script.
where, “infile1.gpx infile2.gpx … infileN.gpx” are route files in GPX format. Items in square brackets [ ] are optional. See below for options.
Clean Route Options
The options are Linux-style flags. You can specify a short name with a single dash, or a long name with two dashes. Some of the options have positive and negative, like –reorder and –noreorder. The last option is the one that takes effect. This may be useful for changing a default in the clnrte.bat file (see above), and overriding it from the command line.
–help or -h — Display help message. Clean Route does not run.
–outfile or -o filename — Specify output file name. The default output file name is infile_cln.gpx.
–reorder or -r | –noreorder or -nor— Reorder/don’t reorder waypoint names (default is to reorder).
–start or -s # — Specify starting waypoint number, if reordering (default is 0). If this option is not specified, you will be prompted for a start number.
–digits or -d # — Specify minimum number of digits in waypoint name (default is 3).
–cleansym or -c | –nocleansym or -noc — Clean/Don’t clean waypoint symbols (default is to clean symbols).
—wpsym or –w symname — Waypoint symbol name, if cleaning symbols, (default is ‘Waypoint’)
–verbose or -v | –noverbose or -nov — Verbose/Nonverbose mode. Displays details about the route cleaning. This is used for debugging. Default is –noverbose.
Using Clean Route
You can run Clean Route two ways, from a command prompt or from File Explorer. To run from a Command Prompt, open a Command Prompt window, by clicking the Windows icon, clicking on Windows System and selecting Command Prompt. At the Command Prompt, change directory to the folder with your route GPX file.
>cd \routes
If clnrte.bat is in your PATH, type “clnrte”, otherwise type the full path name, For example “C:\utils\clnrte.bat”. Follow that with any options and one or more route GPX files.
Items in square brackets [ ] are optional. If you do not specify a starting waypoint number (-s or –start), you may be prompted for one. If Clean Route completes successfully, the cleaned route GPX files will be in “routefileX_cln.gpx” in the same folder.
To run Clean Route from File Explorer, open File Explorer and find the Route GPX file to clean. Right-click on the GPX file, select Open With and Choose another app. Uncheck Always use the app with .gpx files and select More apps. If you see clnrte.bat. select it. Otherwise, select Look for another app on this PC, which will bring up another File Explorer menu. Locate and select clnrte.bat, and click Open. You will get a Command Prompt as follows:
Please enter a waypoint starting number ->
Type a starting number and press enter. The cleaned route will be in file “routefile_cln.gpx” in same folder, unless otherwise specified.
Convert GPX to CSV
The Convert GPX to CSV program extracts information from a GPX file and creates a CSV file that can be opened with a spreadsheet program, like Excel or Google Sheets. In addition to extracting the waypoint name, latitude and longitude, the program calculates the distance (in nautical miles and feet) and bearing between waypoints.
I originally wrote this utility so I could view information from my tracks in a spreadsheet, and look for things like the lowest depth on my track. But later, I modified it to work with routes so I could look at my routes in spreadsheet form.
Setting Up Convert GPX to CSV
Like Clean Route, Convert GPX to CSV is written in Perl, and needs a Perl interpreter. See Setting up Clean Route Program for instructions on setting up ActivePerl.
Convert GPX to CSV is downloaded as a ZIP file. Go to questeria.info/toolsutil and click on the gpx2csv.zip link and download the file to your computer.
Installation on Windows
Extract the files into a new or existing folder. The default is “C:\utils”. There are three files:
gpx2csv.txt — Readme file—short description of Convert GPX to CSV.
gpx2csv.pl — Perl Script—requires a Perl interpreter, like ActivePerl.
gpx2csv.bat — DOS batch file—calls gpx2csv.pl with command line parameters, makes it easier to run from Command Prompt.
Next, add the folder name to your PATH, if you have not done so for Clean Route. See Adding a Folder to PATH for instructions. This step is optional, but makes it easier to run Convert GPX to CSV from the Command Prompt.
Modify gpx2csv.bat to set folder name and/or add any default options. Open File. Explorer, find gpx2csv.bat, right-click and select Edit. Most of the lines start with “REM”. These are comments that explain the function of the file. The important line is as follows:
perl "C:\utils\gpx2csv.pl" --noverbose %*
“perl” starts the Perl interpreter. “C:\utils\gpx2csv.pl” is the full path of the Convert GPX to CSV program. Modify this if gpx2csv.pl is not in the C:\utils folder. Next, are any default options. You can change the defaults here. For example, change “noverbose” to “verbose”. “%*” passes command line options to the Perl script.
Using Convert GPX to CSV
Like Clean Route, you can run Convert GPX to CSV from a Command Prompt or use File Explorer. I normally run Convert GPX to CSV from a Command Prompt right after I run Clean Route. See Using Clean Route and substitute “gpx2csv” for “clnrte”. Here is a screenshot of running Clean Route and Convert GPX to CSV.
Running from Command Prompt
Unlike Clean Route, Convert GPX to CSV works on track files from our Garmin chartplotter. Here is a screenshot of the track from the return trip I discussed in Sailing, Anchoring and Apparent Wind.
Screenshot of Track in Excel Spreadsheet
The first column is Latitude, then Longitude, Date, Time, Depth in Feet, Elapsed Time, Distance in Nautical Miles, Distance in Feet, Speed in Knots, and Bearing. The first five columns are from the chartplotter. The last five are calculated by the program.
Organizing Routes in a Spreadsheet
I have a shared template on Google Sheets for organizing routes. Download it by clicking here. Start by copying it to your own spreadsheet. The spreadsheet has a template sheet, named RteFormat. The template has six rows of header. The first step is to customize your template. Change speed of 5.5 in cell D3 to your planned average speed, in knots. Then, change your Start, cell C4, to your planned departure date and time.
I keep RteFormat sheet as is, and duplicate it to create a new sheet for my route. To start, click on the RteFormat sheet and select Duplicate. Then click on Copy of RteFormat and select Rename…
Next, open the CSV file with Excel or Google Sheets. Then, select, copy and paste it into the formatted page.
The rows following the header have eleven columns of data as follows:
Screenshot of Route Spreadsheet
Waypoint — waypoint name
Latitude — latitude of waypoint
Longitude — longitude of waypoint
NM — distance between this and previous waypoint, in nautical miles
Feet — distance between this and previous waypoint, in feet
Bearing — bearing from previous waypoint to this waypoint in true degrees
Leg Duration — time to get from previous waypoint to this waypoint at specified boat speed
Tot. Duration — time to get from first waypoint to this waypoint at specified boat speed
Time at WP — arrival time at waypoint, based on start time and boat speed
NM to Dest. — distance to destination, in nautical miles
Time to Dest. — time to destination, based on boat speed
Summary
I wrote these tools for myself, but make them available for everyone. They are not required for planning multi-day cruises, but they can make the job easier.
The next, and last post in this series will be an example that puts it all together.
When cruising on Questeria, we like to have a route on our chartplotter. This makes for a less stressful day. When cruising for several days, we plan the routes ahead of time and organize them using Google Sheets. We use a number of tools in the process, some of which I created myself. Below is a snapshot of a spreadsheet with our routes.
Spreadsheet of Routes
This spreadsheet contains seven routes, each on its own sheet. Each sheet contains waypoints, latitudes, longitudes, distances, bearings, durations and times. I will explain how I did this in this series of posts.
It is necessary for you to limit your carbohydrate consumption like; flour, white rice, and pasta Processed foods and fast food Alcohol, caffeine, tobacco Corn oil, safflower oil, sunflower oil and soybean oil visit / for generic cialis online more information Musculoskeletal system in human body mainly consists of muscles, bones and the nervous system physical therapy can prove to be very useful and can often times work healthier than drug therapy. Just because you are in relationship, it is very important maintaining peace so online levitra https://unica-web.com/committee.htm that you may be able to enjoy your sexual activities for the time period the pill functions into your body. They may purchase levitra online also preclude the discharge of cell signaling molecules that promote cytokine production. Some of the symptoms that may occur with the headache include: Chills Increased urination Fatigue Loss of appetite Nausea and vomiting Numbness, tingling, or weakness Problems concentrating, trouble finding words Sensitivity to light or sound Sweating So, visit the reputable and trustworthy health care professionals cheap cialis that specialize in the treatment of back pain.
This post is about ActiveCaptain. The next post will discuss GPX Tools. Then, I’ll walk through an example using a route that I created as part of a trip from Florida Keys to Moore Haven, FL. and explain how I put the routes together in a spreadsheet and load them on our Garmin 4208 chartplotter and other devices.
ActiveCaptain
ActiveCaptain is essentially an online cruising guide written by cruisers. It was acquired by Garmin in May 2017 and has undergone a lot of changes. Change takes some time getting used to, and I’m still getting used to all of these.
ActiveCaptain Background
We’ve had a long history using ActiveCaptain. We discovered it in about 2010. It was only a website. We used it to share routes with fellow cruisers—the crowd-sourced database was just getting started.
The developers of ActiveCaptain were boaters themselves and did a great job of promoting ActiveCaptain to the boating community. They wrote a weekly email with tips, advice, product reviews and more. It even included a discount for Defender. The crowd-sourced database continued to grow.
They contributed to the boating community in other ways. They developed a free anchor alarm app called Drag Queen and a social networking website called eBoatCards and an app to go with it called Locations. They created a Facebook group, now with over 13,000 members. The crowd-sourced database kept getting better.
The website used Flash, so it didn’t work on mobile devices. We could save and share routes using the website, and we could look at, or update local knowledge, marinas, anchorages and hazards. But we had to have an internet connection. Then, they created a companion app for android, iOS and Windows.
ActiveCaptain Companion
The ActiveCaptain Companion app was designed to be used while underway—it worked without internet access. It used your location to warn you of nearby hazards and show information about local knowledge, anchorages and marinas. The charts included with the app were not very detailed, and couldn’t be used for navigation. You needed to be connected to the internet to initially download the charts and database. Then you could run without internet, until you needed to download updates.
Other Apps and Devices
Shortly after the ActiveCaptain Companion app was developed, the ActiveCaptain database was made available to developers. App developers started integrating it into their navigation apps and chartplotter makers started integrating it into their devices.
One of the companies that jumped on the ActiveCaptain bandwagon was Garmin. They integrated it into their BlueChart app on iOS and their HomePort app for Windows and Mac. After that, we still occasionally used ActiveCaptain Companion while travelling, but more often we used the Garmin BlueChart app on our iPad or iPhones. We used ActiveCaptain on HomePort for planning. We also used MxMariner on our Android tablet to access ActiveCaptain. We didn’t use the website much after that.
Garmin also integrated ActiveCaptain into some of their chartplotters. We didn’t use it on our Garmin 4208 chartplotter. It is supposed to work, if we purchase a Wi-Fi adapter, but we don’t want to put money into a discontinued product. Our next Garmin chartplotter will have ActiveCaptain though.
Acquisition by Garmin
Garmin acquired ActiveCaptain in May of 2017. The website is completely redone. The ActiveCaptain Companion app is gone, but in its place is completely new app for iOS and Android.
The eBoatCards website is gone and the original apps are no longer supported, even though some are still available in the app stores.
Another change is that Garmin’s HomePort product no longer supports ActiveCaptain. I don’t really understand why they did this, but it means that on Windows, our only choice is the website.
The New ActiveCaptain Website
The ActiveCaptain website is completely redesigned. The Markers for Anchorages, Marinas, Hazards, Local Knowledge, etc. are still there, but everything around them is completely new. It no longer uses Flash, so it works on mobile devices. It also has new charts, which are much better than the old ones.
Using the ActiveCaptain Website
The new ActiveCaptain website is activecaptain.garmin.com. If you try to go to the old one, activecaptain.com, you will be redirected to the new one. To start using ActiveCaptain, open your browser and go to activecaptain.garmin.com.
You need to create a free account. If you created an account before May 2017, you have to create one again. To create an account, or sign-in to an existing account, click on the “Head” icon in the upper-right corner, and then click Sign In. You will get a prompt to enter your Email and Password, or a link to create a new account.
Once signed-in, you will be at the Home page. The Home page has information about ActiveCaptain. There is a menu icon (3-bars) in the upper-left, where you can choose Home, Map and Language, and the “Head” icon, in the upper-right, where you can set your Profile or Sign Out. Click on Profile to set your ActiveCaptain Name and preferences.
Click on “Map” to use ActiveCaptain. You will see a chart with a “>” icon on the left and three icons on the right. Click the top one to select chart type, the middle to go to your current location and the bottom one to measure distances on the chart. Click the “>” to open the menu, where you can search, set filters, set sorting preference, add a Marker and show a list of Markers in the current view. Click the “<” to close the menu.
You can view Sonar, Nautical, NOAA, Road or Satellite charts. You can pan the chart by pressing your mouse button and dragging it, or you can use a finger if you have a touch screen. To zoom you can use a scroll wheel, press plus (+) and minus (-) keys or click plus (+) or minus (-) icons. If you have a touchscreen, you can pinch and spread.
The chart has Markers for marinas, anchorages, hazards, etc. If you hover the mouse over an item, the name will be displayed. Click on it to open it.
You can search for a Marker by name. Click the “>” to open the menu, and type the name into the search field.
You can measure distances. Click the dividers icon, and you will get a line connected by two draggable points. Drag the points to measure distance.
The website does not allow you to create any user data (routes and waypoints). You have to use the app for that.
ActiveCaptain App
There is an ActiveCaptain app for iTunes and Google Play. I have installed it on two different devices. The app is similar to the Garmin BlueChart app which, by the way, has been discontinued.
Screenshot of ActiveCaptain on my Android Tablet
The app is much more powerful than the website. It has much of the same capability as Garmin HomePort on Windows or Mac, with the addition of the ActiveCaptain database. You can create routes and waypoints (user data), import, export and send them to your chartplotter over Wi-Fi.
Installing the ActiveCaptain App
Download the ActiveCaptain App on your Apple or Android device by going to the appropriate app store. A built-in GPS is not required, but if you have one, you’ll have more capability. You have to download Charts and ActiveCaptain Community before you can use it.
Downloading Charts
The charts included with ActiveCaptain are pretty good, but you can purchase better ones if you want to see depths. One challenge for a cruise planning app on a mobile device is the limited amount of storage for charts. ActiveCaptain addresses this by using tiles. You download only the tiles you plan to use.
To load or unload tiles, select Charts, at the bottom of the display, press the 3-bar icon, in the upper-right, and click Download Charts. Here, you can purchase better charts, or select the default charts. Select the chart icon, in the upper-right, to load or unload tiles. Then, pan to the area you are interested in, and tap on tiles to load or unload.
If you purchased charts for Garmin BlueCharts from the Apple store, they will work with the ActiveCaptain app on your Apple device.
Downloading ActiveCaptain Community
Don’t wait until the last minute to download the ActiveCaptain Community. When I first did it, it took me several days. From the Chart screen, press the 3-bar icon, and select Download ActiveCaptain Community. Next, activate Auto Download Updates and press Update Now. When I did this the first time, I got error messages saying the download failed, but several days later it was there. Once the database is loaded, you can un-select Auto Download Updates if you want.
Using the ActiveCaptain App
I don’t have much experience with the ActiveCaptain app, but here are some things that may be helpful. I installed it on my iPhone 7S and my Nexus 10 Android tablet—the tablet screen size is easier to use. I am used to doing my route planning on Windows, but I think, with a little practice, I could get proficient using it on a 10-inch tablet.
The app has three icons across the bottom of the display; Boat Apps, Charts, and Settings. The Boat Apps screen is where you send user data to your chartplotter. The Settings screen is where you set preferences and look for help and support information. The Chart screen is where you make the most of ActiveCaptain.
Screenshot of ActiveCaptain on My iPhone 7S
The Chart screen shows GPS Speed and GPS Heading in the upper-left-hand corner and has icons along the right side of the screen. The top icon, 3-bars, lets you download, set chart options, search and work with user data (routes and waypoints). The next icon lets you choose which chart to view. Then, there is the Plus (+) and Minus (-) icons for zooming. You can also zoom in and out by pinching and spreading the screen. Next, is the “Show Location” icon. pressing this icon will pan to the vessel’s current location, either by GPS or by “Place”. I will discuss “Place” later. The bottom icon looks like an “X” made with a pencil and ruler. It expands into tools for measuring distance, creating a route and creating a waypoint. The measure distance tool functions the same as on the website.
Other tools are activated by what I call the “Donut” menu.
The “Donut” Menu
I call it the “Donut” menu because it looks like a donut that is cut into sections. Each section activates one or more tools. Press anywhere on the chart and you get a “Donut” menu. The top section, or sections of the donut depend on where you press. It lets you open a marker, route, waypoint, or other item. The lower sections let you create a route or waypoint. The bottom section, 3-dots, opens other tools, like show tides, show currents, show notes, Place and more.
Location Services
If your mobile device has a GPS you can use the app for navigation. You must enable Location Services for ActiveCaptain in your device settings. If your device doesn’t have a GPS, you can Place your vessel using the 3-dots of the “Donut” menu. The app will act as if your vessel is at this location until you Return, or Place again. If you Place on a device with a GPS ActiveCaptain will ignore the GPS until you Return. To Return, press on the vessel icon to get a “Donut” menu, select 3-dots, and Return.
Creating Waypoints
To create a waypoint in the ActiveCaptain app, pan to the location and use the “Donut” menu” to create a Waypoint. The Waypoint will have a default name and symbol. To open the Waypoint, press on the top “Donut” section, or the 3-bar icon, User Data, and Waypoints. There, you can rename, choose a symbol, move, delete, add information, etc. for the Waypoint.
Creating Routes
You can create routes on the ActiveCaptain app. Pan to the starting point of the route and press to open the “Donut” menu. Press the route icon to create the first waypoint. Continue pressing on the chart to create additional waypoints for the route. Press Done to end the route. The route and its waypoints will have default names. Press on the route, and select the route in the “Donut” menu, or press the 3-bars icon, User Data, and Routes to open the route. There you can rename it, edit it, delete it, etc.
Importing GPX Files to ActiveCaptain App
You can add routes and waypoints created on other devices, or by other programs, such as HomePort, or OpenCPN to the ActiveCaptain app. You need a way to copy your GPX file to your mobile device. I use Google Drive, but there are others, such as DropBox, that will work just as well. Sometimes you can open the files directly from the Google Drive app on your device, but if that doesn’t work, you might need to copy the file to local storage.
Once you have the GPX file on your mobile device, select it and, when prompted, open it with ActiveCaptain. The routes and/or waypoints should now appear in User Data.
Exporting GPX Files from ActiveCaptain App
You can export your routes and waypoints as GPX files. Press on the 3-bar menu icon in the upper-right of the chart display, choose User Data and press the 3-dots menu icon in the upper-right corner. Select Export to GPX File and choose your method. I use Mail, and send an email to myself. I get a GPX file with all routes and waypoints. You can import the file into HomePort, OpenCPN, or ActiveCaptain on another device to work with the routes and waypoints in the GPX file.
Summary
We have been spending a lot of our time on the RV, and this was the first multi-day cruise we planned since Dry Tortugas. We were aware of some of the changes to ActiveCaptain, but hadn’t looked at it for a while. I was overwhelmed at first, but quickly came to realize how much better it is.
The website works on any desktop or mobile browser. The ability to switch between Sonar, Nautical, NOAA, Street and Satellite charts is a great feature. The app is all-new, packed with features, and very powerful. Garmin has put a lot of effort into a free website and app for the boating community, but the real value is still the ActiveCaptain Community, and that continues to get better.
Next
In the next article of this series, I’ll talk about two GPX tools; Clean Route, and Convert GPX to CSV. The final article in this series will be an example that puts it all together.
When cruising on Questeria, we like to have a route on our chartplotter. This makes for a less stressful day. When cruising for several days, we plan the routes ahead of time and organize them using Google Sheets. We use a number of tools in the process, some of which I created myself. Below is a snapshot of a spreadsheet with our routes.
Spreadsheet of Routes
This spreadsheet contains seven routes, each on its own sheet. Each sheet contains waypoints, latitudes, longitudes, distances, bearings, durations and times. I will explain how I did this in this series of posts.
In the first post I gave an overview of the route planning process. Then, I talked about OpenCPN. In this post I talk about HomePort and, in future posts I’ll talk about ActiveCaptain and GPX Tools.
Then, I’ll walk through an example using a route that I created as part of a trip from Florida Keys to Moore Haven, FL. Finally, I’ll explain how I put the routes together in a spreadsheet and load them on our Garmin 4208 chartplotter and other devices.
HomePort
We bought a Garmin 4208 chartplotter in 2006 and I was expecting to be able to plan my routes on OpenCPN and send them to my Garmin 4208 chartplotter. At first, I couldn’t make that work. Then, Garmin came out with HomePort. I thought I would be able to use HomePort to plan routes on my computer, but it was harder than I thought. I was not used to the user-interface, and early versions had some bugs. So, I planned my routes on OpenCPN, exported them to HomePort, sent them to an SD card and copied them to our chartplotter. HomePort uses the same charts as the chartplotter and sometimes I would notice things I didn’t see using the NOAA charts in OpenCPN. Then, I started using both programs to edit my routes.
Note: Garmin uses the term “Map” in place of the more nautical term “Chart”. I will continue to use “Chart” in this, and other posts, but they refer to the same thing.
HomePort is free software from Garmin that you can use as a route planning tool. It does not come with charts, you have to copy the charts from your Garmin chartplotter to an SD card.
What I like most about HomePort is that when I create a route, it looks the same as on my chartplotter. When I zoom in and out, the detail of the chart automatically changes, I can easily switch between overview and detail.
HomePort Screenshot
Here is a screenshot of HomePort with routes. It looks the same on our Garmin chartplotter.
Downloading HomePort
You can start using HomePort by downloading it from the Garmin HomePort Download Page. Go to the page and choose Windows or Mac. Download the executable file, run it and follow the instructions.
When you start it for the first time you’ll see a small-scale global map (chart). It’s not detailed enough for planning routes. You have to copy the built-in charts from your Garmin chartplotter. Also, it will not show any devices until you copy your chartplotter User Data.
Setting Up HomePort
The Garmin 4208 uses a standard SD card to transfer data. Our computer is a Windows tablet, that has a slot for a micro SD card. We have a 16G micro SD card and an adapter that allows it to plug into a standard SD card slot. First, we copy the built-in map to the Micro SD card, and then we copy the User Data. User Data is all routes, tracks and waypoints stored in the chartplotter.
We use the 16G Micro SD card for other things, like NOAA charts for OpenCPN. The card is slightly more than 1/4 used with Garmin files, NOAA charts from six states and the Bahamas, and other miscellaneous files.
Copying the Charts (Map)
I plug Micro SD card into the adapter and then into our Garmin 4208 chartplotter, and select Copy Built-in Map. It takes several minutes to copy the 1.9GB file to the card. I leave the card inserted for the next step.
Copying User Data
Next, I copy the User Data. With the SD card still inserted, I select the Manage Card prompt, and then Save to Card. It prepares the card, transfers User Waypoints, Routes and Tracks. Then, I eject the SD card from the chartplotter, remove it from the adapter and plug it into my computer.
When I start HomePort, with the SD card in place, HomePort finds it and shows the charts from our chartplotter and a 4208 device with a file named USERDATA. USERDATA is an ADM file that contains all the routes, tracks and waypoints from our chartplotter.
Using HomePort
The HomePort window contains a menu bar, Toolbar, and three or four panes. The menu bar, along the top of the display, has drop-downs for File, Edit, View, Find, Tools, Device, Utilities, Charts, and Help. The Toolbar has icons for Pan, Zoom, Select, Measure, New Waypoint, New Route, New Track, Insert, Move Point, Erase, Divide, and other actions. The upper-left-hand pane contains Folders, Lists, and Devices. Beside and below that are the Routes, Tracks and Waypoints pane, a Navigation Chart pane, and/or a Fishing Chart pane. The Navigation Chart pane and Routes, Tracks and Waypoints pane may be swapped.
Folder, List and Device Pane
HomePort provides folders and lists for organizing your routes, waypoints and tracks. Folders can contain folders and lists. Lists can contain routes, tracks and waypoints. The top folder is named My Collection. A device is created when you save charts or User Data to an SD card on your computer. We have a device named 4208, with an ADM file named USERDATA, and a chart file. The ADM file contains routes, tracks and waypoints. It’s like a list, but can be transferred to and from our Garmin.
The Folder, List and Device pane is where you select a folder, list or device. Select the top folder, My Collection, to show all your routes, tracks and waypoints, or select a sub-folder or list to show a subset of your routes, tracks and waypoints. Select an ADM file on your device to show routes, tracks and waypoints coming from, or going to your chartplotter. Select a list or ADM file, not a folder, to create or modify routes, tracks or waypoints.
You can adjust the relative size of the Folder, List and Device pane by dragging the bar between it and the lower pane up and down.
Route, Track and Waypoint Pane
The Route, Track and Waypoint pane lists items in the folder, list, or ADM file that is selected in your Folder, List and Device pane. At the bottom of the pane is a search box and a hide/show filters icon. The search box is used to find an item in your selected folder, list or ADM. If Show Filters is enabled, there is a row of icons below the search box to show only certain types of items, for example routes. The selected filter is highlighted with a blue rectangle.
There is a tab between the Route, Track and Waypoint pane and Chart pane that swaps locations of the two panes.
Chart Panes
The Chart pane, or panes show your nautical chart, overlaid with your routes, tracks and waypoints in the selected folder, list or ADM file. You can elect to show a navigation pane, fishing pane or both. I show only the navigation pane when planning a cruise. If both chart panes are shown, you can drag the bar between them left or right to change their relative sizes. Swap the Navigation Chart pane and Route, Track and Waypoint pane by clicking the tab between them.
Zooming
You can zoom the Chart panes in and out when one is selected. I normally use the scroll wheel of my mouse to zoom. You can also use the minus (-) and equal (=) keys on your keyboard. Another way to zoom in and out is to hover the mouse over the triangle in the upper-left of the Chart pane to bring up a slider. Drag the slider up and down to zoom in and out. You can also zoom in by selecting the Zoom tool (magnifying glass icon) and clicking on the chart. If you have a touchscreen, you can pinch and spread. The chart will become more detailed as you zoom in and less detailed as you zoom out.
There is a distance bar in the bottom right of the chart pane that shows the chart detail. It shows a distance in some unit of measure, for example, 500 ft. It changes as you zoom in and out. If you zoom in too much for the chart detail, overzoom will appear under the distance bar.
Menu Bar Actions
The menu bar is across the top of the HomePort window and has the following drop-down tabs:
File — Use the File tab to create new items, import/export, backup/restore, print and exit
Edit — Use Edit to open items, undo, redo, cut, copy, paste, duplicate, delete, rename, send to, move to, etc.
View — The View tab has actions for changing the look of your window. For example, changing the toolbar, or changing to full-screen mode.
Find — The Find tab lets you search for locations, items, etc.
Tools — Activates some of the tools. These tools can also be activated using the Toolbar. See below for a description of some tools.
Device — Send to/receive from an ADM file.
Utilities — Manage boat profiles, check for updates and set program options, such as units of measure.
Charts — Switch charts, buy charts, install charts, etc.
Help — Help, Garmin Forums, Report Chart Error, Check for Software Update, View HomePort License, View Garmin Privacy Policy and About Garmin HomePort.
The one we are going to discuss is the most recent social networking site launched by the Pfizer as the branded product used to treat erectile dysfunction The execution of kamagra or amerikabulteni.com generico levitra on line sildenafil citrate performs well in the human body to erect the penis as well as the rest of the body. Sentiment that you simply have on’t need to stay away from androgens.” Various other benefits associated with research chemicals tamoxifen include the treatments for bi polar conditions to cancer malignancy treatment methods. super cheap viagra Consult with a doctor before starting tadalafil 20mg india view for more info and discuss other diseases you are experiencing, medicines being taken and allergies. Acai contains a wealth viagra overnight usa of vitamins and has zinc, potassium, iron, fiber.
Creating New Folders and Lists
HomePort gives you the option to organize your routes, tracks and waypoints using hierarchical folders and lists. For example, you could have a folder for every year, and multiple lists of waypoints, tracks and routes in each folder. Bit we don’t use folders like that, we just have a list for each cruise and one for tracks in the top folder, My Collection.
Every route, track and waypoint within a list or ADM file must have a unique name. This applies to both standalone waypoints and waypoints within a route. HomePort and the Garmin 4208 modifies duplicate names by appending a digit to the end. The Garmin 4208 forces names to uppercase and truncates them to ten characters. After truncating, it will append a digit to ensure no duplicates. The modified names can get confusing, so I try to keep my item names unique, shorter than ten characters, and use different lists for liked-names items.
To create a new folder, select the parent folder in the Folder, List and Device pane. Then, click File, New and List Folder. A new folder will appear in the Folder, List and Device pane. It will have a default name. Type a name for your folder and press Enter. To create a new list, select a folder in the Folder, List and Device pane. Then, click File, New and List. A new list will appear in the Folder, List and Device pane. It will have a default name. Type a name for your list and press Enter.
Tools
There are multiple ways to activate a tool. For example, to activate the waypoint tool, you can click on the flag icon in the Toolbar, click Tools, then Waypoint in the menu bar, click File, New, and Waypoint, or press “W” on your keyboard.
The Toolbar is under the menu bar. The Toolbar has groups of tool icons. The icons include, options to send or receive to/from a device, Pan, Zoom, Select, New Waypoint, New Route, New Track, route and waypoint editing, view options, tide, current and others. Some of these tools can be activated using the menu bar Tools drop-down. When you activate a tool, the cursor will change to indicate which tool is active. Deactivate the tool the same way you activated it, or by selecting another tool.
Select Tool
The Select tool is the default tool. Activate it by clicking the pointer icon or pressing “S” on the keyboard. Use the select tool to select a route, track or waypoint on the Chart pane.
Pan Tool
To pan, select the Pan tool (hand icon or “H”). The cursor will change to a hand. Hold the mouse and drag the spot around the Chart pane. The Pan tool can sometimes be used to select items on the Chart pane.
Creating a Waypoint
To create a waypoint, select a list in the Folder, List and Device pane. Then, activate the Waypoint tool (flag icon or “W”). The cursor will change to a flag. Click on the Chart pane to create a new waypoint. Deactivate the Waypoint tool by clicking Waypoint (flag) icon or pressing “W”, the Pan tool will be activated. A new waypoint will appear in the Routes, Tracks and Waypoints pane. HomePort will assign a name and symbol to the waypoint. Double-click on the waypoint in the Chart pane or Route, Track and Waypoint pane to open the waypoint. There, you can rename the waypoint, choose a symbol, edit the position and set other options for the waypoint.
Creating a Route
To create a route, select a list in the Folder, List and Device pane. Then, activate the Route tool (Three squares connected with a line icon or “R”). The cursor will change to a pencil. Click on the Chart pane to create the starting waypoint. Move the cursor and click to create the next waypoint. Continue creating waypoints until you reach the end of your route, or the edge of the Chart pane. Deactivate the Route tool by clicking the Route icon or pressing “R”. The Pan tool will be activated. Click the Route icon or press “R” again to continue adding waypoints to your route. A new route will appear in the Routes, Tracks and Waypoints pane. HomePort will assign a name to the route. Double-click on the route in the Chart pane or Route, Track and Waypoint pane to open the route. There you can rename the route and set other options.
Route and Waypoint Editing Tools
For me, creating a route is an iterative process. I start at a high-level, create a few waypoints and zoom in and refine. Select the route or waypoint to edit by clicking on the item or name. There are four tools for editing the selected item. If you make a mistake, you can undo it by clicking Edit, Undo, or pressing Ctrl-Z on your keyboard.
Insert Waypoint
Use the Insert tool to add waypoints to an existing route. First, select the route by clicking on the name. Then, activate the Insert tool by clicking the Insert icon (+ and Pen) or pressing “I” on the keyboard. The cursor will change to a Pen+. Next, click on the route where you want to insert a waypoint. Then, move the cursor to where you want the waypoint to be and click. A new waypoint is now added to the route. Continue inserting waypoints as desired. Exit the Insert tool by clicking the Insert icon or pressing “I”. The Pan tool will be activated.
Move Waypoint
Use the Move Point tool to move a standalone waypoint, or a waypoint in a route. First, select the route or waypoint by clicking on the name. Then, activate the Move Point tool by clicking the Move Point icon (Pointer and Square) or pressing “M” on the keyboard. The cursor will change to a Pointer and Square. Next, hover the cursor over the waypoint to be moved. The waypoint will be highlighted. Then, click and drag the cursor to where you want the waypoint to be and release the mouse button. The waypoint is moved.
Erase Waypoint
Use the Erase tool to remove waypoints from an existing route. First, select the route by clicking on the name. Then, activate the Erase tool by clicking the Erase icon (Eraser and Square) or pressing “E” on the keyboard. The cursor will change to an eraser. Next, hover the cursor over a waypoint in the selected route. The waypoint will be highlighted. Then, click to remove the highlighted waypoint from the route.
Divide Route
Use the Divide tool to split an existing route into two or more routes. First, select the route by clicking on the name. Then, activate the Divide tool by clicking the Divide icon (Scissors) or pressing “X” on the keyboard. The cursor will change to a pointer and scissors. Next, hover the cursor over the selected route, where you want to split it. The last part of the route will be highlighted. Then, click to split the route into two routes. You now have another route in your list. Exit the Divide tool by clicking the Divide icon or pressing “X”.
Other Useful Actions
Here are some common actions performed with the File or Edit drop-down menu bar.
Deleting or Removing an Item
You can delete or remove anything you can create. For example, folders, lists, routes, waypoints, etc. In general, you click on the item to be deleted to select it. Then, you click Edit, in the menu bar and look for options to delete or remove. You can also right-click on the item. To delete a route, track or waypoint, you must have a List or ADM file, not a Folder, selected in the Folder, List and Device pane. You may have the option of removing the item from the selected list, or deleting it everywhere. When removing a folder, list or ADM file, you may be given the option to Remove and Delete Unique Content, or just Remove. If you delete or remove something by mistake, click Edit, Undo to restore it.
Duplicating an Item
To duplicate a folder, list route, waypoint, etc., click on the item to select it. Then, click Edit and Duplicate. HomePort will assign a default name to the duplicate item. I sometimes duplicate a route and edit it to create an alternative.
Renaming an Item
To rename an item, click on the item. Then, click Edit and Rename, type the new name and press Enter.
Sending or Moving an Item
Use Send To… to copy items to lists or ADM files. First, select the item to be copied by clicking on it. Then click Edit and Send To… You will get a menu of folders, lists and ADM files to select your destination. Use Edit, Move To… to move a list to another folder.
Joining Routes and Tracks
You can join multiple routes or tracks into one. We use this feature to create a new route from two or more routes, or one track from multiple tracks from the same day that were created when our GPS lost and regained its signal. First, select all the routes or tracks to join by clicking on the names while pressing the Ctrl key. Then, click Edit, Advanced, and Join theSelected Routes… or Join the Selected Tracks… You will see a menu that allows you to choose the order of the routes or tracks. Click Ok when ready.
Exporting GPX Files
Share routes tracks and waypoints with other programs as GPX files. Select the route, track or waypoint to be exported. Then, click File, Export, and Export Selection… A file explorer menu will come up to specify where to store the file.
Importing GPX Files
You can import GPX files on your computer that were created by HomePort or other programs. First select the List that you want to import the route, track or waypoint into. Then, click File and Import to ‘list name’… You will get a File Explorer menu. Select the file to import and click Open. You will see the new routes, tracks or waypoints in the selected list.
Transferring To/From Chartplotter
The Garmin 4208 has limited memory for routes, tracks and waypoints. Therefore, we don’t store routes that we don’t plan to use right away. When track memory fills up, it will overwrite the oldest track, so at the end of the day, we save our tracks to HomePort. When we anchor in a new spot, we like to save a mark and copy it to HomePort as well. To ensure they are both in sync, we copy USERDATA to our SD card every time we stop for the day. Then, we copy any new items to HomePort and organize them in lists. We edit any new waypoints, remove any routes that we are finished with, replace any routes that have been modified and add any new items we might want. Then we write it back to the Garmin 4208.
We have a list that is only for completed tracks. We send any new tracks to the list, and combine them into one track per day. Then we rename them to trackYYYYMMDD (year, month and date) so we can go back and find them later.
The steps we use to copy data from the Garmin are:
Exit HomePort, safely remove Micro SD card from computer and insert it into adapter.
Turn on Garmin and select Agree.
Insert SD card adapter into Garmin.
Select Manage Card
Select Save To Card
Select USERDATA Save To Card
Select Yes to Overwrite this file: USERDATA
The Garmin will say:
Preparing Card
Transferring User Waypoints
Transferring Routes
Transferring Tracks
Card Prepared
User Waypoints Transferred
Routes Transferred
Tracks Transferred
Transfer Complete!
You can eject the SD card from the Garmin unit.
Next, we insert the Micro SD card into the computer, and start HomePort. Select USERDATA, under 4208 device and we can see an exact copy of what is in our chartplotter. New waypoints will probably have default names and symbols, so we edit those. New tracks will have default names, we send those to the Tracks list, where we combine and rename them. If we have modified any routes or waypoints on the Garmin, we send them to our working list. Next, we update USERDATA with any new routes or waypoints. If we have any changes to routes or waypoints, we remove the old ones from USERDATA and send the updated items. Otherwise, HomePort treats them as duplicates and renames.
We copy the data back to the Garmin before we move the boat again. The steps are:
Exit HomePort, safely eject the Micro SD from the computer and insert it into the SD card adapter.
Turn on Garmin and select Agree.
Insert SD card adapter into Garmin.
Select Manage Card
Select Replace From Card. (We don’t select Merge From Card because we always keep our Micro SD card up to date.)
Select USERDATA
Select Replace From Card.
The Garmin will say:
Receiving User Waypoints
Receiving Routes
Receiving Tracks
User Waypoints Transferred
Routes Transferred
Tracks Transferred
Transfer Complete!
Our Garmin chartplotter is now in sync with HomePort and ready for our next trip.
Summary
HomePort has many features. I’ve used it for a number of years, but I discovered new things about it when writing this article. The Garmin charts are excellent, and you can zoom and pan seamlessly. If you have a Garmin chartplotter that is compatible with HomePort, I encourage you to try it — you have nothing to lose.
Next
The next article in this series talks about ActiveCaptain. Later articles include GPX Tools and an example that puts it all together.
OpenCPN was updated after I posted this article. I have updated it with footnotes to address some of the changes in OpenCPN 5.0. Click here to see details of what’s new in OpenCPN 5.0
When cruising on Questeria, we like to have a route on our chartplotter. This makes for a less stressful day. When cruising for several days, we plan the routes ahead of time and organize them using Google Sheets. We use a number of tools in the process, some of which I created myself. Below is a snapshot of a spreadsheet with our routes.
Spreadsheet of Routes
This spreadsheet contains seven routes, each on its own sheet. Each sheet contains waypoints, latitudes, longitudes, distances, bearings, durations and times. I will explain how I did this in this series of posts.
In the post titled Planning Multi-Day Cruises—Overview, I gave an overview of the route planning process. In this post I talk about OpenCPN. In future posts, I’ll talk about other route planning tools we use before our cruise:
Arousal and stimulation are both important stages of gaining and keeping erection. cialis no prescription J Ethnopharmacol 2000;71:193-200.Uabundit brand levitra in usa N, Wattanathorn J, Mucimapura S, Ingkaninan K. Activity: Sildenafil Citrate is the key part inconceivably compacted in this medication. purchase viagra online Erectile dysfunction generic india viagra is the problem when a male cannot hold up erections for enough to achieve successful lovemaking.
Then, I’ll walk through an example using a route that I created as part of a trip from Florida Keys to Moore Haven, FL. Finally, I’ll explain how I put the routes together in a spreadsheet and load them on our Garmin 4208 chartplotter and other devices.
OpenCPN
OpenCPN is a free software project that you can use as a chartplotter or route planning tool. It does not come with charts, but it works with different kinds of charts, that can be downloaded for free.
OpenCPN Screenshot
Here is a screenshot of OpenCPN with some routes, tracks and waypoints.
Setting Up OpenCPN
Start using OpenCPN by downloading it from the OpenCPN download page. Click on the download for your computer type and open the executable file to install OpenCPN on your computer. OpenCPN has very good offline and online help and documentation. But it is intuitive, so you can probably get by without it.
Downloading Charts for OpenCPN
Next, you have to download charts for your cruising area. If your cruise is in the US, you can use free NOAA, and/or Army Corps of Engineers charts. You need to decide on RNC charts², ENC charts, or both.
Large Scale vs. Small Scale
If you pick a particular point near the coast, it will be covered by multiple charts of different scales, from Large Scale to Small Scale. A Large Scale chart has more detail and covers less area, while a Small Scale Chart covers more area with less detail.
RNC, or Raster Navigational Charts, look like paper charts. They are organized by chart numbers, which are 2 to 5 digit numbers. The numbers are in no particular order, so you need a catalog or locator to know what RNC chart to use. Some disadvantages of RNC charts are that they take more storage and are not updated as often as ENC charts. You must use the units of measure, for the chart. For example, if the chart is in feet, you can’t view it in meters.
ENC Charts
ENC, or Electronic Navigational Charts, take much less storage than RNC charts. For example, ENC charts for FL are 60M versus 128M for RNC charts. ENC files have alphanumeric names that tell you the state and coast guard district number, such as US4FL10M. ENC charts have more viewing options. There are fewer charts for small and large scale, so you can zoom in and out without changing charts. NOAA updates ENC charts more often than RNC charts. You can specify a unit of measurement preference for ENC charts. For example, you can display depth in feet, meters or fathoms. I prefer the look of RNC charts over ENC charts. That is because I started off with paper charts, but I use both when planning a route.
Charts for Bahamas
If you want charts for the Bahamas, you’ll need to purchase NV Chart Combo Packs. You pay for a paper chart book and also get a CD of electronic RNC charts that are identical to the paper charts.
Chart Downloader
The current version of OpenCPN includes a Chart Downloader. This was not available when I started using OpenCPN, so I still use the manual method. You’ll need to use the manual method for NV Charts for the Bahamas. To get to the Chart Downloader, first click the Options tab (the wrench or cogwheel icon¹). Then, click Charts and Chart Downloader. Next, click Addand select the charts for your cruising area. For example, USA – NOAA and Inland charts, RNC, by States, FL – Florida.
Manually Downloading Charts
If you use the manual method, and your cruise is in the US, you can download RNC and ENC charts from the NOAA chart website. I store them in a folder named charts, on a micro SD card that is always plugged into my computer. I do this because my computer is a Windows tablet, with limited drive space. When I first started out, I created a new folder by opening a File Explorer menu, finding my SD card, Secure Storage Device (D:), right-clicking on it, selecting New and Folder. Then, I right-clicked on New Folder, selected Renameand named it charts. I like to keep each state in a separate folder. So, I right-clicked on charts, selected New and Folder. Then, I renamed New Folder to something like FL_RNCs. I made another folder for the ENC charts, like FL_ENCs and then an RNC and ENC folder for every state I was interested in.
I now have a subfolder for ENCs and RNCs for each state we might cruise in. It’s not important how your charts are organized on your computer, because OpenCPN will figure it out. You just need to remember the full path name of the top directory, or directories of your unzipped chart files. In my case this is D:\charts.
Both types of charts are downloaded as ZIP files. You can download them as individual files, or groups organized by coast guard districts, states or regions. I like to download them by state. First, I go to the NOAA chart website and click on RNCs or ENCs. Next, I find ENCs/RNCs by State and click on the desired state. This downloads a zip file to my computer. Then, I extract it by right-clicking on it and selecting Extract All… This brings up a File Explorer menu. I click Browse… and select the desired folder, for example D:\charts\FL_RNCs, and click Extract.
For my Bahamas charts, I have a subfolder in charts named Bahamas. I installed my NV Charts from the CDs there.
When we are starting to plan a cruise, I download updated charts and extract them to the appropriate folder, overwriting everything.
OpenCPN Settings
When you download new charts, you must tell OpenCPN where they are.
Chart Settings
Once all the charts are downloaded and extracted, you need to go into settings and customize OpenCPN. The first thing to set is the charts directory. To get to the Chart Directory, first click the Options tab in the Toolbar (the wrench or cogwheel icon¹), or Tools in the menu tab and Options… Next, click Charts and Chart Files. Then, click Add Directory… and select your charts directory. In my case, D:\charts. You can add multiple directories if needed. Click Apply when all chart directories are added. Next, click to check the Scan Charts and Update Database and Force Full Database Rebuild boxes, and click Apply. You can skip this step if you use the Chart Downloader. As a final step, click Prepare All ENC Charts. This must be done every time you download updated charts. Next, click the Vector Chart Display tab and choose your preferences.
After setting your chart options, you can start using OpenCPN to create routes and waypoints, but there are other preferences you might want to set.
Connections
If you want to use OpenCPN as a chartplotter or for AIS, you have to set up connections. To get to the Connections menu, click on the wrench or cogwheel icon¹ or Tools and Options… And then, Connections. We don’t normally use OpenCPN as a chartplotter because our Garmin 4208 is easier to see in sunlight and it’s weatherproof. But we have OpenCPN setup as a chartplotter in case we need it as a backup. Our Windows tablet doesn’t have a built in GPS, so we use an external GPS that plugs into a USB port. We can also plug in our Garmin AIS 600 transponder. See my post titled AIS, to read about connecting OpenCPN to our Garmin AIS 600.
The connections settings can be challenging because every computer is different, but here are some tips for setting an external GPS and AIS on a Windows computer:
Open Windows Device Manager on your computer before plugging in your external GPS or AIS.
Click Ports (COM & LPT) to expand.
Plug in your external GPS and look for a new device. Mine is named Prolific USB-to-Serial Comm Port (COM3).
In OpenCPN connections, click Add Connection, check Serial, then click the ∨, in the DataPort field, and select the corresponding item. For example, COM3 Prolific USB-to-Serial Comm Port.
Set Baudrate to 4800, Priority to 1 and click Apply.
Do the same thing for your AIS connection, except set Baudrate to 38400 and Priority to 5.
If your GPS is working, you should see one or more green bars in the upper right-hand side of your display. You will also see your Ship Latitude and Longitude in the lower left-hand corner.
Other Settings and Options
There are other settings and options you can choose based on your personal preferences or your computer. To get to these settings, click the Options tab in the Toolbar (the wrench or cogwheel icon¹), or Tools menu bar tab and Options… You get a menu with six icons along the top. I’ve already discussed Chart and Connections. Here are the other option categories:
Display — Select the General tab to set some general options, like Navigation Mode and Default Boat Speed. Select the Units tab to choose distance, speed and depth units and Lat/Long display preferences.
Ships — Own ship tab lets you set options for your vessel. AIS Targets tab lets you set options for other vessels. MMSI Properties lets you set options for other vessels based on their MMSI, Maritime Mobile Service Identity, number.
User Interface is for setting languages and other UI options, such as Show Menu Bar. If Show Menu Bar is checked you get a traditional menu bar at the top of the display. The menu bar is mostly redundant because you can perform the functions using the Toolbar. There is also a Show Chart Bar box. If checked, there will be a row of rectangles at the bottom of the display. Each rectangle lets you select a chart, going from left to right, large scale to small scale. I like to have that checked.
A few words about Lat/Long settings… When I took piloting classes, we used Degrees, Minutes and Seconds (dd° mm’ ss”) for latitudes and longitudes. Now, with more sophisticated electronics, I often see them expressed as Degrees and Decimal minutes (dd° mm.mmm’) or Decimal Degrees (dd.ddddd°). The OpenCPN lat/long format setting is for display only — you can enter them in any valid format. Use a space to separate degrees, minutes and seconds. You can enter the direction as “N”, “S”, “E”, “W”, “+” or “-” (“+” for north and east, “-” for south and west). You can even copy or paste a latitude and longitude pair into OpenCPN in a single step. You can change Lat/Long display preferences to easily convert between formats.
Navigating OpenCPN
Here are some tips for navigating OpenCPN. (No pun intended.) On OpenCPN there are usually multiple ways to do the same thing. For example, to zoom in and out you can:
Click Zoom In and Zoom Out on the Navigate menu bar ³
Press plus (+) and minus (-) keys on your keyboard
Click plus (+) and minus (-) icons on the Toolbar
Roll the scroll wheel on your mouse
If you have a touch screen, you can pinch and spread the screen
Since there are multiple ways to do things, I normally don’t show the menu bar, I use the Toolbar. I have a touchscreen, but I usually use my two-button mouse, with a scroll wheel, to do everything I want.
Zooming in to a Particular Point on a Chart
If enabled, there is a row of rectangles along the bottom of the display. Each rectangle corresponds to a chart for the area displayed. They are arranged from left to right, Large Scale (more detail, less area) to Small Scale (less detail, more area). You can click on rectangles in the chart bar to switch to different charts. If you right-click on a rectangle, it gives you information about the chart, and a preview. The blue rectangles are RNC charts, the green are ENC charts. The blue rectangles with a red line through it are RNC charts for a waterway.
You can also switch between Large Scale charts and Small Scale charts by clicking on the Down Arrow (larger) or Up Arrow (smaller) icons on the Toolbar, or you can also use F7 (larger) and F8 (smaller) keys on your keyboard ⁴.
To find a particular spot on a chart, zoom-out to a wide view and select a scale chart that covers the area. Find the approximate point and hold the mouse button and drag it to the center of the display. Then, right-click on an area without a route, track, waypoint, etc., and select Max Detail Here5or click on the left-most rectangle in the chart bar. If you don’t see Max Detail Here, you are selecting an item, so right-click on a nearby spot until you see Max Detail Here, and click on it. OpenCPN will switch to the largest scale chart for that location in your chart directory. You can then zoom in to see your spot. If your spot is not there, recenter and repeat. If you zoom in too much for the chart, you will see OverZoom in top-left of your display. You can switch to a larger scale chart, or zoom out in that case.
Creating a Waypoint
To create a waypoint right-click on the spot and select Drop Mark. Double-click on the waypoint to bring up its properties menu. There, you can name it, select an icon, or change its location, etc. Click on it to select it. When it’s highlighted you can hold the mouse button and drag it around on the chart. To delete it, right-click on it and select Delete.
Creating a Route
A route is essentially a series of ordered waypoints. To create a new route, you click the Create Route icon (the first zigzag line icon in the Toolbar, or a pen and lines in version 5.0+). The cursor will change to a pen. Click on the starting point and then on the next point. Continue clicking until the end point is reached, or you get to the edge of the display. End the route by right-clicking and selecting End Route, or click on the Create Route icon (the first zigzag line), or Show Tool Bar (three horizontal lines) in version 5.0+ 6. Finally, right-click on the route and select Properties…, to name and document the route.
Editing a Route
For me, creating a route is an iterative process. When I first create a route, I use a small scale chart, zoom-out to a high-level and create a few waypoints. Then I zoom-in, switch to a larger scale chart, and edit it to a finer detail. I spend most of my route planning time editing. Here are tools available for editing a route:
Inserting a Waypoint — Right-click where you want to insert the waypoint and select Insert Waypoint.
Appending a Waypoint — Right-click anywhere on the route and select Append Waypoint. The cursor will change to a pen. Click on the next location on the chart. Continue clicking to keep appending waypoints. When finished, right-click and select End Route, or click the first zigzag line icon or Show Toolbar icon.
Moving a Waypoint — Click on the waypoint you want to move — it will be highlighted when selected. With the cursor over the highlighted waypoint, hold the mouse button down and drag the waypoint to where you want it. If you move a waypoint by mistake, right-click and select Undo Move Waypoint. If you want to move the waypoint to a specific latitude and longitude, double-click on the waypoint and edit the latitude and longitude fields.
Deleting a Waypoint — Right-click on the waypoint you want to delete and select Delete. This removes the waypoint from the route and deletes it.
Removing a Waypoint from Route — Right-click on the waypoint you want to remove and select Remove from Route. This removes the waypoint from the route but does not delete it.
Reversing the Route — Right-click on the route and select Reverse… You will get a pop-up asking if you want to rename the waypoints, select Yes, No or Cancel.
Splitting the Route — Right-click on the route and select Properties… You will get a Route Properties menu. Click on the waypoint where you want to split the route into two routes. Then click Split Route. You will now have two routes, one with a “_A” on the name and the other with a “_B” on the name.
Route and Mark Manager
The two rectangles icon, or the second zigzag line icon, in older versions is the Route and Mark Manager. Clicking this icon brings up a menu that shows all routes, tracks or waypoints. You can do things like modify properties or delete items. You can also import and export routes, tracks and waypoints to/from your computer.
Managing Routes
Select the Routes tab in the Routes and Marks Manager to manage your routes. You will see a list of your routes, the names and their Depart From and Destination fields. To the left of the route name is an eyeball. Clicking on the eyeball will toggle between showing and not showing the route on the chart. There is a line of buttons along the right side of the display. These are actions to perform on a selected route, and are grayed-out if no route is selected. Along the bottom of the display are buttons not associated with a selected route, Import GPX…, Export All Visible… and OK. Select a route by clicking on it. You can perform actions on the selected route:
Properties… — This is the same as double-clicking on the route.
Activate — Navigate to this route when using OpenCPN as a chartplotter.
Center View — Center the display on this route.
Reverse — Swap Depart From with Destination.
Delete — Delete this route.
Export Selected… — This action exports the selected route to your computer as a GPX file. It brings up a File Explorer menu to specify where the GPX file is stored.
Send to GPS — Sends selected route to chartplotter, over serial port, if your chartplotter supports this function and is connected.
Delete All — I don’t use this button.
Importing a GPX File
If you want to import a route into OpenCPN that is saved on your computer as a GPX file, click Import GPX… This brings up a File Explorer menu so you can select the GPX file to be imported. Select the file and click Open. If the GPX is a valid route file, you will see at least one new route in your list. It will be named for the route name, not necessarily the same as the file name. If you already have a route of the same name, they will both be shown. If there are more than one route in the GPX file, they will all be shown. If the imported route does not show up in the route list, it could be a waypoint or track GPX file, in which case it will be in one of those lists, or the GPX file could be corrupted. OpenCPN will not tell you if you try to import a corrupted GPX file.
Exporting GPX Files
I talked about exporting a single, selected route above. Here I talk about exporting multiple routes. Export All Visible… will export all route in the list to your computer. Clicking it will bring up a File Explorer menu to specify where the GPX file is stored on your computer. Only routes that are shown will be exported. Routes with a red “X” through the eyeball will not be exported. This is a good method of backing-up all your routes. Another way to export multiple routes is to select the routes by clicking on the routes you want to export while holding down the ctrl key, and then clicking Export Selected.
Managing Tracks
A track is similar to a route, except that it is based on actual travel. When you click on the Tracks tab in the Route and Mark Manager you see a list of tracks listed by name and length. You can click on the eyeball icon to the left of the track name to toggle showing and not showing the track.
On Questeria, we save our tracks from our Garmin 4208 chartplotter to an SD card. Then, we import them into HomePort. Next, we rename the tracks to show the date and export them to the computer, as a GPX file. We don’t import every track into OpenCPN, but sometimes we want to look at one and use it to refine our route. Importing a track into OpenCPN is just like importing a route. Click Import GPX… and select the GPX file of the track.
If you use OpenCPN as a chartplotter, you can start a new track by clicking Start Track. You can perform many of the same actions as routes, like Properties, Delete, Export, etc.
Another action available is to create a route from a track. Just click Route from Track and OpenCPN will create a route. I don’t use this feature because, in my opinion, the route has too many waypoints. I think it is easier to create a new route, using the track as a guideline.
Managing Waypoints
Select the Waypoints tab in the Routes and Marks Manager to manage your waypoints. You will see a list of your waypoints, their names and their distance from your location. To the left of the route name is the icon for the waypoint, such as an anchor or a diamond. The actions you can perform on a selected waypoint are the same as a route.
We like to have the same waypoints on OpenCPN and HomePort. We import and export to keep the two programs in sync. Importing and exporting waypoints works the same as importing and exporting routes and tracks
Summary
There is a lot more to OpenCPN than what I have described here. It’s pretty easy to use once you start. The documentation is excellent, if you are the kind of person who likes to read manuals, but if you aren’t, it’s pretty easy to figure out. If you make a mistake, you can undo it or delete, and start over. Export your routes, tracks and waypoints periodically to save your work.
Next
In the next post of this series, I will talk in detail about HomePort. Then, in future posts, I’ll talk about ActiveCaptain, GPX tools and putting it all together with an example.
Footnotes Addressing OpenCPN 5.0+
¹ OpenCPN version 5.0 replaced the wrench icon with a cogwheel icon.
² NOAA Raster Nautical Charts (RNC) are being discontinued. Click here for more details.
³ Zoom-in/out buttons are gone in OpenCPN version 5.0.
⁴ Scale up/down buttons are gone in OpenCPN version 5.0. Instead, use the rectangles in the chart bar, or right-click and select Scale In or Scale Out.
5 In OpenCPN 5.0, Max Detail Here will take you to your boat location. Instead, click on the desired location and then on the left-most rectangle in the chart bar at the bottom of the display.
6 In OpenCPN version 5.0 the tool bar is hidden when creating a route. You can click the Show Toolbar icon (three horizontal lines) to end the route.